Einleitung

Does your Cuisinart coffee maker leak water from the bottom of the machine? This guide will show how to fix the problem by checking and replacing the internal hoses. You will need a tweezers and the bit driver with the T10 driver bit.

  1. gLcjAop3OqOTeGkf
    gLcjAop3OqOTeGkf
    fWo2IssjFEbJEqUc
    MGUMojfi32JgWSXO
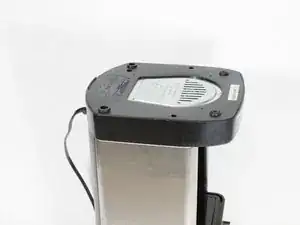
    • Flip the coffee maker over so the bottom is facing upwards.

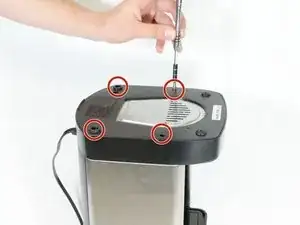
    • Use the screwdriver with size 4 extension with the T10 Torx bit to remove all four 17 mm long screws.

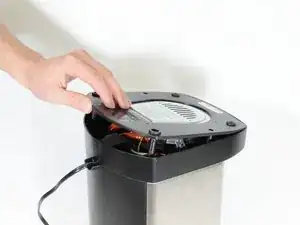
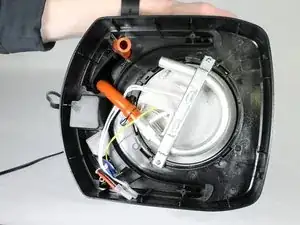
    • Lift the bottom cover off the bottom of the coffee maker.

  2. vUTRDKYYQSqOgqCF
    vUTRDKYYQSqOgqCF
    RCFc3A25JqG1YhYM
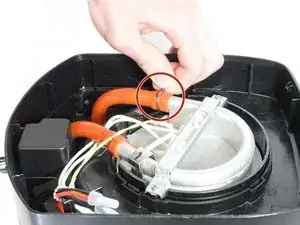
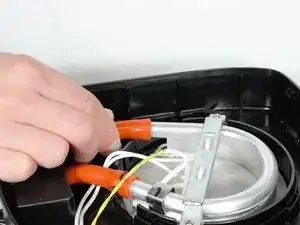
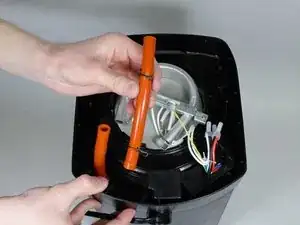
    • Gently squeeze the hose clamps together and begin moving the metal clamp away from the heating element.

    The picture above is not accurate for the DCC3200 coffee Brewer. The hose from the tank on ours is shorter and out of reach. For a Cuisinart product, I am highly disappointed.

    Tina Burnsworth -

    Highly? You seemed to figure it out.

    B Schlough -

    Where can I get a replacement hose? Standard hose? Specified part?

    Mario G -

  3. pPw4gDmufjX6jSPS
    pPw4gDmufjX6jSPS
    SEjPtG1cjPFlyMv2
    cSwfQXFZf53lb5Sq
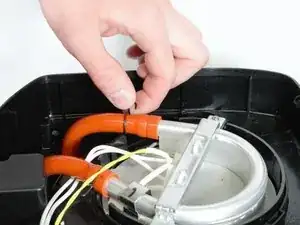
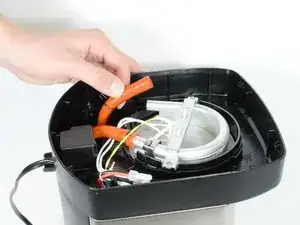
    • Gently pull on the loose hose to remove it from the heating element.

    I had the same problem after 1 year, 1 month, and 19 days. After filling up the reservoir and turning on the unit, I left the room only to come back 10 minutes later with water all over the place, coming from directly under my coffeemaker. I knew the screw heads were not Phillips but that’s all I had. Wrenched my back and arm getting the 4 screws out. After assessing the situation, I saw that that the other end of the hose had come away from/off of the opening. The clamp was still on the hose but the hose was off. I tried to first remove the closest end, as shown in the picture but the hose was sealed on, even after loosening the clamp. Somehow, I was able to get the other end of the hose back on the opening but could not get it all the way down. Tweezers are fine but you would need a 10” long pair. Used pliers as best I could but could never get the clamp back on. Screwed the bottom back on and back it goes to Kohl’s. They don’t have the same color any more but Walmart does. Refund to buy the new one.

    Jim Herbert -

    You also need hands the size of a baby’s to get down in the hole to fix any hose problems. While Cuisinart has a 3-year warranty, which my unit is still under, you have to pack the unit up and, at your expense, mail it to Cuisinart. You must also include a $10 check or money order for them to ship it back to you. This machine has a lot of great features but Cuisinart screwed up on this hose problem. Love the looks. Love the 14-cup decanter. My wife and I can have larger cups. Love the high temp setting for the burner plate. Love that the 2-hour cut-off time starts AFTER the coffee finishes brewing. Mr. Coffee’s 2-hour cut-off time starts when the coffee starts to brew. The one feature that is a hassle is the steam vent. The vent is on top of the unit. So every night before I go to bed, I make coffee for the morning with my timer set. But … I have to pull the unit out and away from the back splash so the steam does not hit the underside of the cabinet. Otherwise, the wood will get wet and eventually warp.

    Jim Herbert -

    Unit allows for four hour shut off

    Mario G -

    Thanks for insight for replacing hose. Sounds like I should avoid trying this. And where do you get replacement hose?

    Mario G -

  4. 5iAVGWqEW1J5uPI2
    5iAVGWqEW1J5uPI2
    YEekVSOYvjEKaqbE
    6fGtLrTOCbhZYYt2
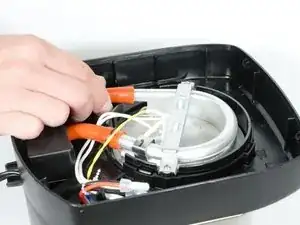
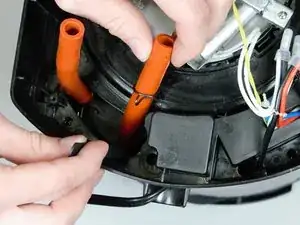
    • Squeeze the clamp with tweezers on the opposite end of the hose from the one you already removed.

    • Once the clamp is free, gently pull upwards on the hose to remove it.

    • Replace the disconnected hose with a new functioning hose.

    How do I push the new hose down on the inside plastic protrusion? Needle nose pliers? Something else? I can’t get it to go over the plastic protrusion from the downward angle.

    Nicholas Koriakin -

Abschluss

To reassemble your device, follow these instructions in reverse order.

Austin Wheaton

Mitglied seit: 15/02/18

804 Reputation

10 Kommentare

I think this was a brand new coffee maker used for this demo. My hoses will not budge. I would guess they soften up and permanently adhere to heating element over time. Also, from other videos, there is a ball in the hose (to control direction of water.) Not sure if you can replace with any old hose.

George Heynen -

Oh yeah that really helped, why not tell us where you got the hose or what type it is?

Silicon Durometer 50 or 70 or is it something else, totally useless site, waste of time.

Ronald Swapp -

Wish someone would answer this good question…

kenzenmaster -

Where to get, and what kind of replacement hoses ??? Do you need a new ball in little filter , or do you need the filter at all ???
kenzenmaster -

https://www.amazon.com/gp/product/B003SY... this is where I ordered red hose from. $5.69 for a foot.

Mike carey -

My DCC-1200 stopped passing water from the receiver, so I took the base off to get to the hoses in order to determine where the blockage might be. I failed to get the base screws out, so I drilled them with a quarter inch metal drill until I broke the heads off. When I got into the base, I removed the hoses and found that the non-return valve in the hose segment after the heating element. I passed a wire through the hose with the non-return and found it was blocked by some large coffee grounds. I pushed the grounds out and got the wire to pass. The hoses on the metal heater portion came loose with a light twist with a pair of pliers fitted with a layer of paper towel to avoid damaging the hose. I reassembled the base and used some powerful wide tape to fix the base. The coffee maker works fine now. I don’t see anyway possible to pass a wire down from the top, even after partially dismantling the lid section where the plastic tube passes through the hinged area.

Michael Cassady -

https://www.amazon.com/review/R5CRMP9AOE... Read the Amazon review.

Go to McMaster-Carr and key in part number 5236K73. It's the same high-temperature silicone rubber tubing semisoft, 3/8" ID, 5/8" OD, opaque red hosing as in the coffee maker. Food safe and heat resistant.

prices change as well as minimum footage

Barbara Keero -

I only see 1 red hose that high up on the heating coil. The other red hose is way down inside & I can't slide it up. Any advice?

Madeline Lyne -

A few things wrong with these instructions. Most importantly, the hose most likely to leak is on the heater output side and very difficult to replace. Not the input hose which is in fact, very easy to replace. You may want to buy another coffee maker if you have my version. I plan on trying to fix mine but I may have to make a temporary opening in the back to access the hose and clamps. The reason for this is my version has the metal heater coil extending way up to approximately an inch from the top inlet and into the cover. It leaks at the lower clamp runs down the heater and creates steam which then condenses all over the inside and runs down and out onto the counter. The hose connections are also not aligned which won’t help matters any. It is not hard to imagine coffee makers are designed to be thrown away every year or two. Alrighty then, good luck!

Larry Stasiewski -

I tried using a 3/8'' ID Silicone hose from a homebrew store. The price was right at $4 a foot but it's slightly larger internally than the original which affects the check valve sealing completely. Also, the hose started to smoke where it connects to the heating element. I brewed a pot of water with no problem but then the smoking began and I had to unplug it. It will not operate now. So my fix was a fail and my machine is going into the garbage. No idea what occurred.

Mike Quinlan -