Einleitung
This guide discusses Bosch blenders from Ergomixx Series. It gives disassembly tricks. It also identifies an electronics failure met by various users.
Werkzeuge
-
-
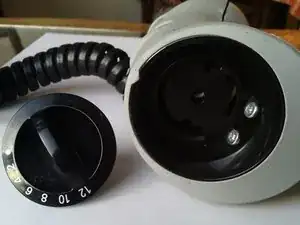
The speed switch can be removed by placing it on position 3 (to be checked, we broke it without realizing it) and then pulling the switch out.
-
The 2 first screws are now visible.
-
-
-
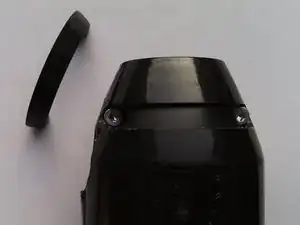
The last 2 screws are hidden under a small plastic cover at the bottom of the motor block.
-
-
-
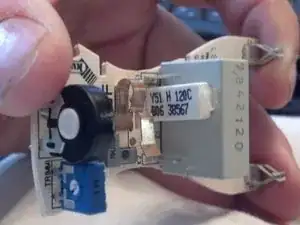
In our case, the thermal fuse was blown, i.e. the small white component labelled «Y51 H 120C».
-
First solution: remove the thermal fuse and place a shunt instead (a small wire). Downside: loss of the thermal protection on this "short working duration" blender.
-
Second solution: replace the thermal fuse (which is better) by a component with the same characteristics. In this case, probably with a fusing temperature of 120°C and a max. current 5A.
-
Thanks to Darr and to webpage http://elwo.ru/forum/34-1408-1 for the picture and for giving us the right hint.
-
To reassemble your device, follow these instructions in reverse order.
Ein Kommentar
Avant tout Merci beaucoup pour ce tutoriel!
Il m’a vraiment bien servi.
Je confirme que la bonne position, pour retirer le bouton du régulateur de vitesse, est 2 ( et non 3 ).
Il faut malgré tout le retirer délicatement ( j’ai aussi cassé pour avoir tiré trop fort )
Cordialement
Lionel
Cachou -


T9 Torx driver needed for all four screws...
franklydude -
On mine it was more like position 2 to allow the pegs to slide through.. Not a big issue to fix though.
franklydude -