Einleitung

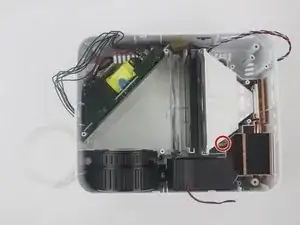
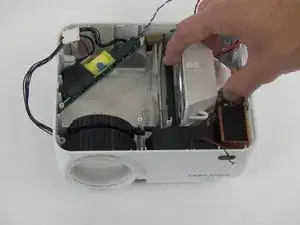
Simply pull the lamp out once you remove the screws. This should not require much force so if the lamp is not coming out, make sure you took out all the screws in the steps leading up to the removal.

  1. EWsMPA6kyq5dmO4b
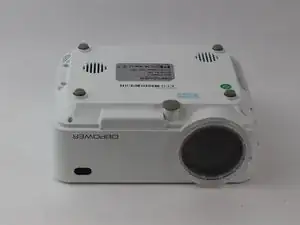
    • Flip the device and lay flat.

  2. tbGKi5YOBUPMMkUO
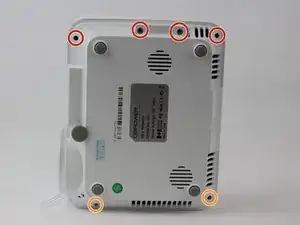
    • Remove the four (9 mm) screws with a PH2 screwdriver.

    • Remove the two (7 mm) located with a PH2 screwdriver.

  3. 4VJodpDJZlvPRqFD
    4VJodpDJZlvPRqFD
    ZSSUp2hSamESYMSV
    XjdUujnaf5LZB4n6
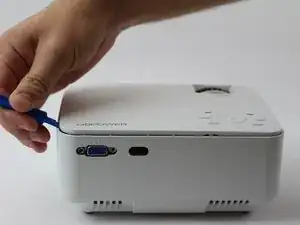
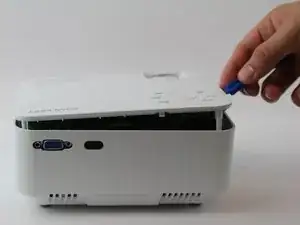
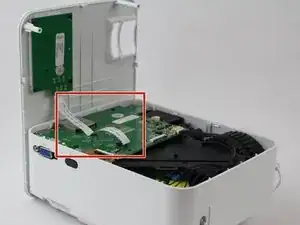
    • Flip the device over and pry the top off with a plastic opening tool.

  4. EXWaF2ou5NcX1lYF
    • Remove the ribbon cable connecting the motherboard to the button control board by gently pulling it from its connector.

  5. fWYsIxUnQjGA2Kyx
    fWYsIxUnQjGA2Kyx
    j4LHonCJvPoNTF1O
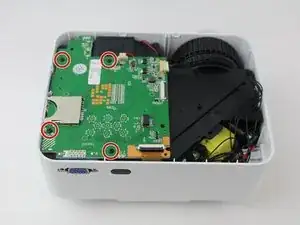
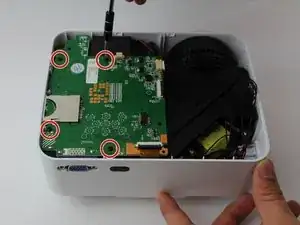
    • Remove four (6 mm) screws connecting the motherboard using a J0 screwdriver.

    one of the screws have been stripped, I’ve tried the rubber band and the glue trick, it didn’t work. What do I do to remove it? please respond

    arman waggoner -

  6. trRAUNLES2IFlrKD
    trRAUNLES2IFlrKD
    vQkSSglA43265rNO
    OcQnJ5HSa6hoNBOA
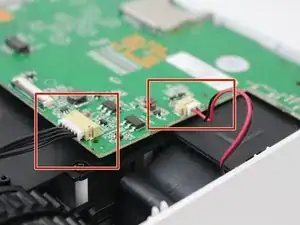
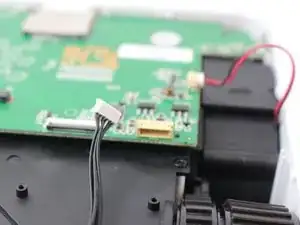
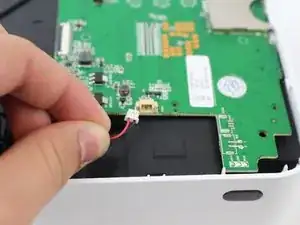
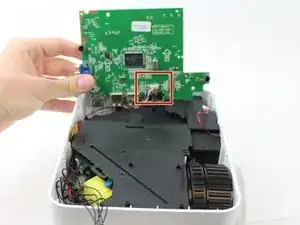
    • Remove the two cables connected to the motherboard: black power cable and the red/black fan cable.

    • the black cable requires more force to remove than the other cables.

  7. joEhEZpGBaYLpUcM
    joEhEZpGBaYLpUcM
    BOHRrUVkxpouFQeU
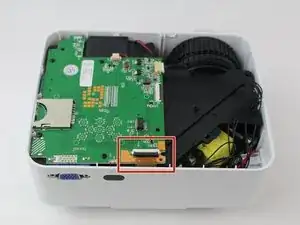
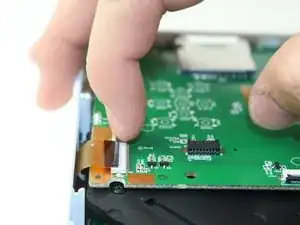
    • Lift the black latch on the ZIF connector and remove the ribbon cable that attaches the digitizer to the motherboard.

  8. PI4iXGIZQqnlLOHb
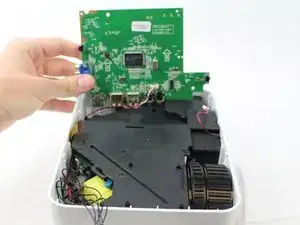
    • Raise motherboard by lifting sideways and then up to avoid the ports.

  9. SZxjwAKmBROTtIES
    SZxjwAKmBROTtIES
    m24f1a2qX3U2OCYs
    • Remove wires attaching the piezoelectric speakers to the motherboard.

  10. PIuyVcthnU1aInaI
    PIuyVcthnU1aInaI
    JottcDMKwepGPKZh
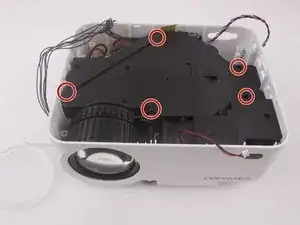
    • Remove the five screws securing the black plastic cover with a J0 screwdriver.

    • Lift up and out to remove.

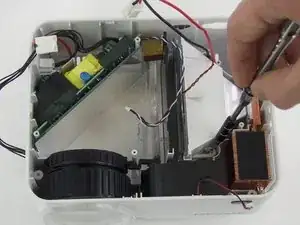
  11. HjkPus6q56mrd5i6
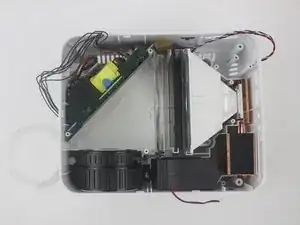
    • Remove the two screws attached to the lamp with a J0 screwdriver.

  12. eVPGrZBFdamN1Tds
    • Lift upwards to remove the lamp.

Abschluss

To reassemble your device, follow these instructions in reverse order.

Andrea Espinosa

Mitglied seit: 15/02/18

506 Reputation

5 Kommentare

where can I get the replacement lamp?

David Rug -

The part that is being removed is NOT the LED lamp. My interest is replacing the actual LED lamp that sits behind the plastic part that is being removed. My projector image started to have a tan cast to it near the top left portion of the screen due to overheating. I am just assuming that it is the actual LED that is overheating and need replacing. The article is very good otherwise. Please add where replacement parts can be obtained.

m patn -

Thank you very much, I appreciate the ability to get a look without having to open it up
Luke e Savage -

Where can i buy the lamp?

Keshawn Buckner -

Merci pour ce tuto! =) ça ma permis de nettoyer la lentille qui était pleine de poussière!

Jules Schminke -