Einleitung

I did a dumb and bonked my not-under-warranty drone into a tree branch. If you’re here you probably bonked yours into something too. Hopefully this will help you get your baby airborne again!

  1. RZoaCmyo5jeTVXlx
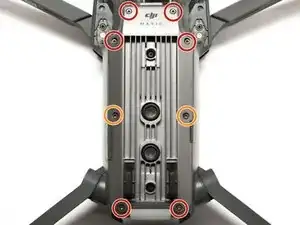
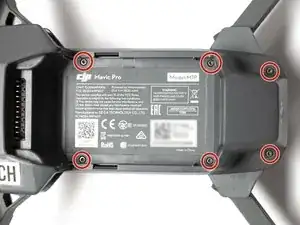
    • Remove 6 hex screws from top cover. These are 1.5 mm and the same length.

  2. heWSiCJwlGu1NNTY
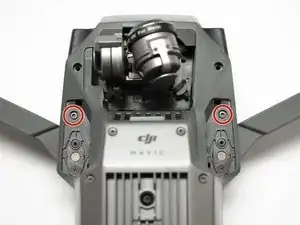
    • Remove two hex screws on either side of the gimbal. These are 1.5 mm and the same length as the 6 top cover screws.

    • Remove two smaller hex screws from the covers under the front arms. These are 1.5 mm and SHORTER than the prior screws.

  3. Z3ix2HeBGK6KO3PY
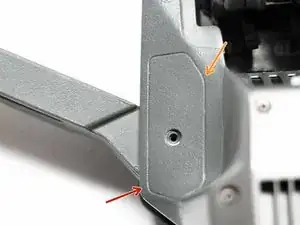
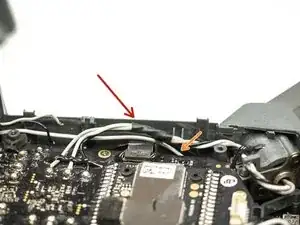
    • Use the flat end of a spudger to remove the covers under the front arms

    • These covers are fitted tightly enough that it's difficult to get a pry tool underneath. I found that when I pressed my thumb against the outside corner (red arrow) I got just enough of a gap on the opposite side (orange arrow) to squeeze a pry tool into it.

  4. D1uHVy1RIjlpYhs2
    D1uHVy1RIjlpYhs2
    aGbuvhanQwfhqdpd
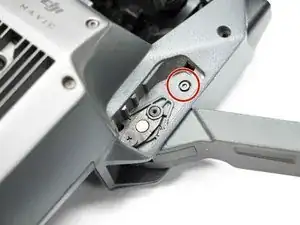
    • Remove the two 1.5mm hex screws under the cover

    what size are these?

    bonjoukhadar -

    Not sure. I think they’re the same as most of the other ones from the case, if I remember right (like these: https://www.ebay.com/itm/253658928778?ha...). I used an ice cube tray to keep all the sets of screws separate as I took mine apart and then made sure I put each set of screws back where they came from.

    Jamie Bell -

    These should be 1.5 mm and the same length as the 6 top cover screws.

    Clark -

    Thanks for the extra info Clark! Yes, they are the same as the top cover ones.

    Jamie Bell -

  5. ipN6LttGRainSgHH
    ipN6LttGRainSgHH
    D2Fck2voXe5aWcWL
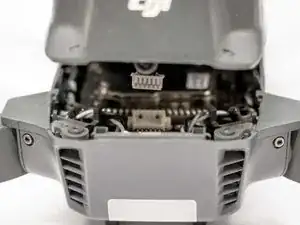
    • Lift the back end of the cover

    • The cover is connected to the body by a cable. Don't open the cover all the way until this cable is unplugged!

    • Unplug the 6-pin GPS connector, then pry along the edges to release the plastic clips holding the top down

    • Remove the cover

    • The clips at the nose of the drone require some extra pressure to release

  6. F4fNfAVOS2QrvZFD
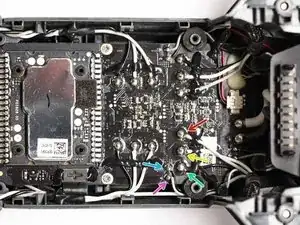
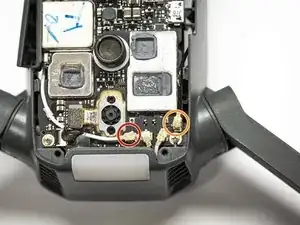
    • Desolder the larger gray motor wire running to the arm to be replaced

    • Desolder the larger white motor wire

    • Desolder the larger black motor wire

    • Desolder the smaller black LED wire

    • Desolder the smaller white LED wire

    • The marked wires are for the right arm. The wires to desolder when replacing the left arm are the mirror image of the ones shown here.

    • Don't forget that plastic has a tendency to melt when exposed to heat! I may or may not have disregarded this fact and put a mark on my drone...

  7. loCAZaqXBnic2iq6
    • Remove 6 hex screws

    • Remove 2 hex screws with longer posts

  8. QMOArICrd1aiJBTh
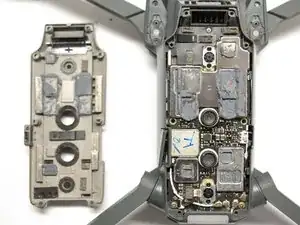
    • Remove bottom heat plate

    • This plate may stick a bit due to the thermal compound underneath it. It's a good idea to replace the thermal paste during reassembly

  9. R3WDsYNYEvHeRmtV
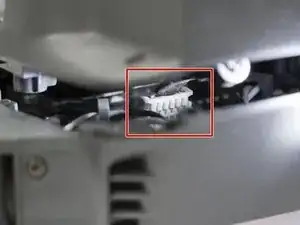
    • If replacing the right front leg, unplug the white front antenna cable

    • If replacing the left front leg, unplug the black front antenna cable

  10. UdshNxMWWPCHtSUl
    • On the top of the drone, gently release the rear leg cable bundle from its cable management clip

    • Lift the white or black wire from the previous step up through the drone

  11. wwjVgYpYWHdUIWwG
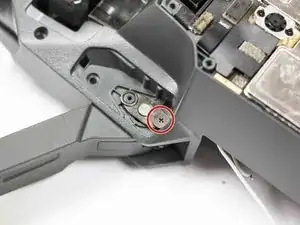
    • Remove the Phillips head screw below the arm to be replaced

  12. pIDMXwV2DAT1idFB
    pIDMXwV2DAT1idFB
    vhLcwGZKTEqFNrMo
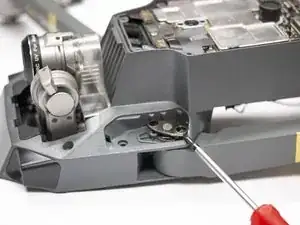
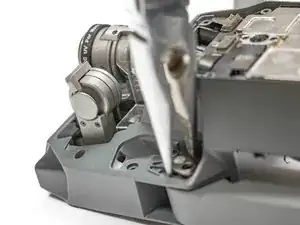
    • Use a metal pry tool or flat head screwdriver to lift out the spring-loaded hinge

    • The spring in this hinge makes it difficult to reseat during reassembly. The easiest way I found to replace it was to fold the arm back into the closed position, and then grab across the top of the hinge with the very tip of a pair of needle nose pliers, using the pliers to rotate the hinge into position and press it down into place.

  13. mPIG6ZmNPBDExjGK
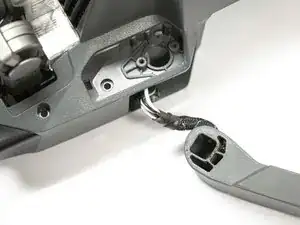
    • Remove the arm

Abschluss

To reassemble your device, follow these instructions in reverse order.

Jamie Bell

Mitglied seit: 01/08/19

397 Reputation

4 Kommentare

Bravo, thanks for the guide! I found myself in the middle of my repair cursing that antenna wire as I didn’t want to pull up the main board. Then I remembered my trusty secret weapon “ifixit.com”. Oh did you save the day for sure, I was hoping for another access point to unclip the antenna, just had no idea where that would be. I’ve been a fixer for 20 + years, but DJI drones are not something you generally just want to go poking and prodding around blind. So a big thanks for helping me get in and out with ninja precision fellow fixer!

Caleb Fitzgerald -

Glad I could help! They’re definitely complicated little buggers.

Jamie Bell -

Did you use some glue along the three wires for the motor arm? This was destroyed when I replaced one damaged arm. Do you know what type of glue would be good to use?

bonjoukhadar -

I didn’t use any glue, and I haven’t had any issues with it leaving it out. It looks like the original glue is some sort of silicone glue. I would think you could probably use an electronics-safe silicone adhesive, like something you could get from a hobby shop, but I haven’t tried it myself so I couldn’t say for sure.
Jamie Bell -