Einleitung

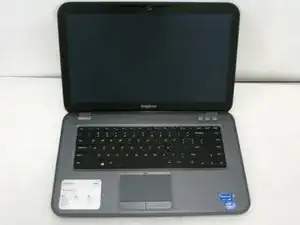
Guide to replacing the Hard Disk Drive (HDD) in your Dell Inspiron 15z-5523. A couple of the reasons you would need to replace the HDD is when you run out of storage or when the HDD starts to malfunction. Some of the tools needed to do this repair are precision screwdrivers and a spudger. Some mechanical skills may be needed.

  1. nkJXtWYHKrCZsGEa
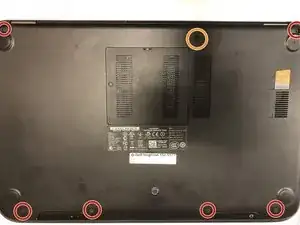
    • Pop out the rubber pieces and unscrew the 7 screws on the bottom of the computer.

    • Open the RAM door in the center remove the hidden screw labeled "KB" just above the RAM sticks.

    You forgot to mention the 8th Screw under the RAM cover.

    Paul -

    What about removing the DVD drive and the screw that’s in the space after you take it out?

    Fred H -

  2. SSO1iSZOMkTpgryh
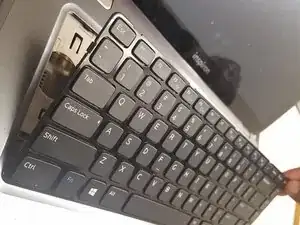
    • Using a nylon spudger, push the retaining clips away from the keyboard - there are five along the top row, and two on each side. You can carefully pull the keyboard away from each clip when it's released. The bottom edge of the keyboard will just pull away.

    How about some actual instruction on HOW to remove the Keyboard??

    And how to release the Ribbon connection even.

    Your pictures are ok but some actual full instructions are required too.

    Paul -

    There’s actually a small screw near ram slots (at base) unscrew that and keyboard comes right up from top

    Shubham Jadhav -

    I’ve added new details in the newest guide (Feb 2020)

    matt -

  3. WLIp1O2BlPEtowaP
    WLIp1O2BlPEtowaP
    qUSbSjhJNQM4JUCc
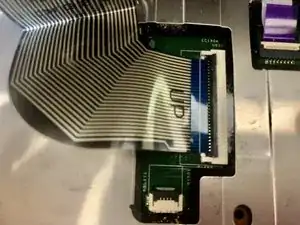
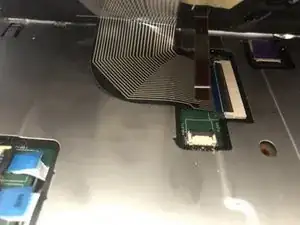
    • There are two ribbon cables securing the keyboard - data and backlight power. Each ribbon connector must be released by flipping the black retainer up with a fingernail or nylon Uspudger before pulling out the ribbon.

    • First flip up the black retainer on the smaller connector. Slide the cable up and out of the connector.

    • Secondly, flip the black connector up on the larger connector. Slide the cable straight out of the connector, parallel to the case.

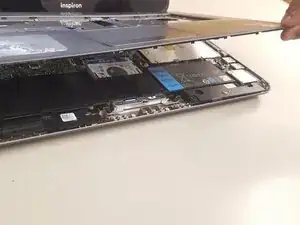
    • Remove the keyboard from the case.

  4. mmJjOQSt126ICMGf
    mmJjOQSt126ICMGf
    Pk1O2gtdQeejmOfT
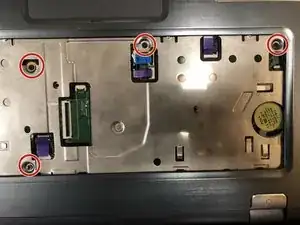
    • Unscrew the surface under the keyboard and remove top plate from the base.

    Again you Missed the Screw Under the top plate where the Optucal Drive is.

    Very invomplete pictures.

    Paul -

    Slide optical drive out and remove screw. Also disconnect 4 ribbon cables

    Simon Clarke -

  5. AtGry6hC6nnAHFyr
    AtGry6hC6nnAHFyr
    NvCDTSsiSSRXQtna
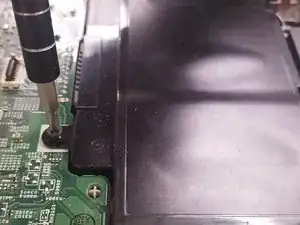
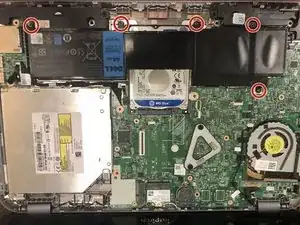
    • Take the battery out by unscrewing the 5 screws and pulling straight off.

  6. VZWClcPCVnXA6GUR
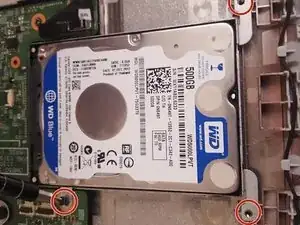
    • Remove the hard drive.

    Yeah thanks!!

    i wish there was an option to take away 100+ points from the Author.

    Goid is luck for anyone else using this “Guide”

    Paul -

    Yeah thanks!! Part 2 — cause I was not able to edit the above post

    I wish there was an option to take away 100+ points from the Author.

    Goid is luck for anyone else using this “Guide”

    you circled two of the screw locations that get removed during battery removal.

    You really may want to go over tour guide and make it more complete!!

    thanks for the advice you have included. But had to figure out many steps on my own without which I would have broken some things during disassembly.

    Paul -

Abschluss

To reassemble your device, follow these instructions in reverse order.
Christian Chavez

Mitglied seit: 23/01/18

726 Reputation

0 Kommentare