Einleitung
Werkzeuge
Ersatzteile
-
-
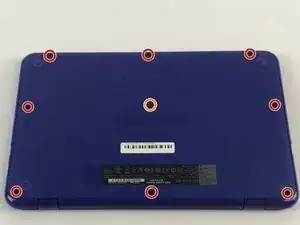
Lay the laptop flat with its bottom up exposing the screws holding it together. Unscrew these eight screws with a JIS #1 screwdriver and put them aside.
-
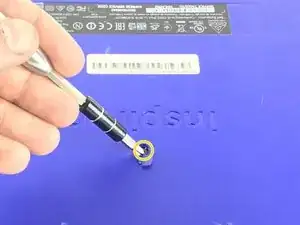
Use your screw driver to pry off the plastic cover exposing the last screw in the middle.
-
Remove the screw and save the plastic cover to put back on later when done.
-
-
-
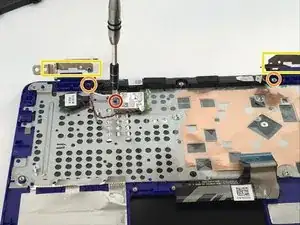
Remove this one screw with the JIS #1 screwdriver in order to take of the holding plate for the wifi card adapter. Then remove the adapter.
-
Unscrew these two screws with a JIS#1 screwdriver.
-
Peel back the two metal brackets to remove the screen.
-
Abschluss
To reassemble your device, follow these instructions in reverse order.


