Einleitung

This guide will teach users how to replace a faulty fan for the Dell Inspiron 14-5447. With removal of the fan, cleaning any debris left behind will help your new fan run much quieter and have better cooling circulation.

Prior to beginning this repair, be sure to power off the laptop and unplug it from the power cord.

  1. LiqTegNiPR1xIRgX
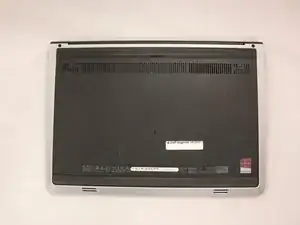
    • Flip the laptop upside down to access the battery.

  2. m1PdYZ4WV4iIOA6d
    m1PdYZ4WV4iIOA6d
    dcCTmxphIlcbyNE1
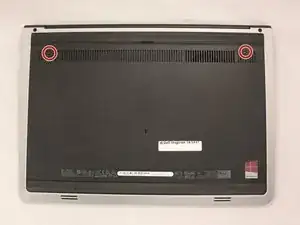
    • Remove the two black 5.70mm Phillips#0 screws on the case's back.

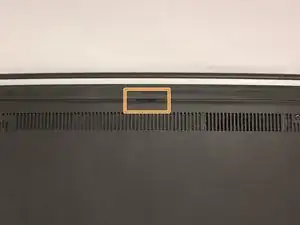
    • Insert a plastic opening tool into the small slit, centered between the removed screws, and pry open the back cover

  3. i3ZmTFKYbJN1LQS1
    i3ZmTFKYbJN1LQS1
    xde3rveEsDL4QGtJ
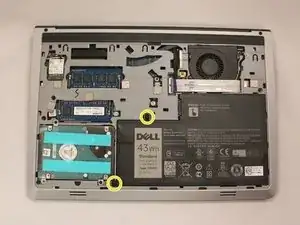
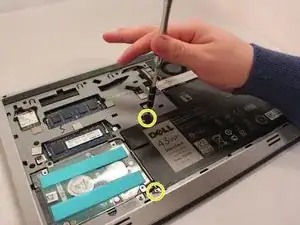
    • Remove the two 5.70mm Phillips #0 screws that secure the battery in place on its left side .

    • Treat the battery with care - puncturing or bending may cause damage to the battery and may result in fire or injury.

  4. G2DY1HptUAhsvgUo
    G2DY1HptUAhsvgUo
    jqJXMWkRr3QxsGAn
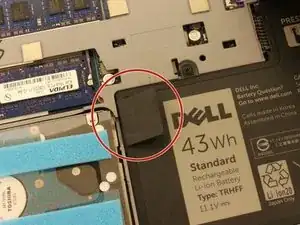
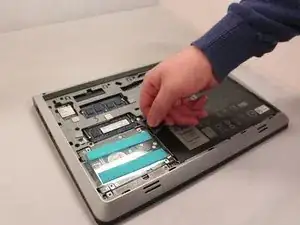
    • Use the black, plastic flap on the left side to pull the battery out.

    • Slowly lift the flap up and the battery should slide out.

  5. AN3vPpF4nquQSikK
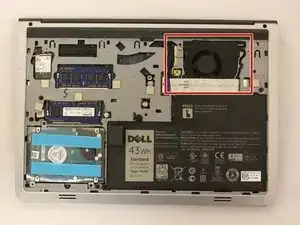
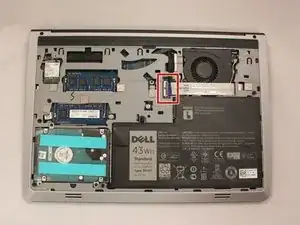
    • Locate the fan system in the top right corner.

  6. q1imroB2aKgEqYGi
    q1imroB2aKgEqYGi
    gjDELIw1vWDaEDsa
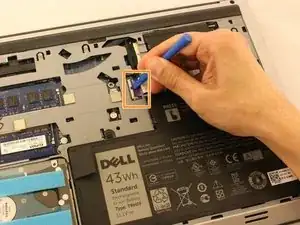
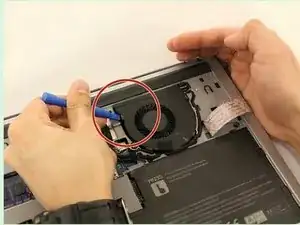
    • Look along the wide line of white cable until you find the tab insert.

    • Remove the thick white cable crossing over the fan, using the blue spudger shown, to flip the securing flap holding down the cable.

    Locate the wide white cable line until to see the securing flap insert.

    Confusing

    Remove the thick white cable crossing over the fan by using the spudger to flip the securing flap holding down the cable.

    What is a spudger?

    Anika Rozeboom -

  7. tOAWVyFmFFJxICye
    tOAWVyFmFFJxICye
    VI4hPHGamIPoqunP
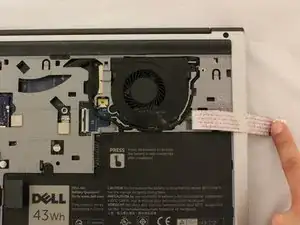
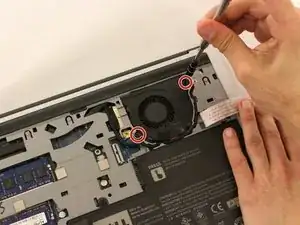
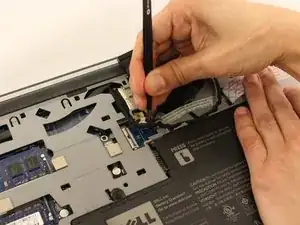
    • Move the cable over to the side to reveal the fan screws.

    • Remove the two black 5.70 mm screws from the fan.

  8. qH6GWCMWMpJ2dCf2
    qH6GWCMWMpJ2dCf2
    bK2mBfOfaKILROrP
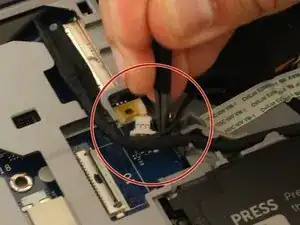
    • Use tweezers to remove the small cable attached to the fan.

    first image is unclear given the information

    Anika Rozeboom -

    clearer instructions could be given

    Anika Rozeboom -

  9. AfydHFqauDkEwxyY
    AfydHFqauDkEwxyY
    CpUidZvno2qVTWcG
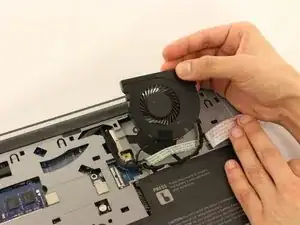
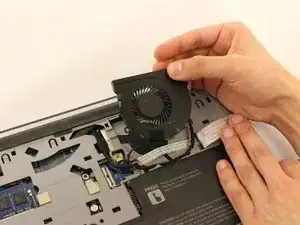
    • Using the opening tool, pry the fan out.

    • Remove the fan slowly to prevent damage to any wires or cables connected to the device.

  10. 3Jl1YMUWImIPRx1P
    • Now that the fan is removed, be sure to clean the area under the fan to prevent overheating.

    you already said to remove the fan

    Anika Rozeboom -

Abschluss

To reassemble your device, follow these instructions in reverse order.
Isabella Chavez

Mitglied seit: 11/04/17

473 Reputation

0 Kommentare