Einleitung

This guide will walk you through the process to remove and replace the wifi internet card in your Dell Inspiron 15 7579.

  1. mIQYVWFDCGpIE14b
    • Remove the ten 7.9 mm screws with the Phillips PH0 screwdriver.

  2. J2bEDWsJEnJZlscT
    J2bEDWsJEnJZlscT
    lNQSG2QFH2SJ2OdM
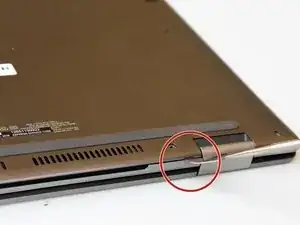
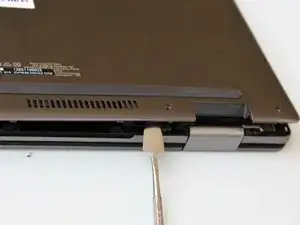
    • Insert metal spudger into a gap in between the back panel and the back of the screen.

    • Pry off the back panel using the metal spudger as a lever, and remove the back panel by lifting the rest off by hand.

  3. mWCdPRHY43ouvn6m
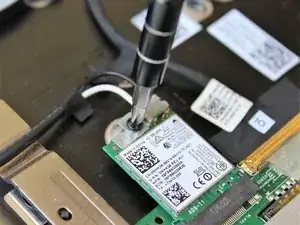
    • Remove the bracket holding the card in place by unscrewing the single 3 mm screw located in the upper left hand corner of the device using a Phillips #1 screwdriver bit.

  4. ZL1KKxWJAupLooCk
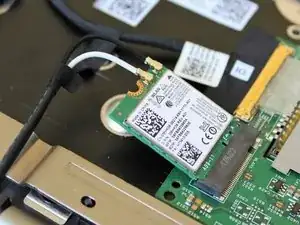
    • Pull the Wi-Fi card out of the connector slot.

  5. yIF52P4SGrYgRxxc
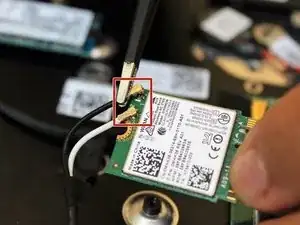
    • Remove the two connector pins from the wifi card using tweezers.

    • During reassembly, the pins require some finesse to fit them back onto the card. It will take time to put back on. Be sure to line up the socket on the cable to the pin socket on the card.

    There is also a plastic cover that fits on the end of the board such that it clips on the board and secures the pins on the board. The plastic piece is sized for the 2.8Ghz board which is a 3/4 board for the socket. I had to open the end of the plastic piece such that it allowed to be used over the full size 5Ghz board, allowing to use the plastic piece to secure the wires onto the board.

    Claude Albertario -

Abschluss

To reassemble your device, follow these instructions in reverse order.
Inaki Madrigal

Mitglied seit: 23/04/18

730 Reputation

0 Kommentare