Einleitung
Werkzeuge
-
-
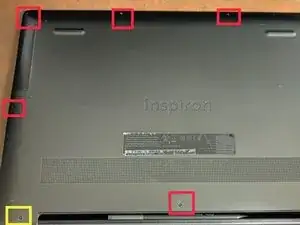
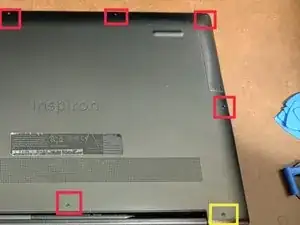
Unscrew the 7 Philips #000 screws.
-
Loosen the 2 Philips #000 screws. These screws do not come out but rather stay attached to the case.
-
With a suction cup lift the top and insert a plastic pry tool or guitar pick. Slide the pry tool from left to right. The panel should pop out slightly.
-
Work downwards with a pry tool on the right and left sides. The panel should pop up and be able to be removed.
-
-
-
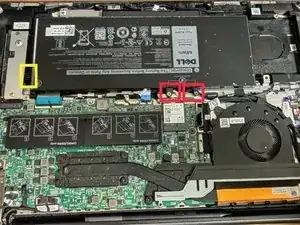
Remove the 2 Philips #000 screws.
-
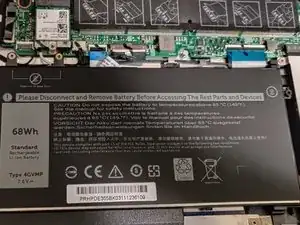
Loosen the Philips #000 screws. The screw is attached to the battery and will remain attached to the battery.
-
-
-
Flip the battery upside down onto the motherboard.
-
Snake the wire out of its housing.
-
Disconnect the power connector.
-
-
-
Slide the battery in with the bottom first in order to attach the latches that are at the bottom.
-
Screw in the 2 Phillips #000 screws and tighten the 1 Phillips #000 screw attached to the battery.
-
-
-
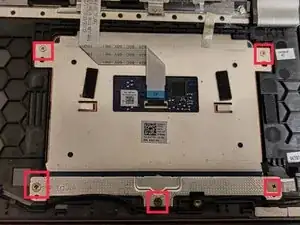
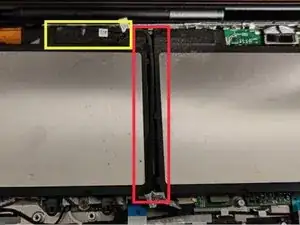
After removing the battery in step 3 the track-pad is exposed.
-
Remove the 5 Phillips #000 screws.
-
Disconnect the blue ribbon connector.
-
To reassemble your device, follow these instructions in reverse order.
