Einleitung

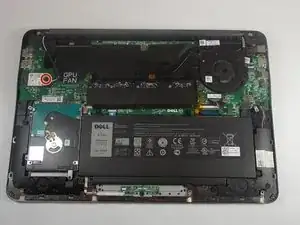
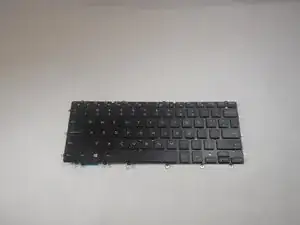
This guide shows the process of removing the keyboard from the Dell Inspiron 15-7547.

  1. qrSoofefwR1quHyr
    • Before you begin, be sure to turn off your laptop and unplug it from the outlet.

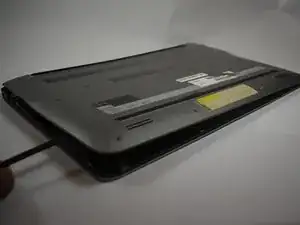
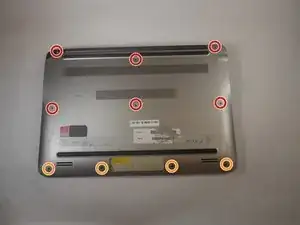
    • Close the display and flip the laptop on its back.

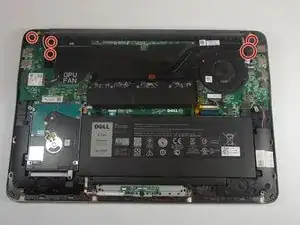
    • Loosen the ten 5.0 mm-long Phillips #0 screws.

    • The four screws marked with orange will remain captive to the cover.

  2. uoRnFPYREFtn1URa
    • Use a spudger to pry up and loosen the back cover.

    • Remove the back cover.

  3. gH2OcB5cnwXB3fZS
    gH2OcB5cnwXB3fZS
    IxHCSBX6ivuDqJdW
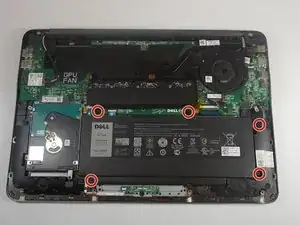
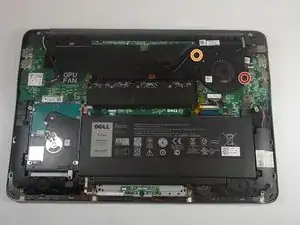
    • Remove the five 5.0 mm-long Philips #0 screws that connect the battery to the case.

  4. rDMWPfXWcCLbIKtU
    rDMWPfXWcCLbIKtU
    2kLxAgSNsxjjZt6F
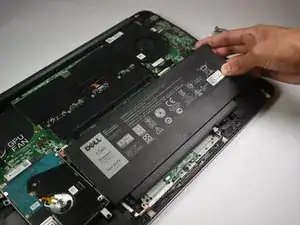
    • Lift the battery out of the case.

  5. x3WeE2ehFi64COQ3
    x3WeE2ehFi64COQ3
    OFv6qJulKruaulEW
    osFGosHA2yoCaEiV
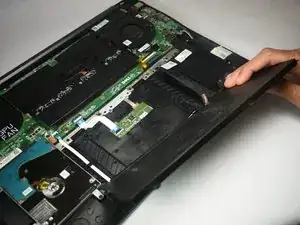
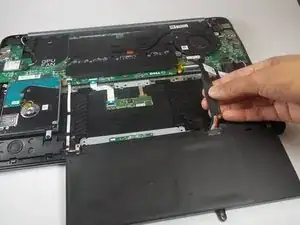
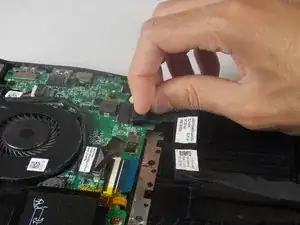
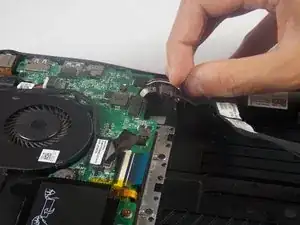
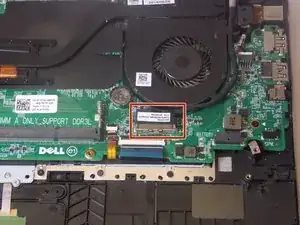
    • Pull the battery cable's pull tab towards the battery to disconnect it from the motherboard.

    • Pull parallel to the motherboard, not straight up.

    • Most of the cable is attached to the case with adhesive, which may cause slight resistance.

    • Remove the battery.

  6. gxwpIFi3QyIZKPJQ
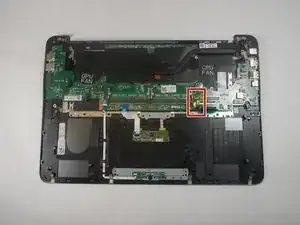
    gxwpIFi3QyIZKPJQ
    uPKU2r1WwwQgaDjn
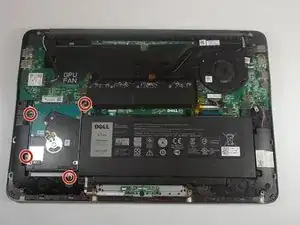
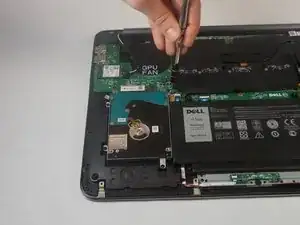
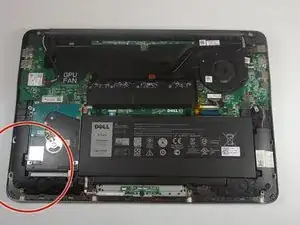
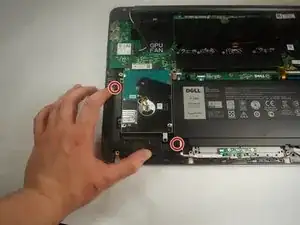
    • Remove the four 5.0 mm-long Philips #0 screws connecting the hard drive to the chassis.

  7. rSVUUITPnLNAnbXg
    rSVUUITPnLNAnbXg
    coyAQQMJIYVXEEZo
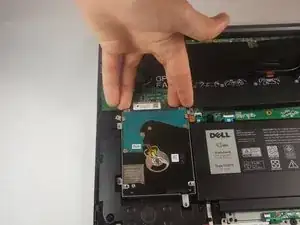
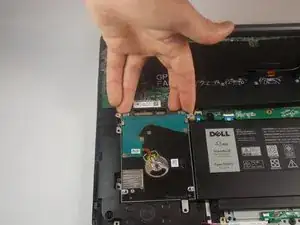
    • Disconnect the hard drive from the motherboard by placing your fingers at the back, and pulling forward towards the front of the chassis.

  8. HraQWkqK2KFkIuXY
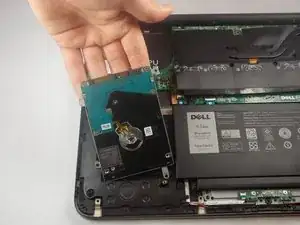
    • Lift the hard drive out of the chassis.

  9. mBXGEY6YZ1fpUGlH
    mBXGEY6YZ1fpUGlH
    FVcaGKEEQKq1HO5p
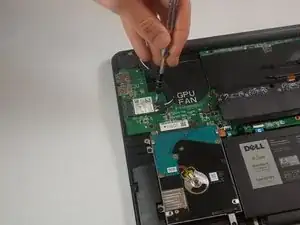
    • Remove the 3.0 mm-long Philips #0 screw at the end of the Wifi-Card

  10. ePALo2XtKpbbMPVI
    ePALo2XtKpbbMPVI
    OixvQFlKqSHpO1IY
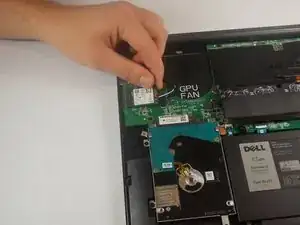
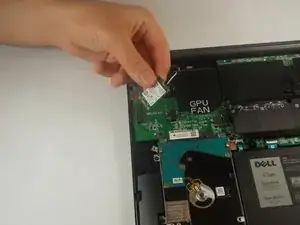
    • Remove the Wifi-Card from its socket by pulling away and up from the connector.

  11. S5KwmRNjZJARObAN
    S5KwmRNjZJARObAN
    rtEHBPA14npRQAcI
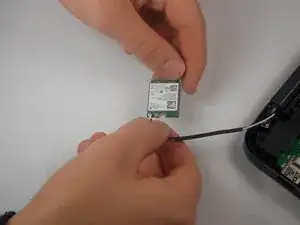
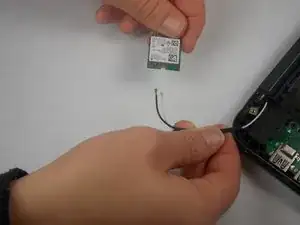
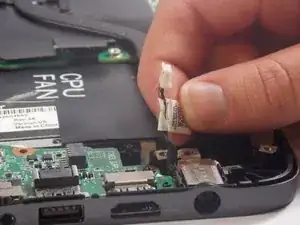
    • Disconnect the white and black cables from the Wifi-Card.

    • Make a note of which wire goes where for reconnecting them to the replacement card.

  12. C3hYDXDR2uXKNPO5
    C3hYDXDR2uXKNPO5
    iBVsU6DLbKvYcPly
    AYbo31hpvVFUSHHN
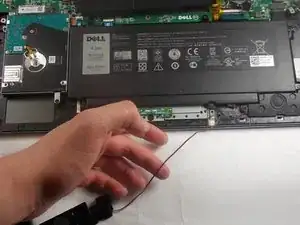
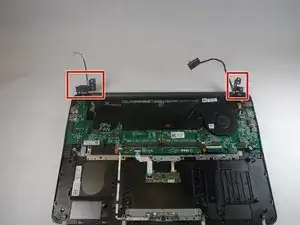
    • Orient the computer so that the hinge for the display facing away from you.

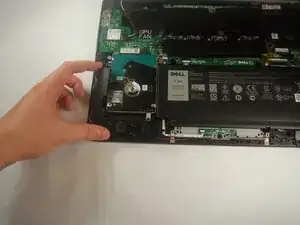
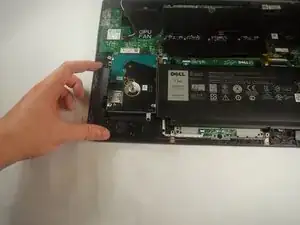
    • Start removing the speaker on the left by pushing the speaker in the direction of the tick mark on the 2 outer pegs, then upwards

    • The tick marks on the two marked pegs should indicate the speaker needs to be pushed towards the center of the front of the chassis.

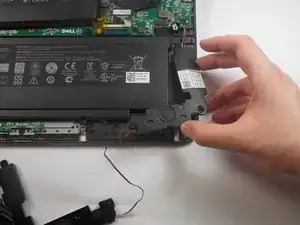
  13. v2HFD6OwaZfpfs13
    v2HFD6OwaZfpfs13
    sFAd4Z6KSXEoguMZ
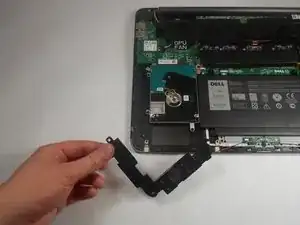
    • Remove the left speaker by pushing the speaker in the direction of the tick mark on the center peg, then upwards

    • The tick mark should indicate towards the middle of the back of the chassis.

  14. 4OGv2E4yRO2rHlYU
    4OGv2E4yRO2rHlYU
    SOIGpCaELcHsGDJ2
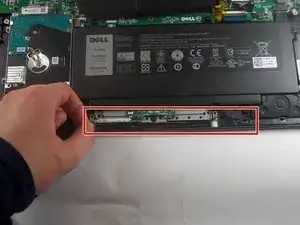
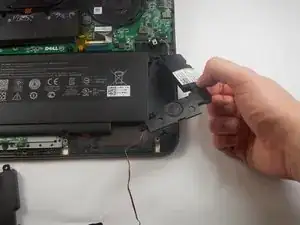
    • Remove the wire connecting the left speaker to the right speaker.

    • The wire is secured by small notches, be careful not to break these.

  15. k2VBCJsuj2LLIUY2
    k2VBCJsuj2LLIUY2
    m6AEx6yTs5yA2HKW
    • Start removing the right speaker by pushing the speaker in the direction of the tick marks on the 2 pegs closest to the front of the device, and then upwards.

    • These tick marks should indicate towards the middle of the back of the chassis.

  16. QdejS2yI5OYskWfw
    • Remove the right speaker by pushing in the direction of the tick mark on the final peg, and then upwards.

    • This tick mark should point towards the center of the right side of the chassis.

  17. hcO2SWqXp1NVGeYq
    hcO2SWqXp1NVGeYq
    y2XihbXf5ZERsWNN
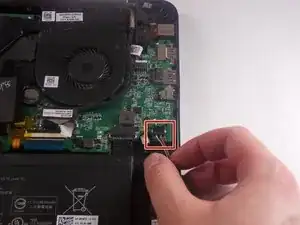
    • Remove the cable connecting the right speaker to the motherboard by pulling towards the front of the device.

    Fairly difficult for me to remove, be careful!

    Matthew Volpe -

  18. QakopZ2fXTOoo1S6
    QakopZ2fXTOoo1S6
    SwnZYIWV3FMZvbfv
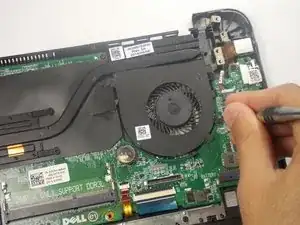
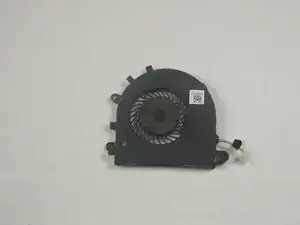
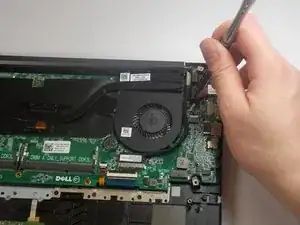
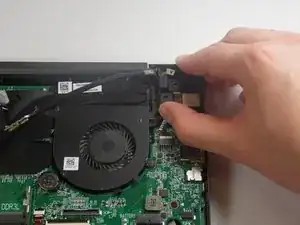
    • Remove the two 5.0 mm-long Philips #0 screws from the fan.

    • The screw marked in orange will remain captive to the fan.

    The top left screw did come out, watch for the display wire that is underneath some metal tags on the fan.

    Matthew Volpe -

  19. oVwSDYBv4UNs1vVN
    oVwSDYBv4UNs1vVN
    qBrIiZFL1BOVwZ3I
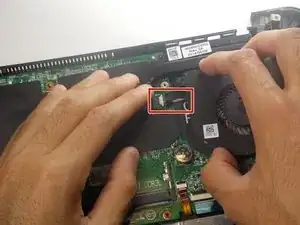
    • Disconnect the wire that connects the fan to the motherboard. This can be found under the flap directly to the left of the fan.

  20. Mp4iSHTI5ixUNK5v
    • Lift the fan out of the chassis.

  21. WXVcnmAjTQKAJvnQ
    WXVcnmAjTQKAJvnQ
    FVOuSgKqjLBdQchX
    PKAAskyGGhJFPXmm
    • Remove the six 7.0 mm-long Philips #0 screws that mount the hinges.

  22. YiToio5LjoQWnQYM
    YiToio5LjoQWnQYM
    W1DUfUQfTclyIXkC
    JRlbtteThRvIUGUT
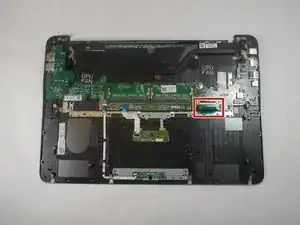
    • Use a spudger to unlatch and unplug the display cable.

    • There will be a notch on the side of the connector.

  23. ot6ZHYFyUtMSqckN
    ot6ZHYFyUtMSqckN
    uVoqAsECa1XRhgCj
    3HwFqZGDMirgMlVW
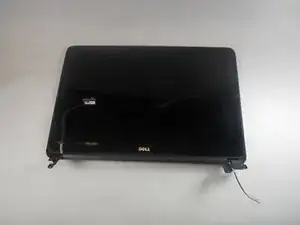
    • Raise the left and right hinges.

  24. GBpGYPIaitGfKVBF
    • Remove the LCD display assembly from the laptop.

  25. NfZAWHHcsSppriwj
    NfZAWHHcsSppriwj
    dedwcnGO2Tlq1CsZ
    uQFpejidE1OsCngp
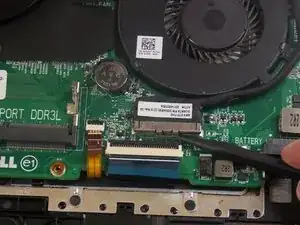
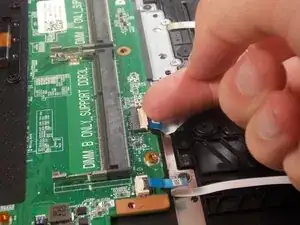
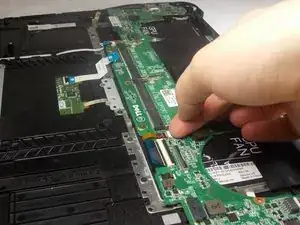
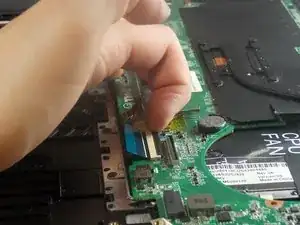
    • Unlatch the ribbon cable by pulling the white release up.

    • If this proves to be difficult using your fingers, try a plastic spudger.

    • Hold the blue flap and pull to unplug the cable.

  26. dLDRpbLAcUSKCcpe
    dLDRpbLAcUSKCcpe
    LIue1CdBeCPyJQiV
    1eCiaiXCIop1qKCP
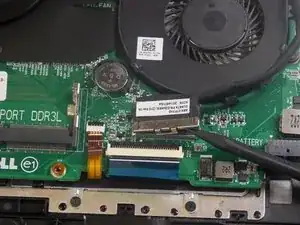
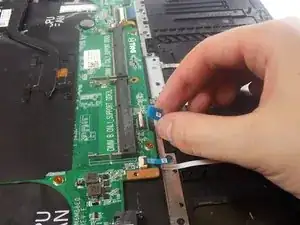
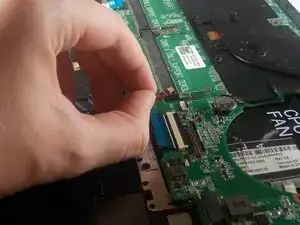
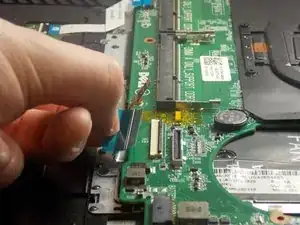
    • Unlatch black release on the ribbon cable.

    • Hold the blue flap to unplug the cable.

  27. aslATmMvVZWBRprT
    aslATmMvVZWBRprT
    2e5QEWmGaBuJFiw6
    EtTNjleMCkEy1okR
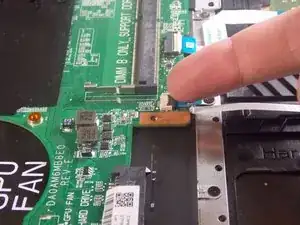
    • Unlatch the ribbon cable by pulling the black release up.

    • Unlike the others, this release is found at the back.

    • Hold the flap and unplug the cable.

  28. wZX2dI3ju1MFBRUV
    wZX2dI3ju1MFBRUV
    aXKRPPc4rclgtBwK
    DNOdMPLjLu1NkWMO
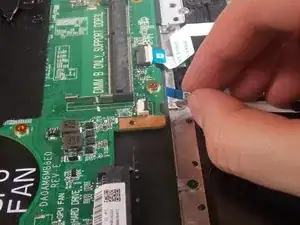
    • Unlatch the ribbon cable by pulling the black release up.

    • Unlike the others this release is found at back.

    • Hold the blue flap and unplug the cable.

  29. PMpEmqwU1gOXNU1x
    PMpEmqwU1gOXNU1x
    4aqvvxyDQmeIUuBF
    YLpRIBDNk1der2ed
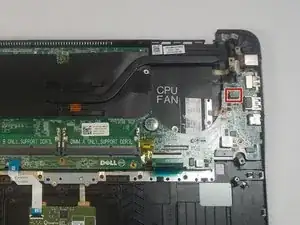
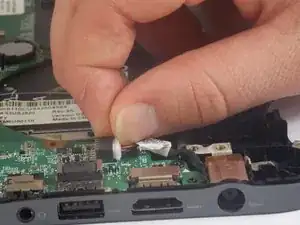
    • Unplug the DC jack cable.

  30. WSrN5uZpOFGaqrA2
    WSrN5uZpOFGaqrA2
    eNGZUYfuJjvBB3DY
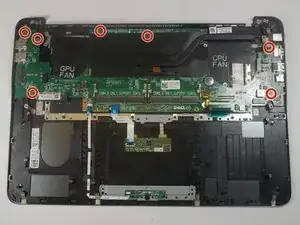
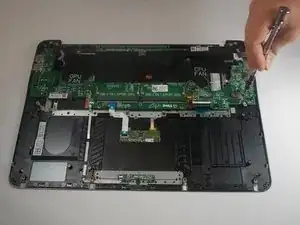
    • Remove the seven 3.0 mm-long Philips #0 screws that secure the motherboard.

  31. 1uOKyxdjZge1hWTH
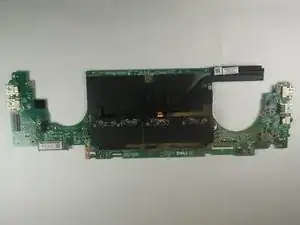
    • Remove the motherboard from the laptop.

  32. ZKlZdqbYTKuljHYR
    ZKlZdqbYTKuljHYR
    YBuINc63YN3K14hQ
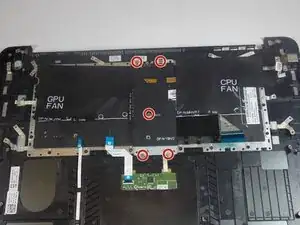
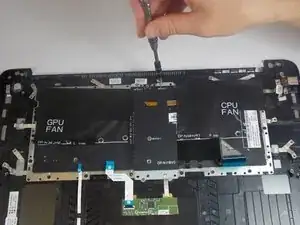
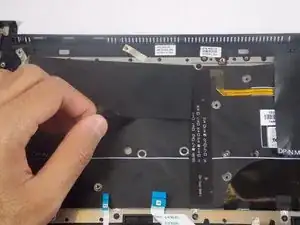
    • Remove the five 2.0 mm-long Philips #00 screws from the metal back-plate.

  33. ESYAUvDgQNu3PU1A
    ESYAUvDgQNu3PU1A
    K1qWU5YHFbQjXRZJ
    BfMyVne4HvMtFbLf
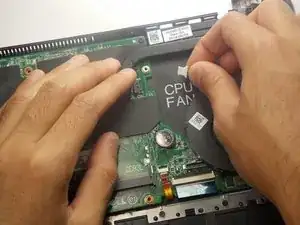
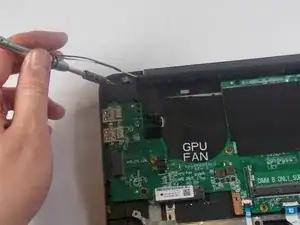
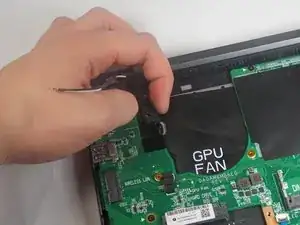
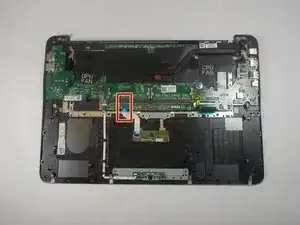
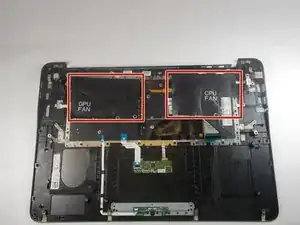
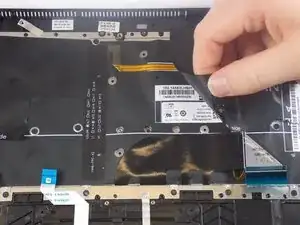
    • Peal away the two plastic covers marked GPU fan and CPU fan.

    • If never previously removed, these covers should be removed very gently so as to not tear the plastic underneath.

  34. QmgbTxwaKUKKQTLP
    QmgbTxwaKUKKQTLP
    Flpn4byiB4DKFOgr
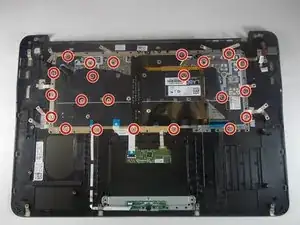
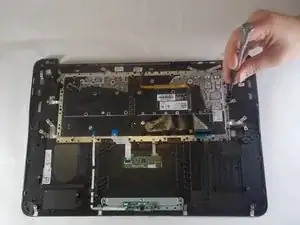
    • Remove the twenty-two 2.0 mm-long Philips #00 screws that connect the keyboard to the chassis.

  35. TsHOCWZIREyDxL1u
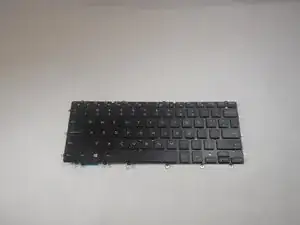
    • Lift the the keyboard from the chassis.

Abschluss

To reassemble your device, follow these instructions in reverse order.

Isaac Brooks

Mitglied seit: 10/09/18

343 Reputation

Ein Kommentar

I'm trying to source the 22 , 2.0 mm-long screws that connect the keyboard to the chassis but I dont know what the correct specifications to look for, can someone please help?
Marlon Fraser -