Einleitung

This guide will walk you through how to remove the power port in your Dell Inspiron 15-7548.

  1. knLVFeuIYeP2ABLa
    knLVFeuIYeP2ABLa
    YLShUY4tnrdyWVtM
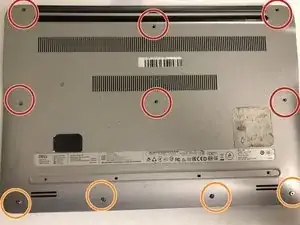
    • Remove the six 6 mm screws from the back panel with a Phillips #1 screwdriver.

    • Loosen the four captive screws at the bottom using a Phillips #1 screwdriver.

    • The four screws on the bottom are captive screws and cannot be removed.

  2. PAVmaqoSkSONEdWP
    PAVmaqoSkSONEdWP
    cJuFK4B4gT5MdqFY
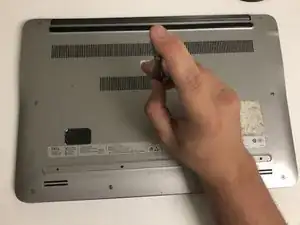
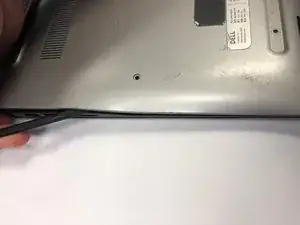
    • Pry out the back panel using the flat head side of the spudger.

    • Do not insert the spudger more than half an inch when separating the bottom and right side of the back panel.

  3. SNuyXoiAVk6b3iWD
    SNuyXoiAVk6b3iWD
    2IPFru43VIGfcspP
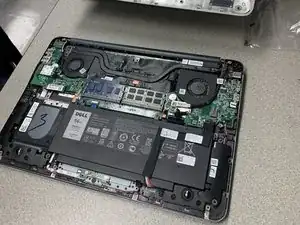
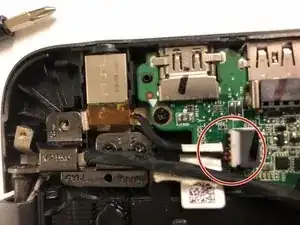
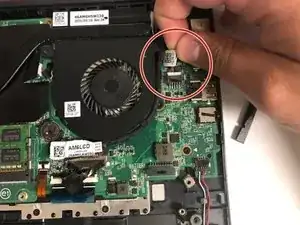
    • Grab the wires and lightly pull to remove the power port from the motherboard.

Abschluss

To reassemble your device, follow these instructions in reverse order.
Christopher Fisher

Mitglied seit: 26/09/18

379 Reputation

0 Kommentare