Einleitung

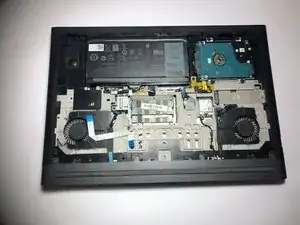
Make sure to disconnect the battery before replacing the hard drive.

  1. jp3Nml1p2iLDut1s
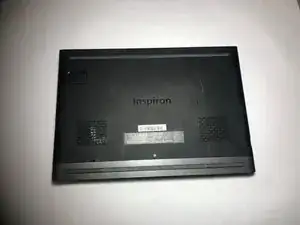
    • Turn off laptop before beginning.

    • Place the laptop upside down on a flat, stable surface.

  2. sNxMGaCZN4yv1DqI
    sNxMGaCZN4yv1DqI
    uJGq6cwytVoNxKMf
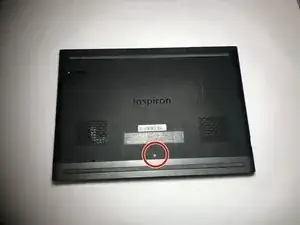
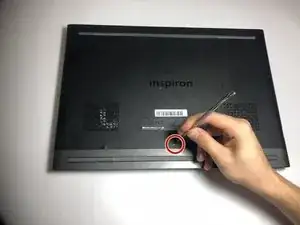
    • Remove the 3mm screw in the location shown, using a Phillips #1 screwdriver.

  3. cqGuhbwGIRHgKjGJ
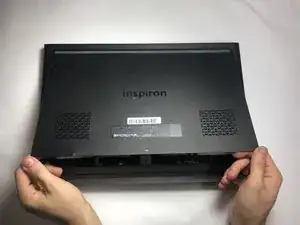
    • Remove the panel from the sides and pull it out at an angle towards you.

  4. KSArSUdUUYuMqMiK
    KSArSUdUUYuMqMiK
    EZgNOTShNibEF1vB
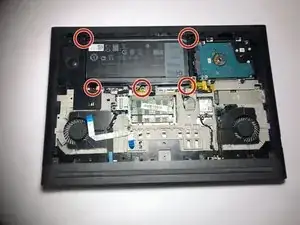
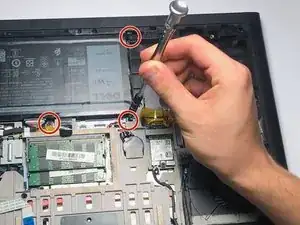
    • Remove the five 3mm screws on the battery with a Torx (T8) screwdriver in the locations shown.

  5. VTP6rTQFlgcn33h6
    VTP6rTQFlgcn33h6
    3HOG2Ss6qeBYiIfd
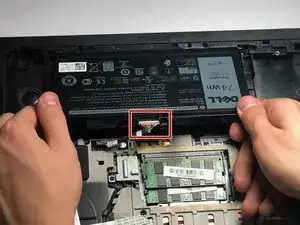
    • Disconnect the power cord from the battery by using a pair of tweezers, your fingers, or the opening tools from the iFixit pro tech tool kit.

    • Pinch the clips on the left and right side while pulling on the cord at the same time.

  6. BMWwq22DuyvPq6tc
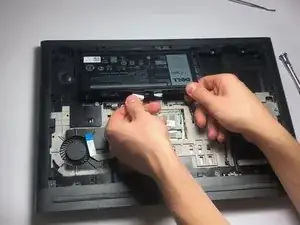
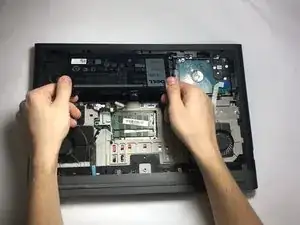
    • Pull the battery towards you.

    • Make sure to pull at an upward angle.

  7. OkXHmq3hjpDDwFUs
    OkXHmq3hjpDDwFUs
    JLeQG2LrM1TAwint
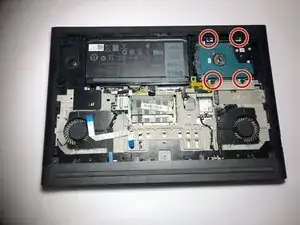
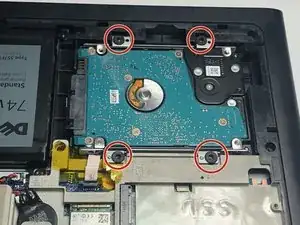
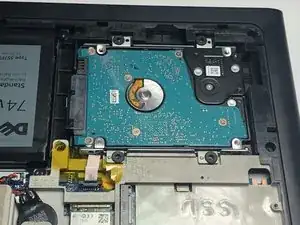
    • Remove the four 5mm screws with a Phillips #1 screwdriver.

  8. 41hD3s5QmxdGduG3
    41hD3s5QmxdGduG3
    5KijJjWsXBaFD24N
    WxrJDAsJBNNA5n1u
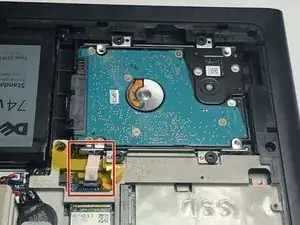
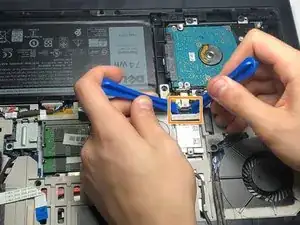
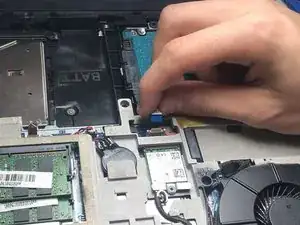
    • Remove the cable from the motherboard that is attached to the Hard Drive.

    • Use your fingers or the plastic opening tools to gently pull up on the clip, freeing the cable.

  9. l3UYFSogWNoUaAPN
    • Lift and remove Hard Drive.

Abschluss

To reassemble your device, follow these instructions in reverse order.
Dallas Lamorie

Mitglied seit: 30/09/18

523 Reputation

0 Kommentare