Einleitung

In this guide, we will be showing you how to remove and replace the Hard-Drive Assembly.

  1. 1oi6NswlJcVbaPYq
    • WARNING: Before working inside your computer, read the safety information that shipped with your computer and follow the steps in "Before You Begin".

    • CAUTION: Hard drives are extremely fragile. Exercise care when handling the hard drive.

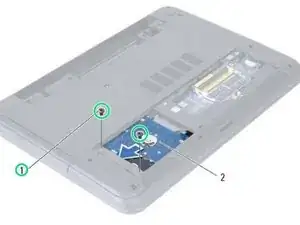
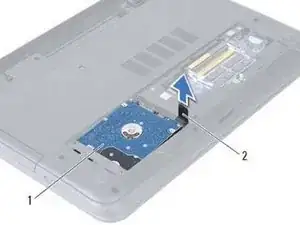
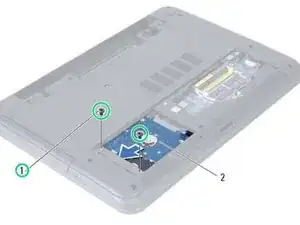
    • Remove the screws that secure the hard-drive assembly to the computer base.

  2. PnWb3WTywoxAQhCP
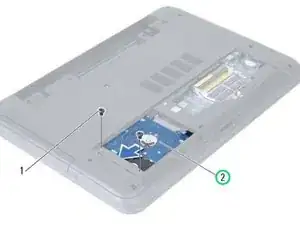
    • Slide the hard-drive assembly forward to disconnect the hard-drive assembly from the system board.

  3. 2DcZXYpfWA1xOHYL
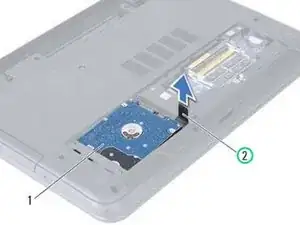
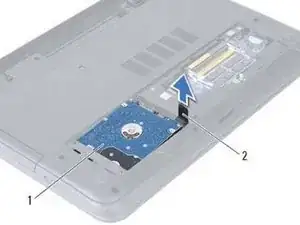
    • Using the pull-tab, lift the hard-drive assembly out of the computer base.

  4. wEkbhpM1LGKoK4yF
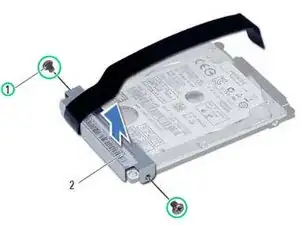
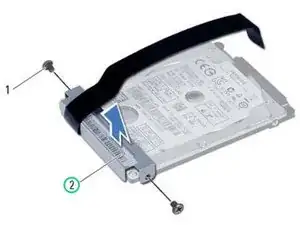
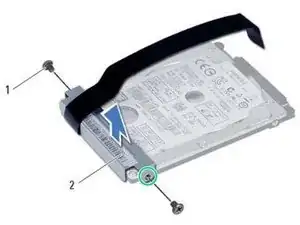
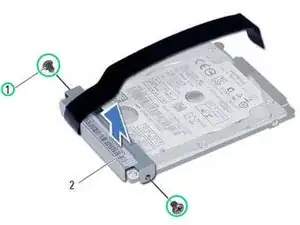
    • Remove the screws that secure the hard-drive bracket to the hard drive.

  5. D1I1RORTN21KUbOp
    • Lift the hard-drive bracket off the hard drive.

  6. im3iQM2EOjGyWDNA
    • Align the screw holes on the hard-drive bracket with the screw holes on the NEW hard drive.

  7. FtMZtcK4cCIhsEMI
    • Replace the screws that secure the hard-drive bracket to the hard drive.

  8. uXGLVVd3VJUSfesf
    • Slide and place the hard-drive assembly in the hard-drive bay.

  9. BT3uEymoJHWrKvBl
    • Slide the hard-drive assembly backward to connect the hard-drive assembly to the system board.

  10. rBFUZLJOb3ieTHn4
    • Replace the screws that secure the hard-drive assembly to the computer base.

Terrence15

Mitglied seit: 18/12/17

78652 Reputation

0 Kommentare