Einleitung

Is your computer heating up easily or getting louder? Consider using this guide to replace the fan in your device.

  1. rBoWkmLjKIEWoKbK
    rBoWkmLjKIEWoKbK
    JKwXJnTyf5NiZJxG
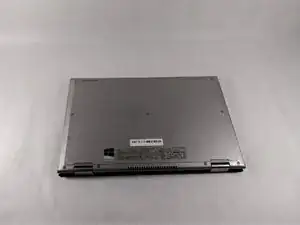
    • Ensure the device is powered off and unplugged. Close the device and orient it face up, with the hinges further away from you.

    • Flip the device over so the backside is facing you.

  2. hNnxvqZkr5B1MKl6
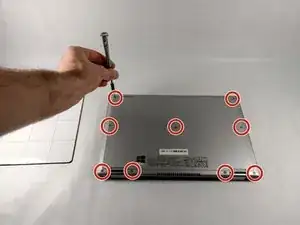
    • Using the Phillips #1 screwdriver, remove all nine 7mm screws.

  3. NJsHhBGIXyxNB6hQ
    NJsHhBGIXyxNB6hQ
    uKpdoJJTLPaQefGl
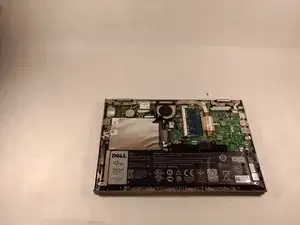
    • Using the plastic opening tool, pull the back panel upward. Move the opening tool along the edge of the device and lift the panel off of your device.

    • Be aware, the back panel is kept in place by magnetic clips. They will offer some resistance, but continue to gently leverage upwards.

  4. cwSHxIdYpjRcPAWB
    cwSHxIdYpjRcPAWB
    FcqBlTMuIAu5NCLb
    sL4QPMgPtQx2xxiC
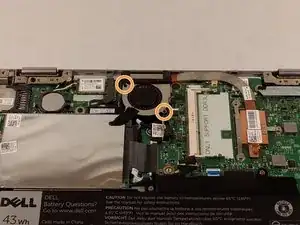
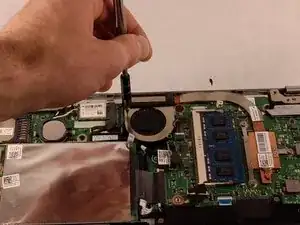
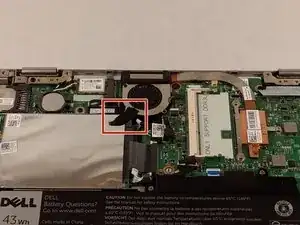
    • If there is tape on your fan, remove the tape.

    • Remove the two 2mm screws on the fan enclosure using the Phillips #00 screwdriver.

  5. ejGHDw3JS4i1AdiB
    ejGHDw3JS4i1AdiB
    konw6cTlGeGc5xDp
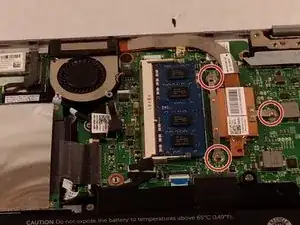
    • Unscrew the three 4mm screws holding down the heat sink of the fan using the Phillips #00 screwdriver.

    • The three 4mm screws found in the heat sink will remain attached to the heat sink. This is okay as long as they are detached from the motherboard.

  6. NuQ5KyMxcaZvaCpV
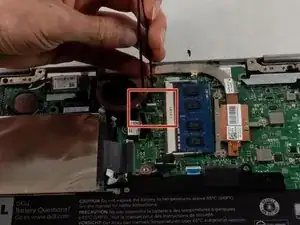
    • Use the tweezers to gently pull the power supply cable from its port.

  7. JoW1ptwJR1JrJWRF
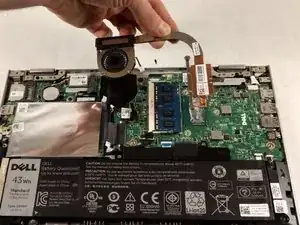
    • Grasp the fan and lift upward. Remove the fan from the device.

Abschluss

To reassemble your device, follow these instructions in reverse order.
Christopher Gravelle

Mitglied seit: 23/10/18

837 Reputation

0 Kommentare