Einleitung

Is your Dell Inspiron 7000 2 in 1 laptop dying fast? This guide will show you how to replace the battery of your laptop. This is a reminder to be cautious during the repair as the battery could possibly be swollen, which can be dangerous.

Prior to beginning the repair, completely turn your laptop off and unplug from the power source. Remember to properly recycle your old battery.

  1. SGFZB4GLVaNyyJKE
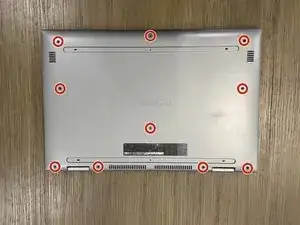
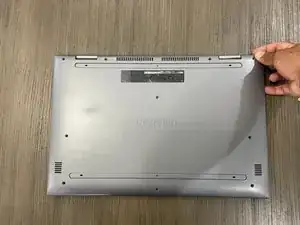
    • Flip your Dell Inspiron 7000 2 in 1 laptop upside down to get started. Find the locations of all the 10 screws.

    • Remember to turn the laptop off before you begin the repair.

  2. bqIXDmY6FK2iWuhj
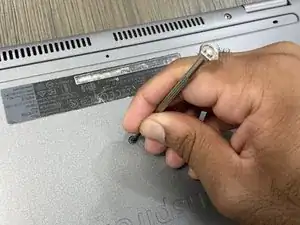
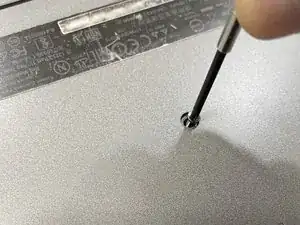
    • Using your Phillips #00 screwdriver, remove the ten 7.00 mm screws at the bottom of the laptop.

  3. a2MvuCM346DLrmvr
    a2MvuCM346DLrmvr
    dVBOhcAxMJArHR6g
    As1nlkWtqGOUqlmE
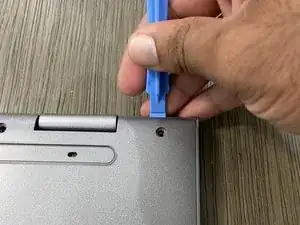
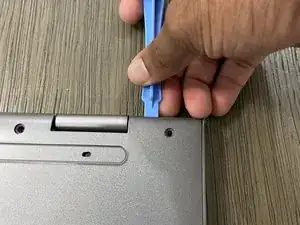
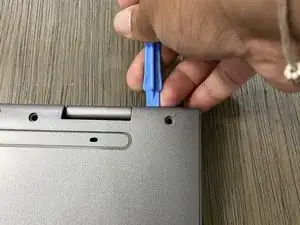
    • Insert the spudger in the gap between the bottom cover and the frame. Then, use it as a wedge and work your way around the perimeter. This will pop open the bottom cover of the laptop.

  4. VkrVsEjwuHV2CFij
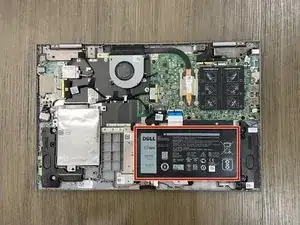
    • Find the battery located at the bottom right corner of the laptop.

  5. jd1HBjQhPDwBrMQc
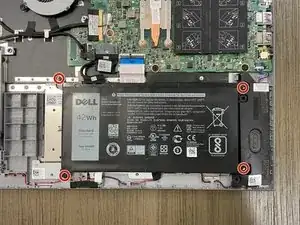
    • Now remove the four 4.0 mm Phillips #00 screws located at each corner of the battery.

  6. U6Q5wqOVvCiCRqc6
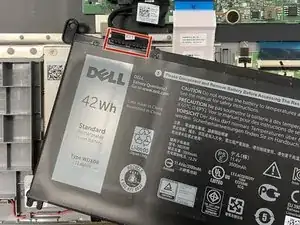
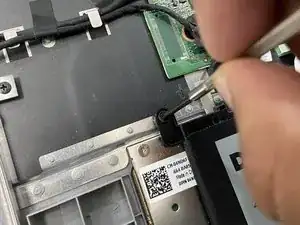
    • Remove the battery pin that is connecting the motherboard to the battery by pulling out the pin gently.

    • Remember to safely recycle your old laptop battery.

  7. 5ppQ2womTQigoo6q
    • Reinsert the battery pin into the new battery and place it back into its position.

  8. DVlolF6XLgXZSN6D
    • Screw the four 4.0 mm Phillips #00 head screws for the battery back into place to make sure the battery is held on securely.

  9. 1HuDwhvtSJkIpErC
    • Place the cover back onto the laptop and press down on all corners and sides.

    • Make sure to listen for a click to ensure the cover is properly secured.

  10. 4rkKCU3S54Ra4Tjs
    • Use the Phillips #00 screwdriver to replace the ten 7.00 mm screws on the back cover.

Neelay Patel

Mitglied seit: 17/09/21

213 Reputation

0 Kommentare