Einleitung

This guide will walk you through how the replace the memory modules (also known as RAM chips/cards) on your Dell Inspiron 7573 2-in-1 computer. The RAM (Random Access Memory) is responsible for the short term storage of data that needs to be accessed quickly by your computer. If you are experiencing frequent crashes, slow performance, or trouble during startup, replacing or upgrading your RAM may alleviate these issues.

  1. VWWaI1me6RIE4jHl
    VWWaI1me6RIE4jHl
    LceKAZAwUFE5WfRJ
    • Make sure computer is off before you begin.

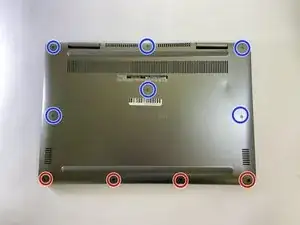
    • Remove the four 5 mm screws from the bottom edge of the laptop using a Phillips #00 screwdriver.

    • Loosen the remaining six captive screws from the bottom cover with a Phillips #00 screwdriver.

  2. RUfBKPttjIllBDvV
    RUfBKPttjIllBDvV
    ZXhZjKIKD3LuLRlL
    DdSJRVoCCvX31rOH
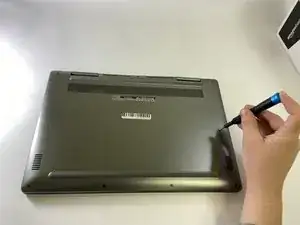
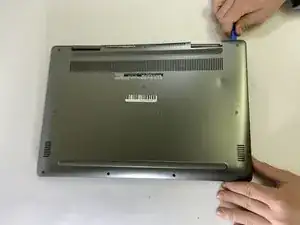
    • Using a spudger, pry off the bottom cover by gently prying from corner to corner in order to disengage the plastic clips.

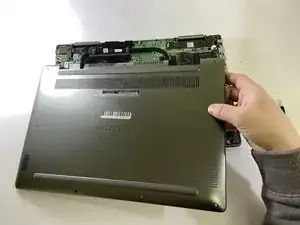
    • Lift off the bottom cover.

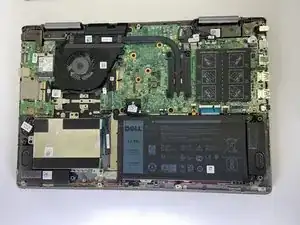
    • After the base cover is removed, your laptop should look similar as depicted in the images provided.

  3. rFjCp5KAXFyjGHn5
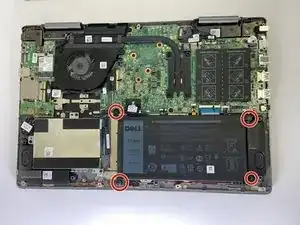
    • Remove the four 3 mm screws holding the battery in place with a Phillips #00 screwdriver.

  4. fuwHdBSxSY2ZxXEg
    fuwHdBSxSY2ZxXEg
    RYtrlAEIOHYS2nRa
    3PbUtOdX5XXRA1y2
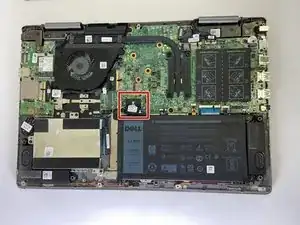
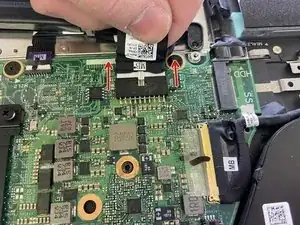
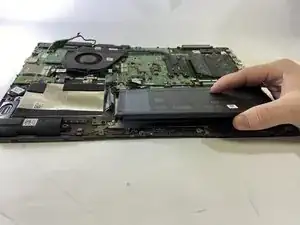
    • Using the pull tab, disconnect the battery cable from the system board.

    • Lift the battery out from the laptop case.

  5. mGjqCPCgHTavVrFu
    mGjqCPCgHTavVrFu
    pURaMq3mVEAeGfCd
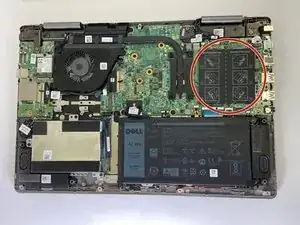
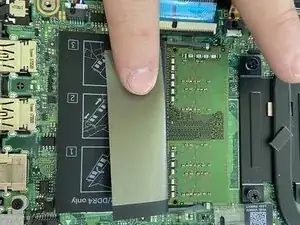
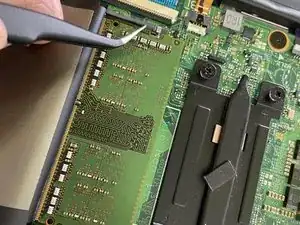
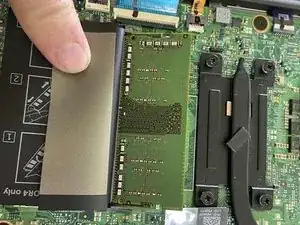
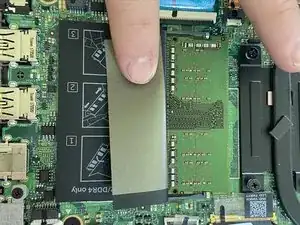
    • Peel back the mylar coverings on the RAM chips on the right side of the system board.

  6. IydBlYDM52JEejyo
    IydBlYDM52JEejyo
    LUalCxrpPVbH4yKp
    xjTfKJ61H3BsK1A1
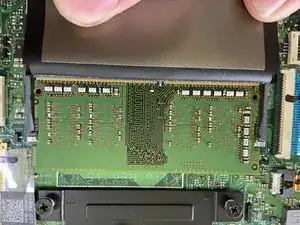
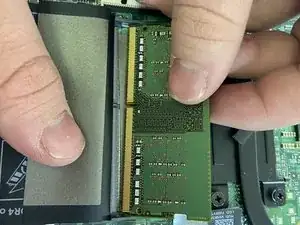
    • Push outward on the two gray tabs on either side of the RAM module.

    • These tabs hold down the RAM modules, which should pop up when disengaged.

    • Gently pull the memory module out of its slot.

    • Be sure to only touch the edges of the RAM module, as the oil from your fingers can damage the components on the face.

  7. TKyOnJaoH2BTvSP4
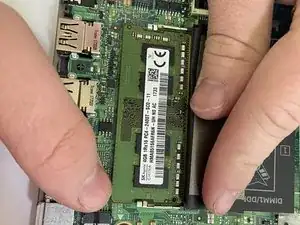
    • With the new memory module, line up the notch on the memory with the tab on the module slot.

    • Insert the memory module at an angle.

    • Push down on the module until the locking tabs on either side click into place.

    • If there is no click, reinsert the module.

  8. BUoksppjDpWKVdKh
    • Repeat steps 5-7 for the other memory module.

    • In this laptop, one set of tabs was gray plastic and the other was metallic.

    • When pushing down on the memory modules, make sure you hear a click.

Abschluss

To reassemble your device, follow these instructions in reverse order.
Brady Kennedy

Mitglied seit: 27/09/21

109 Reputation

0 Kommentare