Einleitung

Sometimes RAM might need to be re-seated to get a computer to work again. Or, you might just want to upgrade the amount of RAM in your computer. Either way, this guide will help you do it.

  1. uQbpZsCfux2ORquJ
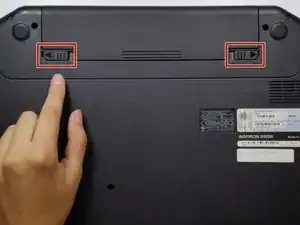
    • Flip your laptop over to view the bottom and locate the two locks.

  2. XbdU6yDTi2uQDWvF
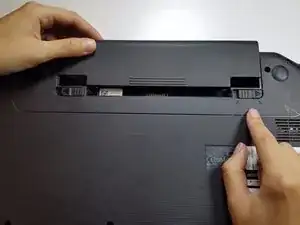
    • Slide the two locks away from each other.

    • Sliding these locks will loosen the battery to allow removal.

  3. cSX5c1IPS2O1WZqB
    cSX5c1IPS2O1WZqB
    hubMXhZEUipkL1qi
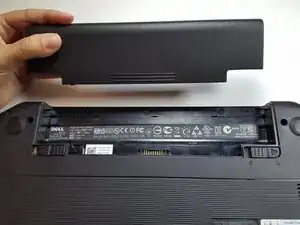
    • Pull battery out of the laptop.

    • Your laptop's battery should be completely removed.

  4. H3LMDXl4IJnHRgdO
    H3LMDXl4IJnHRgdO
    IHoQsRllmltiHLOy
    • Flip the laptop right side up. Open the laptop.

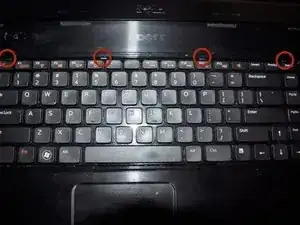
    • Gently press in the four retaining tabs along the top of the keyboard with a spudger, one at a time.

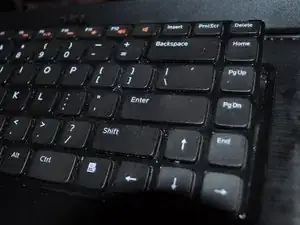
    • After the first tab is released, gently lift up on the keyboard so it doesn't lock again. Finish the other three tabs while gently lifting up on the keyboard. The keyboard will hinge up along the bottom.

  5. Vqv4MgXDdK4jtKCx
    Vqv4MgXDdK4jtKCx
    JZutJhjEdX5fvYCG
    IJRwQJSdgPsJMPWe
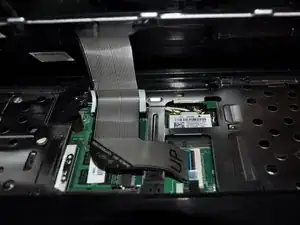
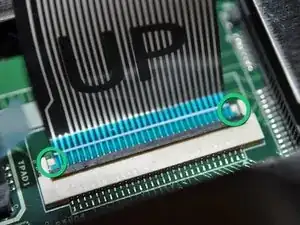
    • Gently flip the data cable latch away from the data cable with flat side of spudger.

    • Lift the cable up and out.

    • When reinstalling cable, there are two retainer wings on the sides of the cable that the cable that lock onto the bottom of the cable latch area. When these are in place the cable is properly inserted.

    • For removing the optical drive you don't need to disconnect the keyboard ribbon cable.

    What do I do is i broke the cable retainer wings and the black thing?

    Wezley Joao Ferreira -

    If the connector on the motherboard is still attached and only the clip is broken you can try and find a new clip, or perhaps tape the keyboard in place with electrical tape.

    Tyler -

    I didn’t need to disconnect and remove the cable. I simply set the keyboard gently to the side. This gave me full access to the two RAM module slots for replacement. Hopefully this will make the procedure easier.

    Clemmitt Sigler -

  6. vVUcJqjYFEplCche
    vVUcJqjYFEplCche
    6vwveM64E5hncQqT
    ltFNrFirkWSADAkI
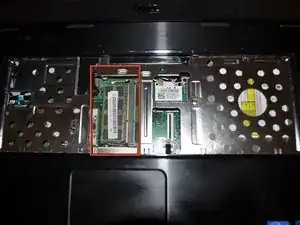
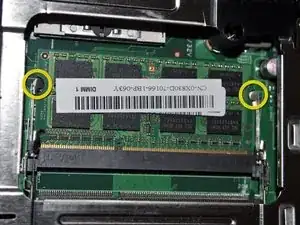
    • Locate RAM

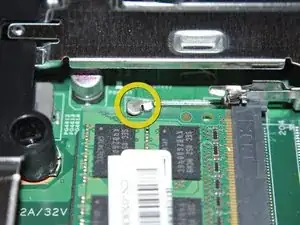
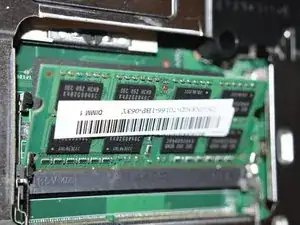
    • Push outwards on both retaining clips, the RAM will pop up slightly when it is free from the clips.

  7. dO1nmlwEjmuLHaLY
    • The RAM will pop up, and then you can slide it out at the same angle it is at.

Abschluss

To reassemble your device, follow these instructions in reverse order.

Tyler

Mitglied seit: 20/06/12

4854 Reputation

Ein Kommentar

Dell Inspiron 15 - M5040 N5040 N5050 disassembly

https://youtu.be/3c5P0pJgckg

mohamed -