Einleitung

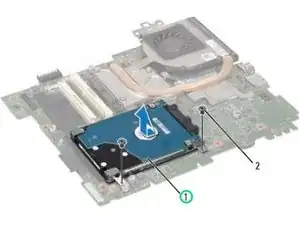
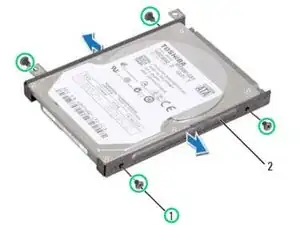
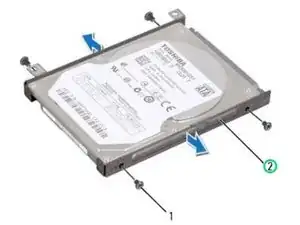
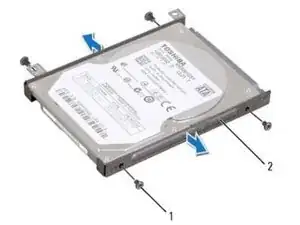
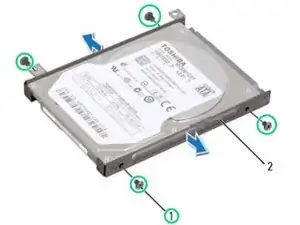
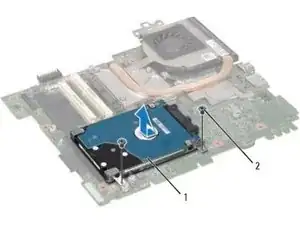
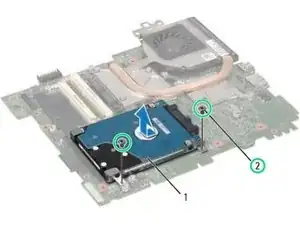
In this guide, we will be showing you how to remove and replace the Hard Drive.

  1. ILwLoe4gYNOOLdsv
    • WARNING: Before working inside your computer, read the safety information that shipped with your computer. Follow the instructions in "Before You Begin".

    • CAUTION: To avoid electrostatic discharge, ground yourself by using a wrist grounding strap or by periodically touching an unpainted metal surface (such as a connector on your computer).

    • Remove the two screws that secure the hard-drive assembly to the system board.

  2. HLHO5HCHNbnsCJi5
    • Slide the hard-drive assembly to disconnect it from the system-board connector.

  3. nR1BKQWSbHnJMhVl
    • Lift the hard-drive assembly off the system board.

  4. tLtNF6kASt1ey4WH
    • Remove the four screws that secure the hard drive to the hard-drive bracket.

  5. tWYpeFIKfESQbIMC
    • Lift the hard drive away from the hard-drive bracket.

  6. bSKivIiXusHAlNft
    • Place the NEW hard drive in the hard-drive bracket.

  7. QoSVdjlZrNgWHVjh
    • Replace the four screws that secure the hard drive to the hard-drive bracket.

  8. BVpwUbUeOnWL6V2p
    • Place the hard-drive assembly on the system board.

  9. PiK2U1SGOGtKqvW1
    • Slide the hard-drive assembly to connect it to the system-board connector.

  10. 23sbscLvHVB1wikc
    • Replace the two screws that secure the hard-drive assembly to the system-board.

Terrence15

Mitglied seit: 18/12/17

78652 Reputation

0 Kommentare