Einleitung
Werkzeuge
Ersatzteile
-
-
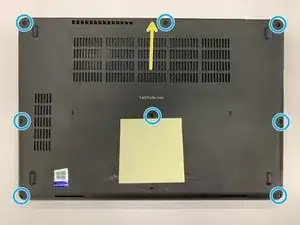
Loosen the 8 screws on the back plate. You will need a #1 Phillips head
-
Insert a spudger or prying device in the notch at the top of the backplate. It is marked with the yellow arrow.
-
-
-
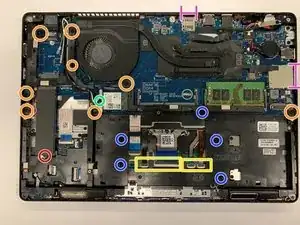
Remove the eight M2x5 screws. They are marked with 'P1' on the frame, and marked by the orange circles in the photo.
-
Remove the five M2x3 screws. They are marked with 'P' on the frame, and marked by the blue circles in the photo.
-
Remove the bracket holding the Wi-Fi card in, and pull back the Wi-Fi antenna from the frame. It is marked with the green circle.
-
Remove the SSD by unscrewing it from the frame, then pull away from the logic board. It is marked by the red circle.
-
Remove the SIM try and SD card dummy cards. They are marked with the pink lines. (See? Pulled a sneaky on ya and used a line instead of a circle.)
-
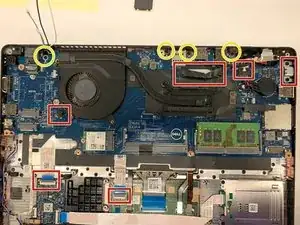
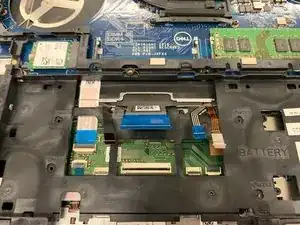
Disconnect the four ribbon cables from the trackpad assembly. These are marked with the two yellow rectangles.
-
-
-
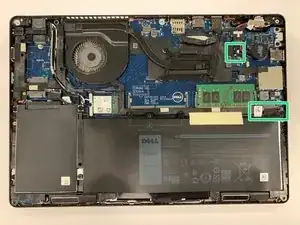
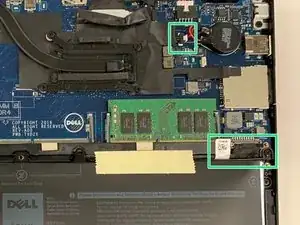
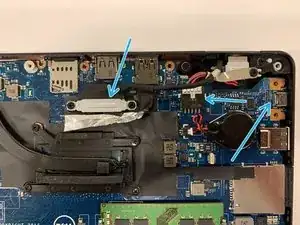
Remove the USB-C bracer, the DC input, fan header, trackpad ribbon cable, USH ribbon and the e-DP bracer and connector. These are marked with the red rectangles. A closer view of the e-DP, DC input and USB C connector are in picture 3.
-
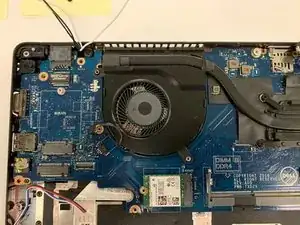
Remove the fan.
-
Remove the four M2x3 screws, these are marked with the yellow circles.
-
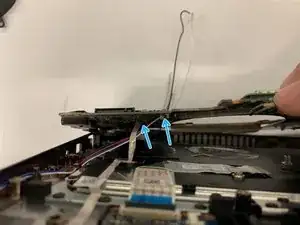
Gently lift up on the Logic Board and remove the speaker header and the LED ribbon. These are marked in picture 2 with the blue arrows.
-
Remove the Logic Board from the chassis.
-
-
-
Remember to route the ribbon cables for the keyboard over the frame on reassembly.
-
The fan should be installed over the Logic Board, but under the frame. Install the frame after installing the fan.
-
Read this guide from the end to start for reassembly, and take the time to make sure every screw finds its home and any cables are put back into their runners.
-
To reassemble your device, follow these instructions in reverse order. Feel that sense of accomplishment?
