Einleitung
Introduction
The display of a computer is a program that is in charge of projecting an image through the screen. there are two common type graphic images the (CRT) cathode ray tube, and the (LCD) liquid crystal diode. Displays usually include a screen or a projector to produce images.
This Guide Will Teach You
- Were the display is connected in the laptop
- How to safely access the display and remove it
- Tools needed to remove the display
Werkzeuge
-
-
Shutdown the computer, detach it from any power source, and make sure the laptop is closed with its latch securely shut.
-
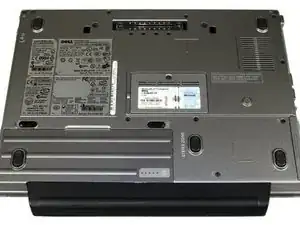
Turn the laptop over so its bottom is facing you.
-
-
-
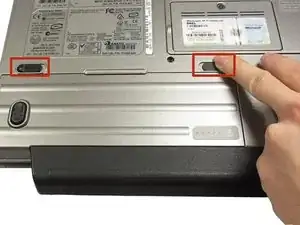
Using two index fingers, slide the battery latches outward.
-
While still holding the latches out, use your thumbs to slide the battery out towards you.
-
Once the battery is dislodged, you can let go of the latches and remove the battery.
-
-
-
With the battery removed, turn the laptop face up and open the lid a complete 180 degrees.
-
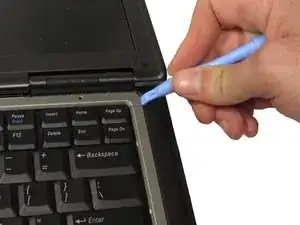
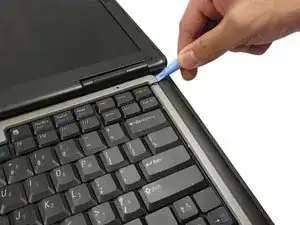
Using a plastic opening tool, pry off the corner of the keyboard bezel by undoing the tab.
-
Once you've removed the corner of the bezel, you can use your hands to slowly, but with moderate force, pull the rest of the bezel slightly up and towards you to release the remaining tabs.
-
-
-
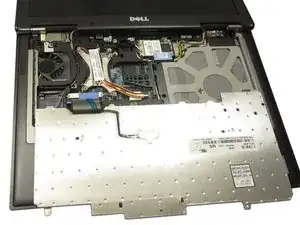
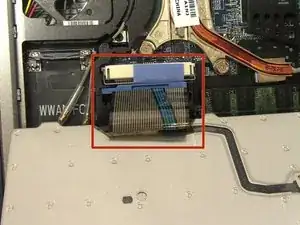
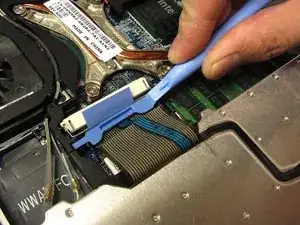
Use a plastic opening tool to unhook the blue latch that secures the keyboard cable.
-
Using the blue tab, pull the keyboard cable connector from its socket on the motherboard.
-
-
-
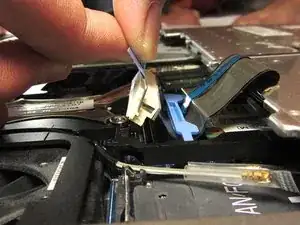
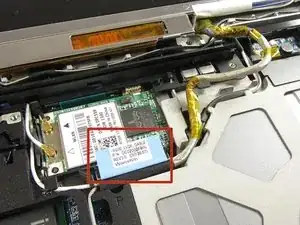
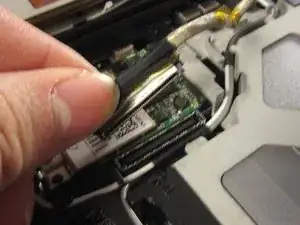
Find and remove the display's ribbon cable by gently pulling on the blue tab indicated in the picture.
-
While tracing the path of the cable back to the display, unhook the cable from the tabs of the body using the spudger.
-
-
-
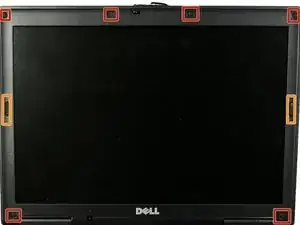
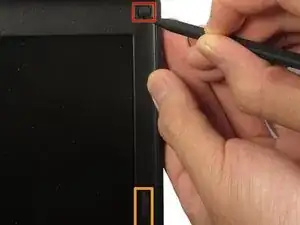
Using the spudger, peel off the 6 circular rubber pads on the display to reveal the bezel screws beneath them. Put the rubber pads aside in a labeled container.
-
Careful: do not remove the two longer pads on the left and right side of the bezel; they do not contain any screws!
-
-
-
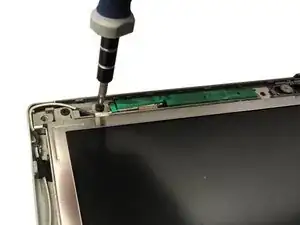
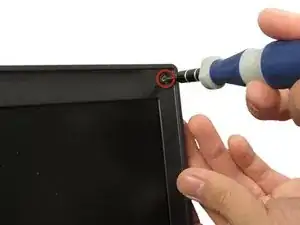
Using the Phillips #0 screwdriver, remove each of the six screws (M2.5-5mm) on the bezel and put them in a labeled container.
-
-
-
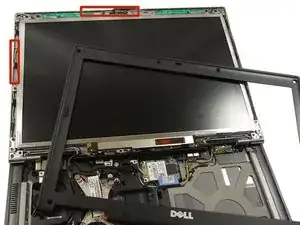
Using the spudger, slowly pry off the the bezel from the rest of the laptop. This can be done by placing the spludge in the small opening that separates the the two adjoining screen pieces along the edge. Slowly slide along this opening till the screen is free.
-
-
-
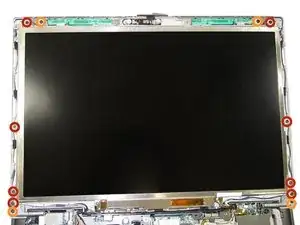
Remove the 8 screws (M2-3mm) indicated in the picture. Place these screws in a labeled container as they are different than the bezel screws.
-
Do not remove these screws
-
To reassemble your device, follow these instructions in reverse order with your new display.
2 Kommentare
Do I actually have to replace the entire monitor? Isnt there a way to use an external monitor?
I really hope this works. This is the 3rd computer I bought in 3 weekz time. All 3 of tjem had something wrong. First the laptop had no hdd. Had to return that. 2nd, didnt evem turn on or have any power to it even after 24 hourz charge. And now this one, has something wrong witj tje monitor. A black screen. Yet, this one was surprise from my boyfriend. God, just make sure it works already.
