Einleitung

If the user would like to replace a faulty wireless card, or one that is not powerful enough, this guide will give step by step information on how to achieve this.

  1. Hs2TLO2OWSFvv5KK
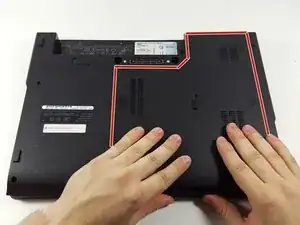
    • Unscrew the single 3.5mm Phillips #1 screw that holds on the bottom plate of the device.

  2. vEVaHOkFD1Ys444t
    vEVaHOkFD1Ys444t
    yQVWWTOQdC321TaO
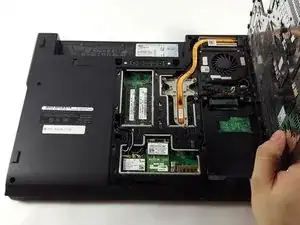
    • Place your hands on the plate and pull it toward yourself.

    • The plate will pop out of place and may then be removed.

  3. L1NVBdYTy3RlHNpv
    L1NVBdYTy3RlHNpv
    AAArLundukOOiiIc
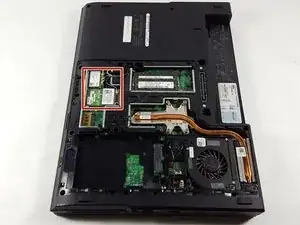
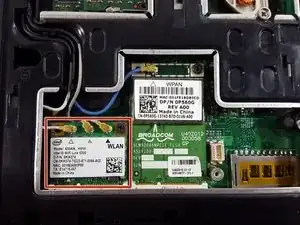
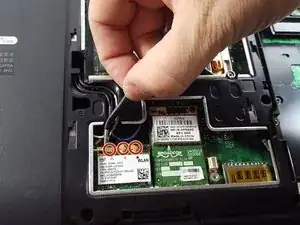
    • The wireless card is located near the front of the device, and is the expansion card with three antennas attached to it.

  4. juwP54mjL1WHqehF
    • Remove the wires connecting the card to the laptop with a pair of tweezers.

  5. NCdRUxShksLqCh1P
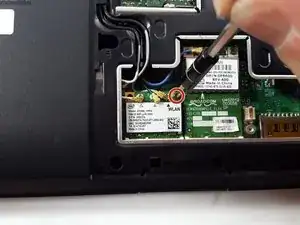
    • Unscrew the 4mm Phillips #1 screw that secure the card in place.

  6. FGns4VlZrSqcsPXZ
    FGns4VlZrSqcsPXZ
    PmW63Qtjq2Rkiiwu
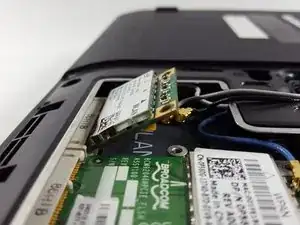
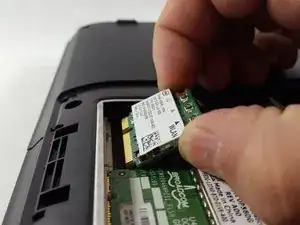
    • After completing steps 4 & 5, the card will lift up at an angle as shown.

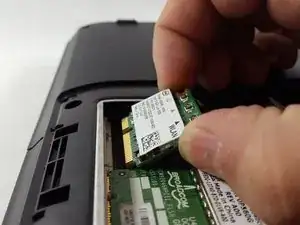
    • Once the card has popped out of place, it can be gently removed.

Abschluss

To reassemble your device, follow these instructions in reverse order.
Richard Harrison

Mitglied seit: 23/10/16

787 Reputation

0 Kommentare