Einleitung

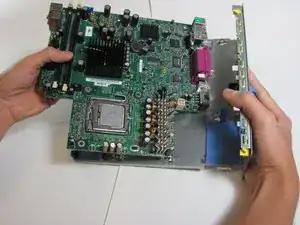
Remove the Motherboard from the computer.

  1. 4ajI5vYBVAH6ILMC
    • Make sure the computer is turned off, by selecting the start menu and choosing “Shut Down”.

    • Ensure all cables, speakers and other devices are unplugged and turned off before opening the computer case.

  2. sdrbdanRpFGHKRFT
    sdrbdanRpFGHKRFT
    5F2rKqpvlGVLmcpd
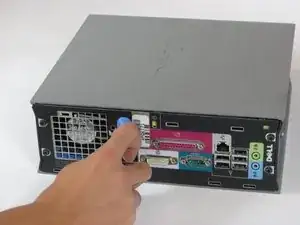
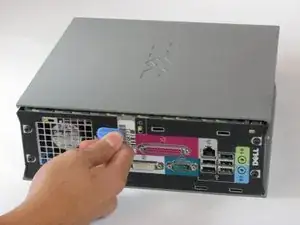
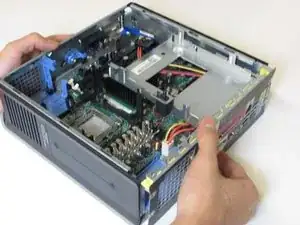
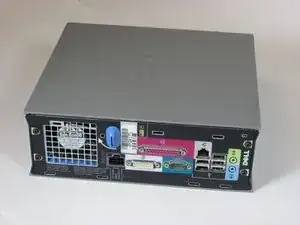
    • Lay the computer on its side; you will see a blue knob.

    • Turn this knob 90 deg clockwise.

  3. UyXsu1ZuJjv1TUkc
    UyXsu1ZuJjv1TUkc
    rTYZcUQRXvknXMCK
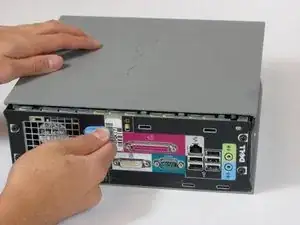
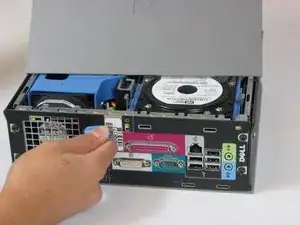
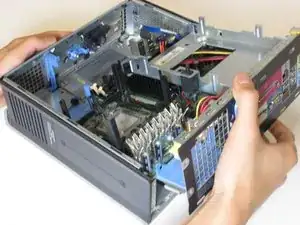
    • Slide the panel case forward about 1/2 inch while knob is turned.

    • Lift panel case off computer.

  4. vSghrTSSLaW524Tv
    vSghrTSSLaW524Tv
    Dv6EDOMrnvDlvbSu
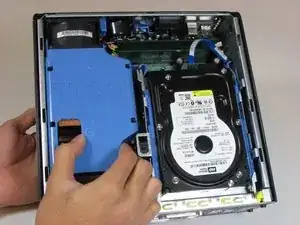
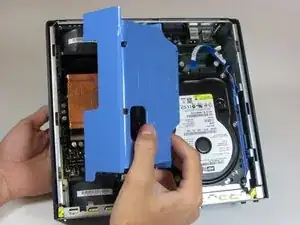
    • Remove the large blue cover from the computer, there are no screws or tabs keeping it in place.

  5. J2PtIKifGKNGYh3N
    J2PtIKifGKNGYh3N
    1ZORfOuUHC5sNLlO
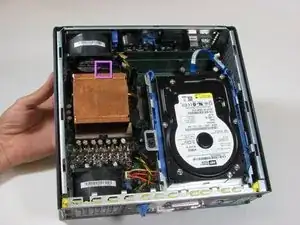
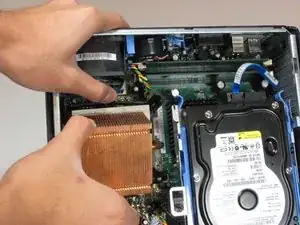
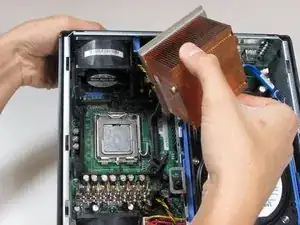
    • Press down on the release tab above the heat sink.

  6. sAS1XERRmyBsVdGO
    sAS1XERRmyBsVdGO
    qhQDnUDjMHucuH2F
    • Pull the heat sink out of the computer while pressing on the release tab.

    • When reassembling make sure to clean the processor and heat sink of all old thermal paste and apply new paste to the processor

  7. qrtTFXcwIcUPxNQB
    qrtTFXcwIcUPxNQB
    JSkRFN4H2ly1vi5n
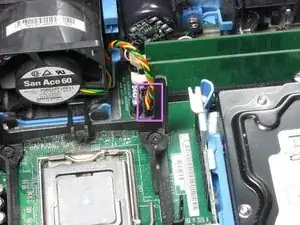
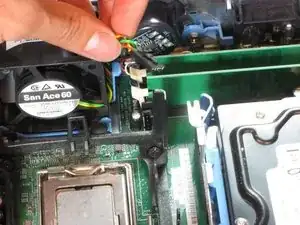
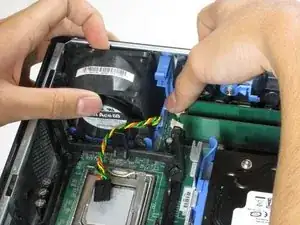
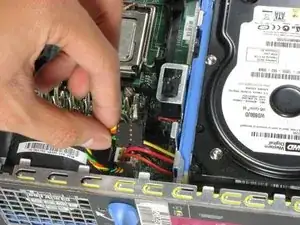
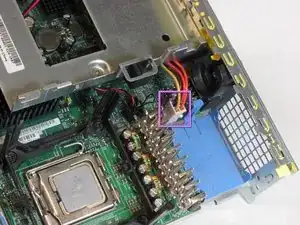
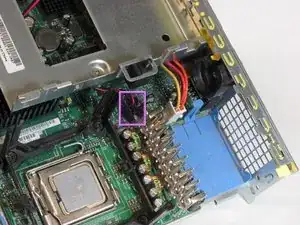
    • Remove the power supply that connects the upper fan to the motherboard. The power supply has black, red, green and yellow wires.

  8. xllhSaC5kJMY5Um5
    xllhSaC5kJMY5Um5
    MyWxw2QPdyMHdPVI
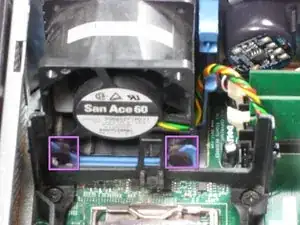
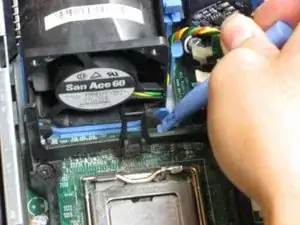
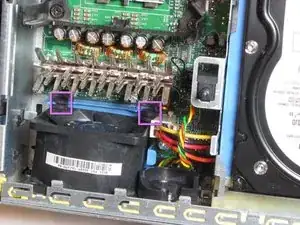
    • Remove the rubber grommets from the base of the fan. A spudger may be useful.

  9. ubG6qPeUvs3je45M
    ubG6qPeUvs3je45M
    LIF2cOVViD5G4HYd
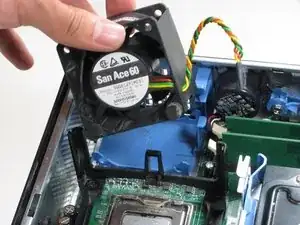
    • Press on the blue release tab and pull the upper fan out of the computer.

  10. DIg2G63HMutPHBeH
    DIg2G63HMutPHBeH
    He1SvVDMR2j5ckXr
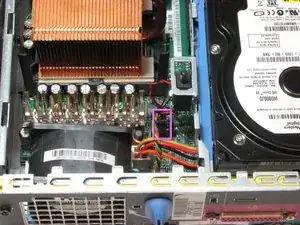
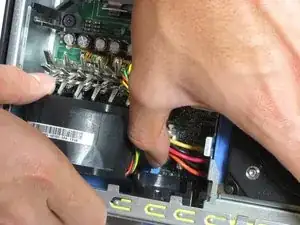
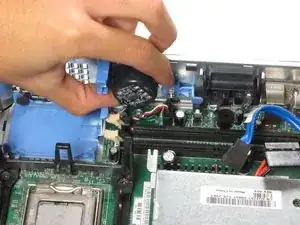
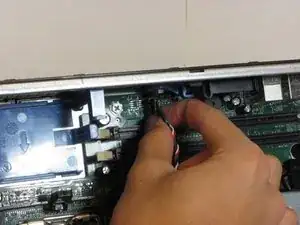
    • Remove the power supply that connects the lower fan to the motherboard, distinguished by it's black, red, green and yellow wires.

    • Make sure to press on the release tab while removing the power connector.

  11. yBnsCAUhLVPMcQR3
    yBnsCAUhLVPMcQR3
    XVHQfw6r3fEaJkUf
    • Remove the rubber grommets from the base of the fan. A spudger may be useful.

  12. FKtNHntqwGl3mDh6
    FKtNHntqwGl3mDh6
    CZvUdgncLL4M31lo
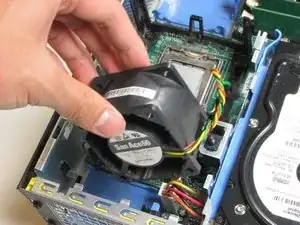
    • Press on the blue release tab and remove the fan.

  13. 5KLi3MaDYGgTW4p4
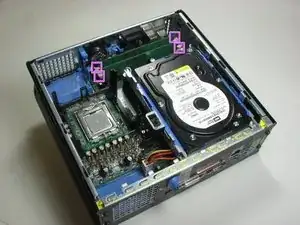
    • The RAM are the two green cards in the corner of the computer.

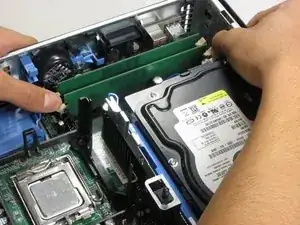
    • At each end of the card, there are two white clips securing the RAM to the Motherboard.

  14. NMJLoADhSDVZINJS
    NMJLoADhSDVZINJS
    InNFa2iCePWcC4PB
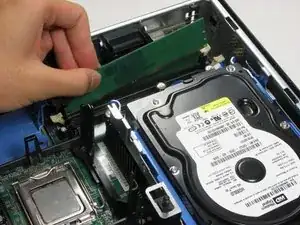
    • Push down both white clips with your thumbs until you hear a click.

    • The RAM cards can now be removed.

  15. 1CCnxPwMHmO46pUB
    1CCnxPwMHmO46pUB
    TuFY1XVcP2djIKIX
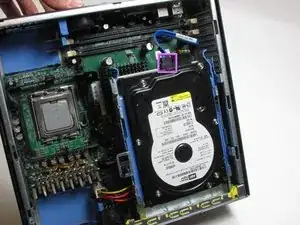
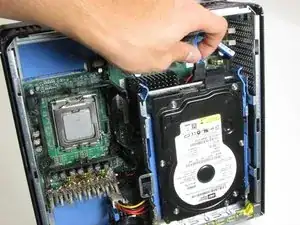
    • Unplug the blue cable that connects the hard drive to the motherboard.

  16. D4CqlOwaVOKEOTBY
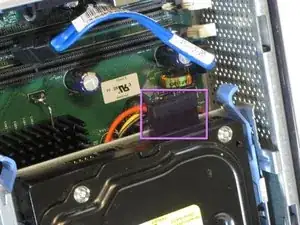
    • Unplug the power supply, distinguished by its red and yellow wires.

  17. 5yGmdPcSxwiOsaCY
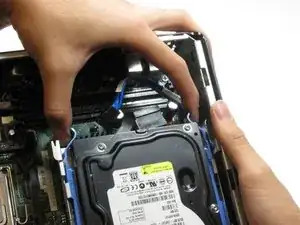
    • Squeeze the release tabs on either side of the hard drive.

    • Then slide the hard drive out of the computer while squeezing the tabs.

  18. wWrTbrZ1eeAKfNlH
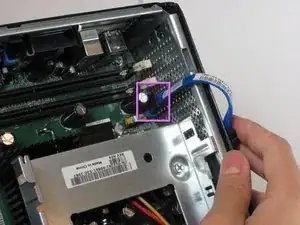
    • Unplug the cable that connects the hard drive to the Motherboard.

  19. QPeAIIehwC3aLJxO
    QPeAIIehwC3aLJxO
    ScUeOSifOZndsbcH
    • Press on the release tab and remove the motherboard speaker which is attached to the side of the tower.

  20. 2VZ21PxdLCrrcGAU
    • Unplug the power cable attached to the motherboard speaker.

    • Make sure to press on the release tab while removing the power cable.

  21. tUuZyLGs3IdFSVgF
    tUuZyLGs3IdFSVgF
    qQfEjn5342BwMWxJ
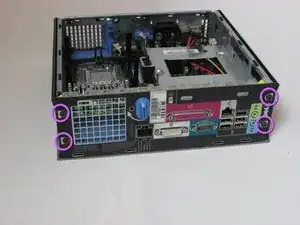
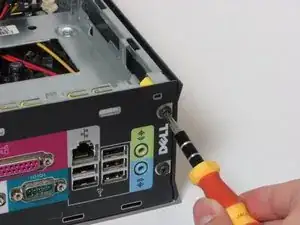
    • Remove four screws located at the back of the computer tower.

  22. PJANbZqRTlVsfPC2
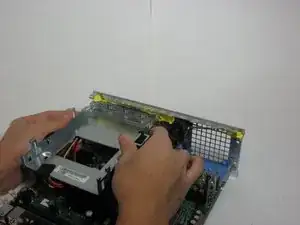
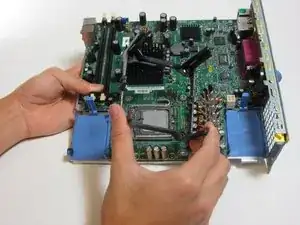
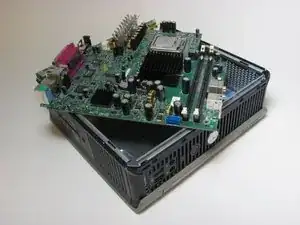
    • Carefully detach the motherboard from the computer case.

  23. 2fSsgSyGcibDjy61
    • Lift the motherboard from the rest of the computer case.

    Thanks a lot :)

    foundedger -

    Hi,

    Excellent guide.

    I have one of these, and i was thinking of opening it up.

    Its sound output disappeared one day. Quite unexpectedly.

    No reason that i could see. Couldn't find anything in the

    settings to make it go again.

    Finally i thought that maybe its 'sound card' had gotten

    jogged, or maybe loose, and needed 're-seating'.

    After reading through your article on the SX-280,

    i now see that it has no 'sound card'.

    It has 'on-board' sound facilities.

    So for me that has pros and cons.

    Pros, i dont need to look for a sound card to re-seat it.

    Cons, i dont know what to do about my lost sound now.

    As to updating the images, i think they are appropriately

    dated to suit this model of PC.

    Pre-Requisites ... Not quite sure what this refers to.

    Maybe a phillips screwdriver is a prerequisite.

    Maybe i missed something, but i dont see that newer pics

    would help at all, but the poster is quite correct about

    this guide, it is very good.

    Regards, John :)

    John -

    REal nice writeup, saved me a lot of guesswork. Thanks a lot.

    JA Reyes, MArch 30, 2015.

    Jose Reyes -

    Fan closer to heat sink

    No need to remove rubber grommets. After pressing blue tap, fan can be moved sideways, towards housing, after about 2 to 3 mmm travel the slots that hold it become wider, and fan, plus blue plastic bracket can be lifted out.

    Same is true for other fan, but more difficult to slide. This fan does not have

    to be removed to get motherboard out.

    Dieter Ast -

  24. VX5gRXKDwanQLYjR
    • Unplug the cable that powers the hard drive, which has orange, red and yellow wires.

    • Make sure to press the release tab while removing the cable.

  25. VyJR4MeBn5LFM2Iy
    VyJR4MeBn5LFM2Iy
    EYWpspdCHZI2Qgpu
    • Unplug the cable that powers the emergency shut off, distinguished by its red wires.

    • Make sure to press on the release tab while removing the emergency shut off.

  26. dinOwBJW1PGaWpXi
    dinOwBJW1PGaWpXi
    qs1Eb1aXQA6Xc3Ux
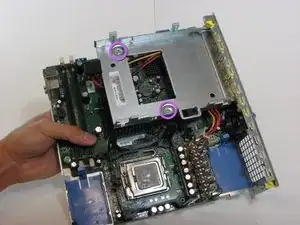
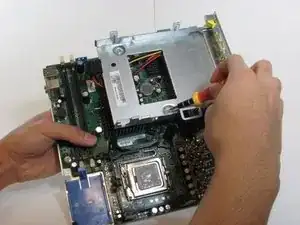
    • Remove two screws from the Hard Drive Stand.

  27. 4hsiOSfjnd2ZfRYT
    4hsiOSfjnd2ZfRYT
    ceBNAfYoFnjgovUr
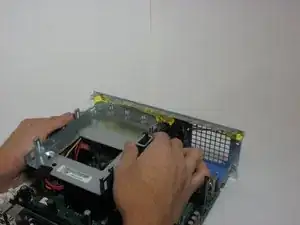
    • Slide the Hard Drive Stand to left side.

    • Remove the stand from the rest of the rear panel.

  28. EYAe6tgCJTVqwlAL
    EYAe6tgCJTVqwlAL
    TZ6ZQpsGSuXKLh36
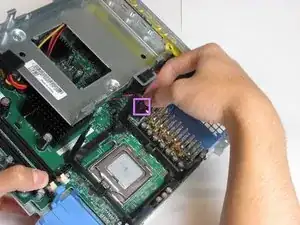
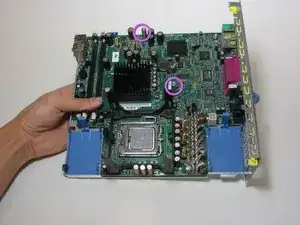
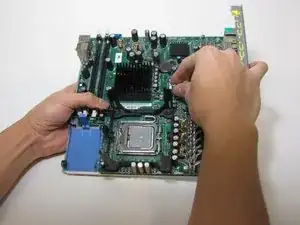
    • Remove the studs that support the Hard Drive Stand from the motherboard.

    • The studs can be removed by hand.

  29. GWpgdnLkigmgJLR6
    GWpgdnLkigmgJLR6
    YoSd1PNeHQGaoHKU
    RlFE1QQYRk1YGQYs
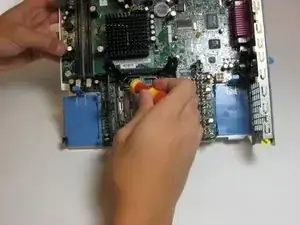
    • Remove the four screws located on heat sink stand.

    • The heat sink stand can now be lifted from the motherboard.

  30. qcwumkJSjiAkYXVj
    qcwumkJSjiAkYXVj
    s3DNitPBXlGBbwSB
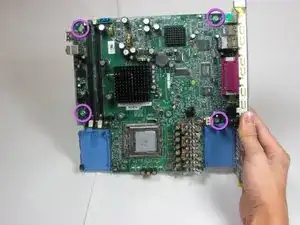
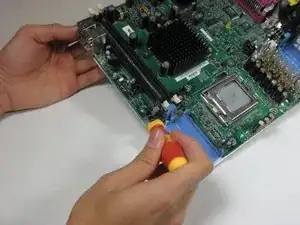
    • Remove the four screws holding the motherboard to the rear computer panel.

  31. cDgW2aJSPpNMrodE
    cDgW2aJSPpNMrodE
    6GI51besObYnIQEr
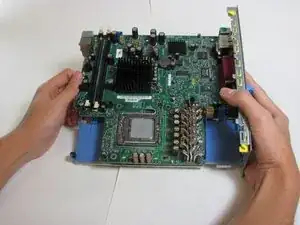
    • The motherboard can now be removed from the remaining panel.

Abschluss

To reassemble your device, follow these instructions in reverse order.

Tom

Mitglied seit: 04/10/10

829 Reputation

2 Kommentare

Good job. Thanks for sharing, friend.

Angel Peguero -

Great guide! I got stuck at the Mobo tray, I knew the black screws were involved but couldn't get it with out help. Thanks!

Fans can be removed with board tray, otherwise they're getting pulled off their rubber isolating feet. Once out with the mobo, the fans slide off the board tray with their plastic shoes attached.
purchases -