Einleitung

If the keyboard is broken, missing, or malfunctioning you can replace the keyboard of the Dell Precision 5510 in 5 steps by following this guide.

  1. fJufTEJVWRqVU2Ne
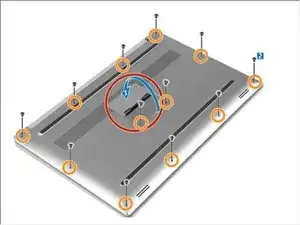
    • Open the system badge flap over to reveal the screws underneath (marked 1 on the image).

    • Remove the 12 screws that secure the base cover to the computer.

    According to the owner’s manual at https://www.dell.com/support/manuals/en-..., most of the screws for the base cover are Torx #5 with a couple of Phillips #0 under the badge flap.

    KCMax -

  2. uUAIrfDAT4xfPB5A
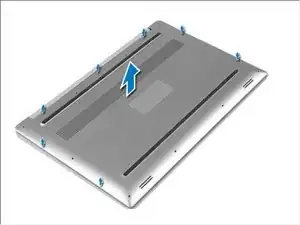
    • Pry the edges base cover and lift it to remove it from computer.

  3. g4R5AJKMnNAdycH6
    g4R5AJKMnNAdycH6
    ejHACNFO5FEECbmS
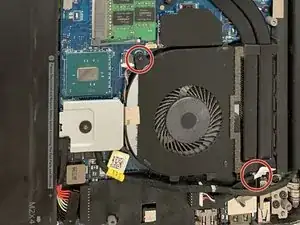
    • There are two screws on each fan circled in the images shown. Use a Phillips #0 screwdriver to remove all four screws.

    • Each fan has one 3.7mm screw and one 4.65mm screw.

  4. iAqDlkxrhAyYDbPa
    iAqDlkxrhAyYDbPa
    cgUXrbx2rSnICR1Q
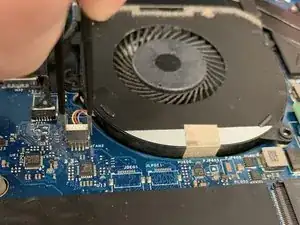
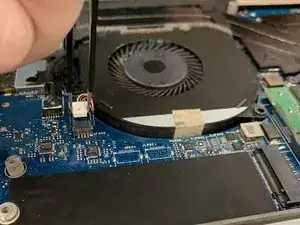
    • Each of the fans are plugged into the motherboard. Use tweezers to pull the plug out.

    • Do not grab by the wires, grab by the white rectangular region.

  5. eL6mVxWkSor11aeg
    eL6mVxWkSor11aeg
    2CWSIE24p3FfkSke
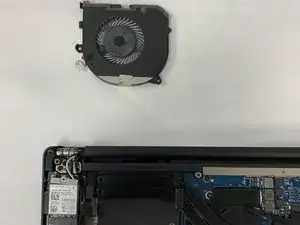
    • Carefully extract the fan from its housing bed. It should remove easily if all parts have been disconnected.

  6. RiLqrHWGOJmPREwi
    RiLqrHWGOJmPREwi
    vBfMpBiqywOSFwXY
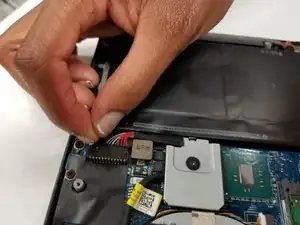
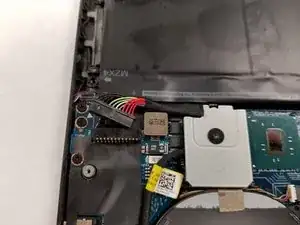
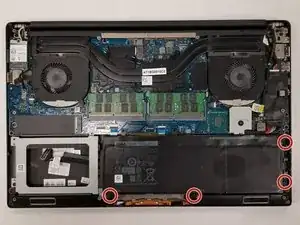
    • Unplug the connection that links the battery to the computer.

  7. rjVem3IIKoUIo2MZ
    rjVem3IIKoUIo2MZ
    sWmNSMptxQyVKpOr
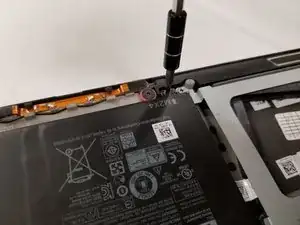
    • Remove the four 4.0 mm JIS #0 screws surrounding the battery.

  8. DucwQ1cvSUZ3L2A1
    DucwQ1cvSUZ3L2A1
    4nTat22ECfIZXWaJ
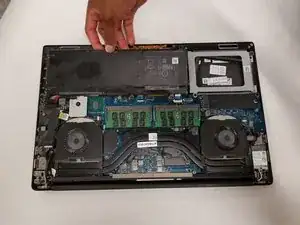
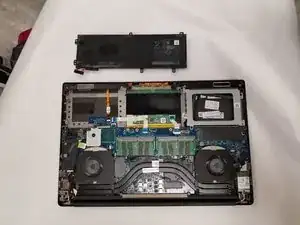
    • Carefully remove the battery from the computer.

  9. RWmJHHdjUjQgNNuJ
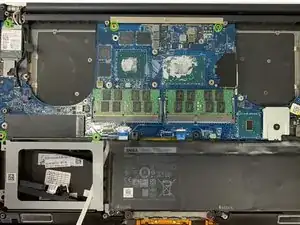
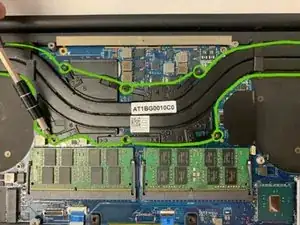
    • Remove 6 screws to take off the heat sink.

  10. 4VQjojPRLchXBrCb
    • Remove all standalone motherboard screws.

    • 8 screws with lengths of either 3.7mm or 4.65mm

  11. Ug2M1KaFaS3rPp61
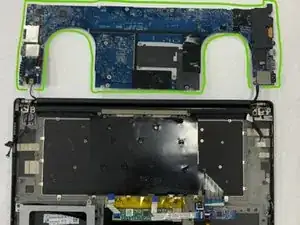
    • Remove the motherboard.

  12. pEOWHFViOaYahxgP
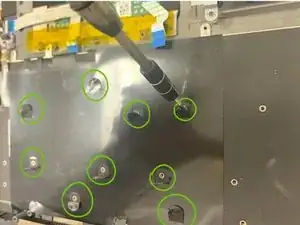
    • Remove nine screws from the back of the keyboard.

    • Screws are 1.9mm in length

  13. rZ3sGtYhrCmdlfiW
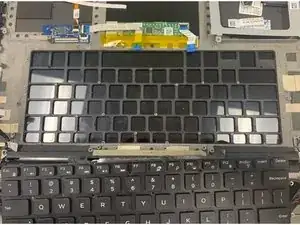
    • Pull keyboard out and replace.

Abschluss

To reassemble your device, follow these instructions in reverse order.
Colin Hunter

Mitglied seit: 31/03/22

121 Reputation

0 Kommentare