Einleitung
Werkzeuge
Ersatzteile
-
-
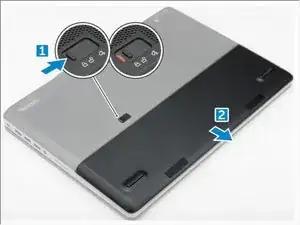
Slide the release latch towards the unlock icon to release the battery cover [1].
-
Slide and lift the battery cover to remove it from the computer [2].
-
-
-
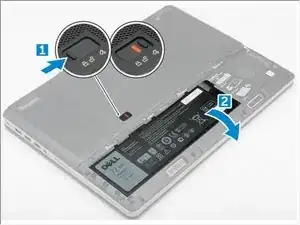
Slide the release latch towards from the unlock icon to unlock the battery[1].
-
Lift and remove the battery from the computer [2].
-
-
-
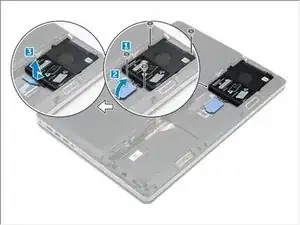
Remove the M3.0x3.0 screws that secure the hard drive to the computer [1].
-
Lift the hard drive latch to release the hard drive [2].
-
Slide and lift the hard drive from the computer [3].
-
-
-
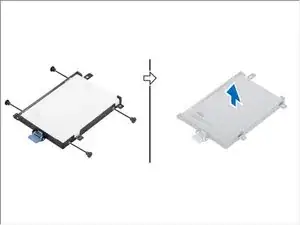
Remove the M3.0x3.0 screws that secure the hard drive. Lift the hard drive from the bracket.
-
Abschluss
To reassemble your device, follow these instructions in reverse order.


