Einleitung
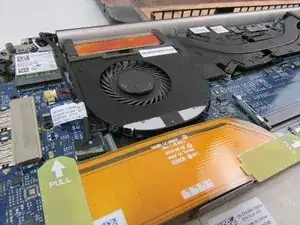
If the Dell Precision M3800 fans are nonfunctional and the computer is overheating, use this guide to replace the fan(s).
The fans run to prevent the computer from overheating and continue normal function. Faulty fan(s) will fail at cooling down the laptop and can be an obstacle to normal functions.
Before using this guide, check faulty fan(s) for foreign objects that cause underperformance. You may be able to fix his issue by dislodging said objects with an ESD-safe brush or small dust blower, instead of replacing the equipment. Be sure to isolate fan(s) that are nonfunctional as a replacement of only one fan may be needed.
Before beginning, be sure to power down the laptop, and unplug from the external power source(s).
Werkzeuge
-
-
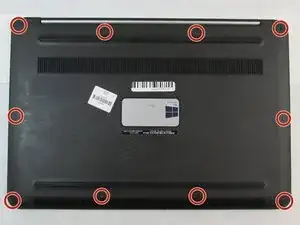
Use a T5 Torx screwdriver to unscrew the ten 3mm screws on the laptop back cover.
-
Lift up the silver cover from the back panel to reveal two screws.
-
Use a Phillips screwdriver to remove the two screws underneath the silver cover.
-
-
-
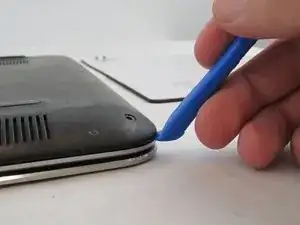
Use an opening tool to pry around the edges of the back panel to loosen the panel.
-
Remove the back panel.
-
-
-
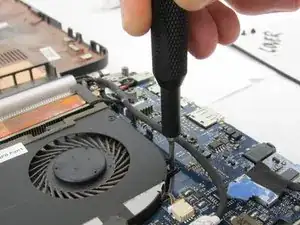
Use a Phillips #00 screwdriver to unscrew the two 3.5mm screws that are holding the fans in place.
-
-
-
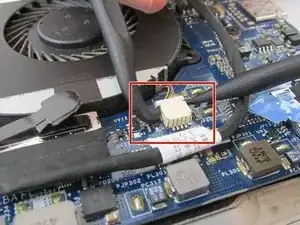
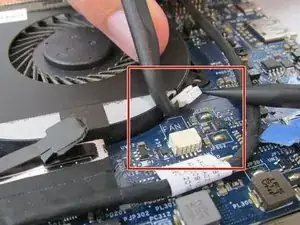
Using a nonmetal prying tool, unplug the cord connecting the fan to the motherboard.
-
If replacing the right fan, this cord is located underneath the fan.
-
If replacing the left fan, this cord is located on the left of the fan.
-
-
-
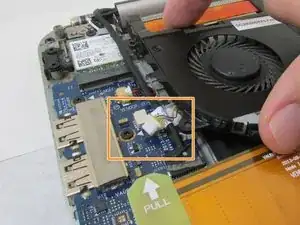
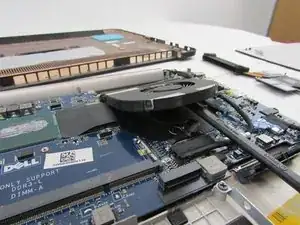
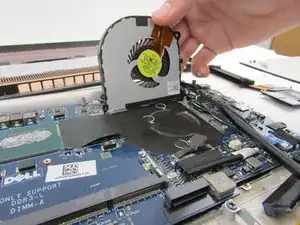
Use nonmetal prying tool to lift the bottom of the fan from the laptop body (this will require some force and you will hear an adhesive pulling sound).
-
Repeat the steps for the second fan if needed .
-
To reassemble your device, follow these instructions in reverse order.
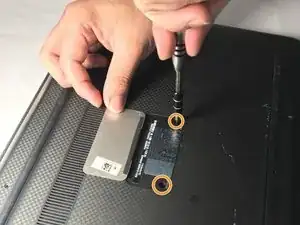


there are 2 additional screws under the metal plate
Andrew Gaquin -
That's right, at first time I tried carefully remove the back plate , with no success, {nly few minutes later I realized it were these 2 screws holding it all together and fighting against my intrusive dids
Alexander Fediushyn -
Thanks for the tip! I corrected the step to include this.
Arthur Shi -