Einleitung
If your camera isnt functioning properly, not showing a display, or looks cracked or foggy, it may need to be replaced. In this guide we will be replacing the rear-facing camera.
Werkzeuge
Ersatzteile
-
-
Hold the device with the screen facing up. Gently wedge your plastic opening tool into the crease, and run it along the perimeter of the case
-
Remove the back panel of the device.
-
-
-
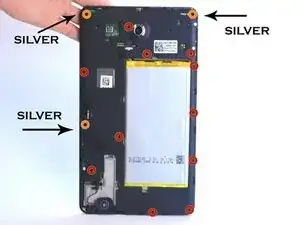
Remove the 14 screws with the T-5 Torx screwdriver. (11 black 3.6mm screws, and three 4.45mm screws)
-
4.45mm Silver screws
-
3.6mm Black screws
-
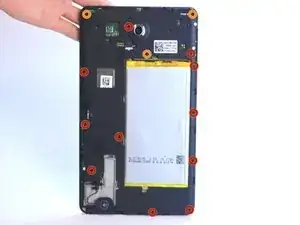
Gently snap the perimeter clips open, and remove the internal plastic case.
-
-
-
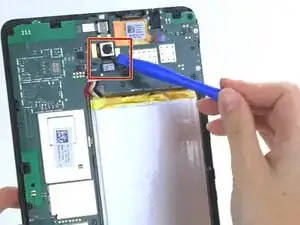
Use the plastic opening tool to disconnect the camera from the logic board, by prying it up.
-


Abschluss
To reassemble your device, follow these instructions in reverse order.