Einleitung
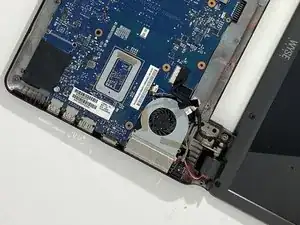
If your device feels sluggish/lagging performance-wise over time of use, you might need to change the fan. If these symptoms are followed by overheating easily, the fan being very loud or sounds weird (clicking, clunks, rotational friction), you should definitely do so.
For this teardown, you will need a PH1 Phillips screwdriver and Spudger.
Follow the steps listed to access the fan and then follow back in reverse order to reassemble the laptop one you have replaced the fan with a new one.
Werkzeuge
-
-
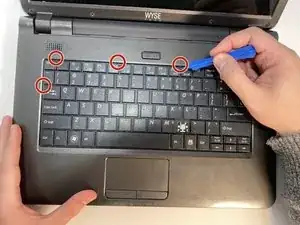
Use a spudger to unclip the keyboard from the main body by disengaging the clips lined around the top and sides of the keyboard.
-
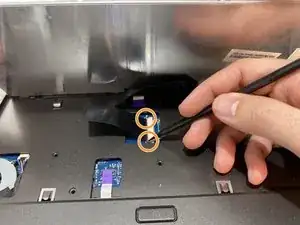
Once lifted, push the white slider holding blue ribbon cable and put keyboard to the side.
-
-
-
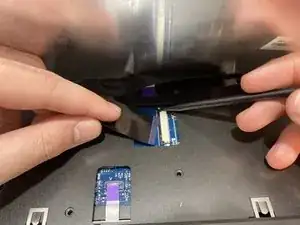
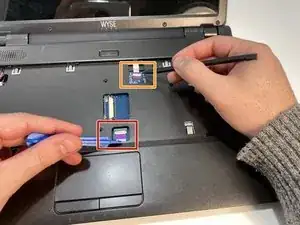
With the spudger, remove sliders that are holding the purple ribbon cable.
-
Disconnect cable by the power button.
-
-
-
Close the laptop and flip it over.
-
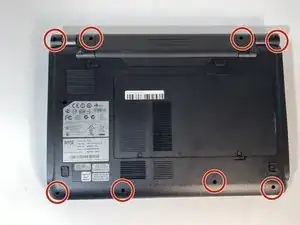
Remove eight 7mm Phillips #1 screws along the edges of laptop.
-
-
-
After removing the screws, flip the laptop back over and open the screen.
-
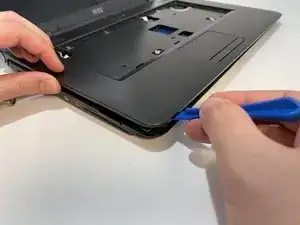
Lift the laptop's keyboard/mouse pad top with an opening tool.
-
-
-
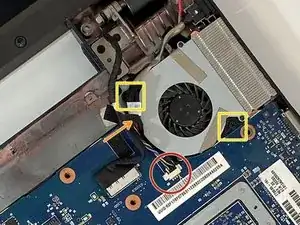
Unplug the cable connecting the fan to the motherboard.
-
Lift the tape holding down the cables over the fan.
-
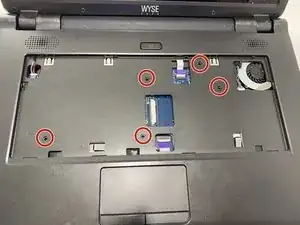
Undo two 5mm Phillips #1 screws.
-
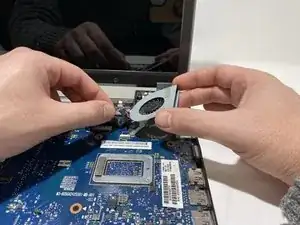
Lift the fan out of its slot.
-
The process is simple but tedious. Be patient, keep the screws organized, be gentle with the clips and you are good to go!
Ein Kommentar
excelent work. thanks for share
