Einleitung

  1. PQjALRJOV1toEmAZ
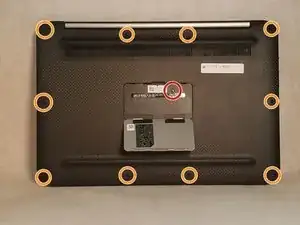
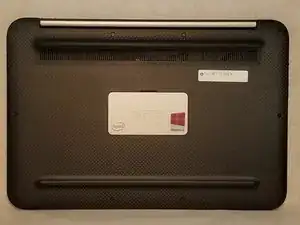
    • Pop the center cover open on the bottom cover.

    • Remove the center screw with a #00 Phillips screwdriver.

    • Use a T5 Torx screwdriver for the remaining screws around the edge of the bottom cover.

  2. aTsAitbJDBuSfWi1
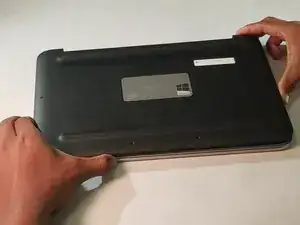
    • Carefully remove back panel after all screws have been removed.

    I suggest sliding an opening tool along the front of the case first to pop the plastic snaps holding the cover to the bottom of the laptop. The snaps near the hinges are the most challenging. It is also important, when following these directions in reverse order, to fit the right side of the case over the sliding power switch before applying downward pressure required to snap the case bottom back into place. Wouldn’t want to break your power switch.

    Jeremy Tilden -

  3. dMqN3cTM34jLpS4o
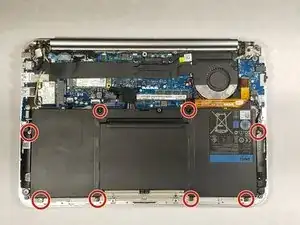
    • After the back panel has been removed, disconnect the battery to prevent electrical shock

  4. IhmDnYLPyoC1bZ1k
    • Use a Phillips #00 screwdriver to remove the 8 screws that secure the battery.

  5. HgcclMZKOf5ijIvp
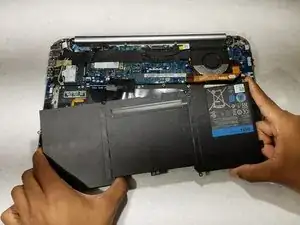
    • Once all the screws have been removed the battery is now safe to extract

Abschluss

To reassemble your device, follow these instructions in reverse order.

Kyle Yatsula

Mitglied seit: 04/04/17

162 Reputation

2 Kommentare

Any tips for registering the new battery in the BIOS?

Ryan Porter -

Your battery is automatically recognized.

There is no declaration to be made in the bios.

If the problem persists, I invite you to open a support question:
https://fr.ifixit.com/R%C3%A9ponses/Devi...

Schwarzer -