Einleitung

Wenn du Probleme mit der Wi-Fi Verbindung hast, kann ein erneutes Einsetzen oder der Austausch der WLAN-Karte helfen. Diese Anleitung zeigt dir, wie das geht.

  1. d4dlLhKy4BBopKMR
    d4dlLhKy4BBopKMR
    k2WqKJVEtDes4Ca2
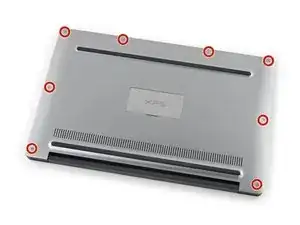
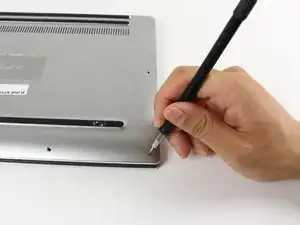
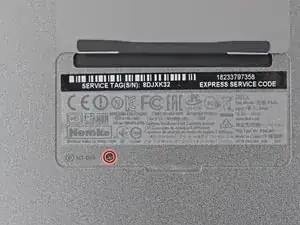
    • Entferne acht 4 mm Torx T5 Schrauben von der Rückabdeckung.

    Missing a step about removing the tiny Phillips head screw under the XPS flip up cover in the middle. Also, there are hooks all the way around the cover so it doesn’t simply lift off.

    curtis_p_brown -

    What about step 3???

    Peter Hecht -

    Please dont hurry , take your Time to follow this procedure. It takes 20 min (not 5) and step 4 requires half of this Time. Good luck.

    Peter Hecht -

    +1 Peter Hecht is right - getting the little clips the back is snapped on with is time consuming and a bit fiddly for people not used to “spudging” off covers. Starting from the back is the key those come loose much easier and help with the rest

    Doug Steinschneider -

  2. 2TNJ3aF1OiC3dQrY
    2TNJ3aF1OiC3dQrY
    RKMGHiGBGvwUs2b6
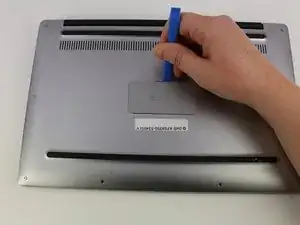
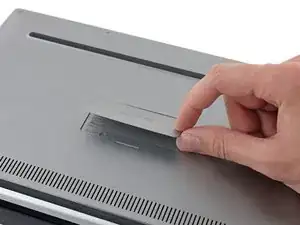
    • Heble mit einem Plastiköffnungswerkzeug die mit "XPS" markierte Klappe in der Mitte auf.

    No flap or screw on the XPS 9370, just a press-fit latch at the centre of the cover. This can be gently prised off.

    Alan Thomas -

  3. TtZb5DNBruSpJQiH
    • Entferne die einzelne Kreuzschlitzschraube unter der Klappe.

  4. SV3vQLxNPuaLAJc2
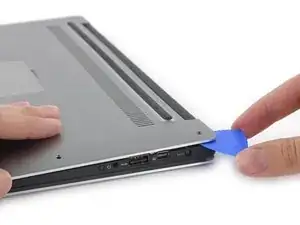
    • Heble mit Plektren oder einem Plastikwerkzeug die Gehäuseklammern auf. Beginne dabei an der hinteren Kante.

    It’s not that easy to lift actually, cause there are latches. Had t release them gently all around beforehand.

    Davit Barbakadze -

    Also there’s one additional screw under that plate on the bottom!

    Davit Barbakadze -

    Maybe the later models are different, since it should be from the front: https://www.youtube.com/watch?v=xFIE2SKs...

    shigmas -

    Very difficult step, Proceed very carefull

    Peter Hecht -

    If you are replacing the battery of a 9360 or latter (2016 onward) make sure to do the FRONT first. There are latches on the back that you may break if you try to force it open that way. After prying up the front and the sides, just lift up the front like you would open a hinged box. You shouldn’t feel that much resistance as the back hinges off towards you after you’ve lifted it around 30-40 degrees.

    Giacomo P -

  5. SclHTlmfKvgauUBi
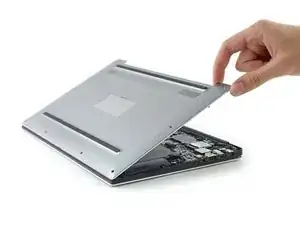
    • Entferne die untere Abdeckung.

    good evening, is there a site that sells the back part because it's broken

    marios cocka -

    good evening, is there a site that sells the

    back part because it's broken

    marios cocka -

  6. PyUToIwsQDJBe6OD
    PyUToIwsQDJBe6OD
    33oCi1YwifwxZYRh
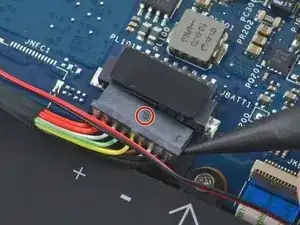
    • Ziehe den Akkukabelstecker zum Akku hin aus seinem Anschluss heraus.

    • Sollte der Stecker klemmen, dann drücke abwechselnd auf beiden Seiten, um ihn so aus dem Anschluss"herauswandern" zu lassen..

    • Nicht nach oben ziehen.

    • Wenn der Stecker nicht leicht aus dem Anschluss herauskommt, dann setze die Spudgerspitze in die Vertiefung am Stecker ein und drücke ihn vorsichtig heraus.

    • Öffne das Display und drücke fünf Sekunden den Einschaltknopf, um das System zu entladen.

    DO NOT OPEN THE DISPLAY!!! When I did, on my Dell XPS 13 9360, I cracked something in the top right corner where the power button is, and the plastic part of the button came out. I can still press it, but there is now a gap there and dust can get it.

    Asher Grossman -

    I opened they display, very carefull. No problem. Open just enough to press they button.

    Peter Hecht -

    Take care on later models. This is not a breakdown for the 9360, I learned that the hard way.

    Giacomo P -

    Agree with Asher Grossman, open at your peril!

    James White -

    First put the bottom cover back, with 4 screws, one at each corner. Then you can safely open the display and press the button. Then close the display and take the bottom cover off again.

    Patrick Bower -

    I did not do the open display and drain the battery because I did not understand this part and I know my battery was essentially dead, hence why I ordered one. Did everything else and voila! Works perfectly!

    Terri DiChito -

    Opening the display worked fine for me, but when I closed it again, something definitely didn’t quite go right – I think it was trying to push against the missing back cover. I managed to carefully close the display by pushing against the metal corner thingy that was meant to push against the cover, and so far the laptop still seems to work, but I concur with Asher and James, be careful at least. Patrick’s suggestion sounds great if I’d seen it in time :)

    Lucas Werkmeister -

    Ich konnte den Stecker schliesslich mit Hilfe einer Plektren sehr gut entfernen. Das Display habe ich nicht geöffnet.

    Ursulina Kölbener -

    Much better to ensure the old battery is fully depleted (unplug from mains & switch on & let it expire) before you begin replacement.

    This allows you to leave the unit face down whilst you work on replacing the battery.

    duncan cresswell -

  7. NovoO4uUZ4YeQTrI
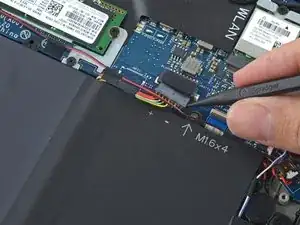
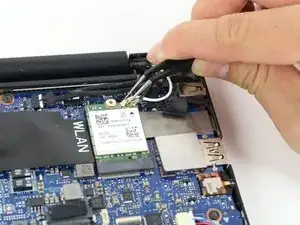
    • Heble die Stecker am schwarzen und am weißen Antennenkabel gerade nach oben und löse sie von der WLAN Karte ab.

    • Heble vorsichtig unten am metallenen Teil der Stecker.

    • Achte beim Zusammenbau darauf, dass das weiße Kabel am Sockel mit der weißen Dreiecksmarkierung angeschlossen ist, das schwarze am schwarz markierten.

    • Um die Kabel anzuschließen, musst du zuerst den Stecker im Anschluss ausrichten und dann fest nach unten drücken.

    Be very careful about how you “pry” these antenna connectors off or you may pry off the entire socket from the PCB! They should rotate freely in their socket which should help with removal.

    edwardsgreg -

    If the replacement Wifi card‘s Main is a black triangle and Aux is a white triangle, should my antenna connectors still follow the triangles (black cable to Aux, white to Main)? Or follow the wording instead (black cable to Main, white to Aux)?

    Randal -

    My replacement card WISE TIGER AX210NGW had Aux white on right and Main black on left, i.e. the opposite of my original card. I crossed the wires over, and connected black to black and white to white and it works!

    Patrick Bower -

  8. Okmnlj6rbaBORHrR
    Okmnlj6rbaBORHrR
    d1WDyIOmduQJEdyB
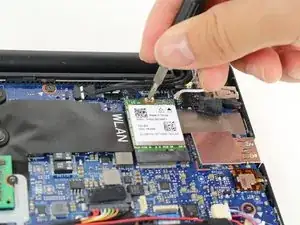
    • Entferne die 3 mm Kreuzschlitzschraube #0, welche die WLAN Karte befestigt.

    • Wenn die Schraube entfernt ist, wird die WLAN Karte unter einem Winkel von 45° aufklappen.

  9. GLj3ZOB1NXhcXvLg
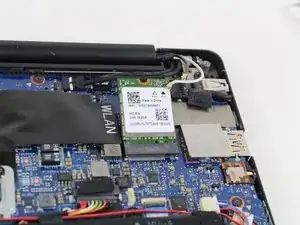
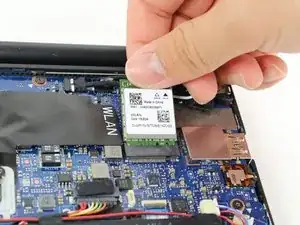
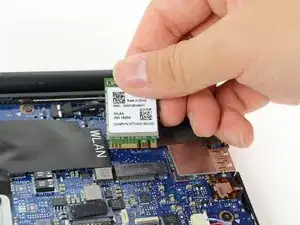
    • Ziehe die WIFi Karte gerade aus ihrem Anschluss heraus.

Abschluss

Um dein Gerät wieder zusammenzusetzen, folge den Schritten in umgekehrter Reihenfolge.

Jay

Mitglied seit: 16/05/17

261 Reputation

Ein Kommentar

Thanks for the instructions on swapping out the WiFi module/chip, it looked pretty straightforward from what I could tell when I had the machine open, I just have a simple question for you.

I recently purchased an Intel Dual Band Wireless -AC 8265 Desktop Kit and I do NOT plan on using the external antenna, or mounting bracket that came with it, ONLY the chip in place of the one on the laptop.

So I wanted to know would the chip in that kit be useable in my Dell XPS 13 9343 model laptop? Everything looks to be about the same with this chip and the actual laptop model [except that the laptop one doesn’t come with the external antenna], so if I can use it that would save me shipping it back and then ordering again.

Thanks
Bob Marotta -