Einleitung

Follow this guide to replace the back cover on your Dell XPS 13 9305. This is necessary to perform nearly every repair for this device. Luckily, the back cover removes fairly easily.

  1. TpIA2FFg24uBChBn
    TpIA2FFg24uBChBn
    a1R1dETf4GDWHuua
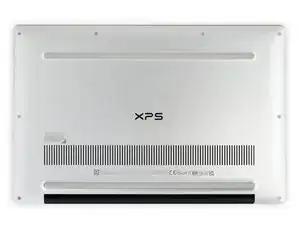
    • For your safety, discharge the battery below 25% and power down your device before disassembly.

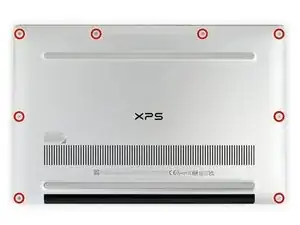
    • Use a Torx T5 screwdriver to remove the eight 3.2 mm-long screws.

  2. PUQ6NCHjVWcFWYLC
    PUQ6NCHjVWcFWYLC
    5Q3yfSPhtWHWLiQe
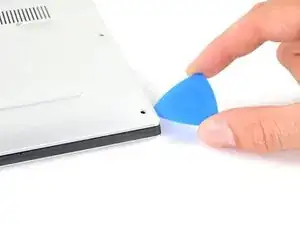
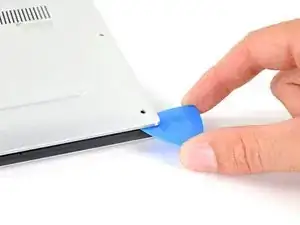
    • At each corner, insert an opening pick between the back cover and the device body.

    • Pry upward to release the retaining clips. Listen for a loud click when each clip releases.

  3. rP6Tf2fvQSFLebHf
    rP6Tf2fvQSFLebHf
    IjcasfkFPqndIuuO
    1LWANk6PCDOLJwpi
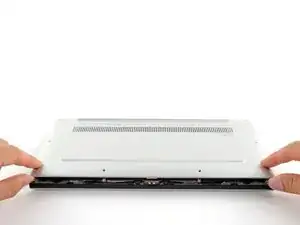
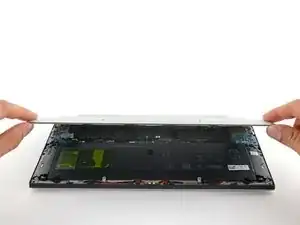
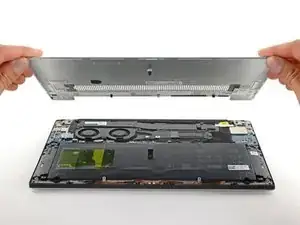
    • The edges of the cover are very sharp. Use caution when handling this panel.

    • Lift the front edge of the cover away from you.

    • Some clips may release during this step. If the cover is stuck, move it side to side to help release additional clips.

    • Remove the back cover from the laptop.

Abschluss

To reassemble your device, follow these instructions in reverse order.

Take your e-waste to an R2 or e-Stewards certified recycler.

Repair didn’t go as planned? Try some basic troubleshooting, or ask our Dell XPS answers community for help.
Clay Eickemeyer

Mitglied seit: 19/09/22

23447 Reputation

0 Kommentare