Einleitung
This guide shows how to remove and replace the battery for the Dell XPS 13 9333.
For your safety, discharge your battery below 25% before disassembling your device. This reduces the risk of a dangerous thermal event if the battery is accidentally damaged during the repair. If your battery is swollen, take appropriate precautions.
Werkzeuge
Ersatzteile
-
-
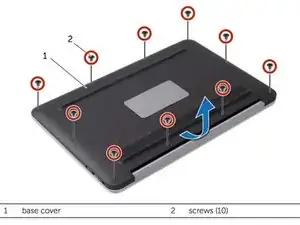
Using a Torx T5 screwdriver, remove the ten screws that secure the base cover to the palm-rest assembly.
-
Starting from the back of the computer, pry up the base cover using your fingertips. Then lift the base cover off the palm-rest assembly.
-
-
-
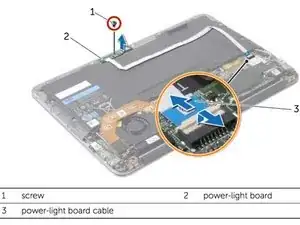
Remove the screw that secures the power-light board to the palm-rest assembly.
-
Unlock the motherboard's power-light socket by lifting the locking latch.
-
Carefully pull the power-light cable's blue tab to slide the cable out of its motherboard socket.
-
Lift and remove the power-light board and cable.
-
-
-
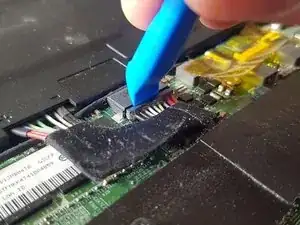
Carefully pull the battery connector away from the battery to disconnect it from the motherboard. You may find it helpful to insert an iFixit Opening Tool to gently separate the connector from the housing.
-
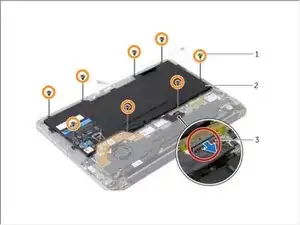
Use a Phillips screwdriver to remove the eight screws securing the battery.
-
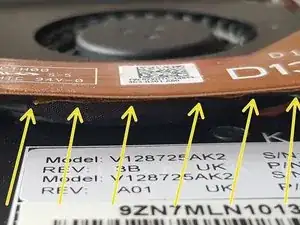
Release the tape underneath the U-shaped hard ribbon connector. There is no need to remove the U-shaped band completely, gently lift the section overhanging the battery and pull back the corners of the tape from the top of the battery upwards. You can use long/fine tweezers to lift the tape completely free of the battery, working from each end.
-
Lift the battery off the palm-rest assembly.
-
To reassemble your device, follow these instructions in reverse order.
Take your e-waste to an R2 or e-Stewards certified recycler.
Repair didn’t go as planned? Try some basic troubleshooting, or ask our Answers community for help.
