Einleitung
This guide shows how to remove and replace the battery for the Dell XPS 13 9365 2-in-1 laptop. Always remove your laptop battery first before doing any work inside your laptop, and follow appropriate safety precautions.
For your safety, discharge your battery as much as possible before disassembling your device. This can be done by disconnecting the AC adapter and allowing the battery to drain. Draining the battery reduces the risk of a dangerous thermal event if the battery is accidentally damaged during the repair. If your battery is swollen, take appropriate precautions.
Werkzeuge
Ersatzteile
-
-
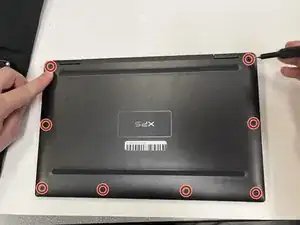
Use a Torx T4 screwdriver to remove the eight screws (M2x3) that secure the base cover to the palm-rest assembly.
-
-
-
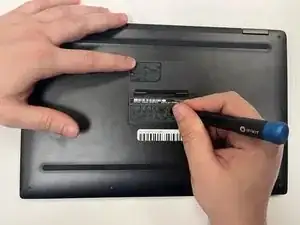
Use your fingertips to lift the system badge open and reveal the single case screw.
-
Use a Phillips #000 screwdriver to remove the screw (M1.6x4) that secures the base cover to the palm-rest assembly.
-
-
-
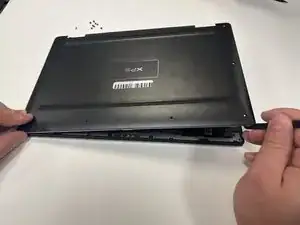
Starting from the front corner of the computer, pry up the base cover using a spudger and lift the base cover off the palm-rest assembly.
-
-
-
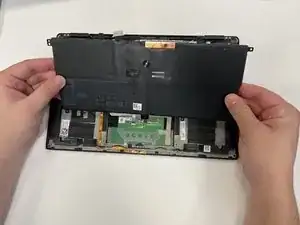
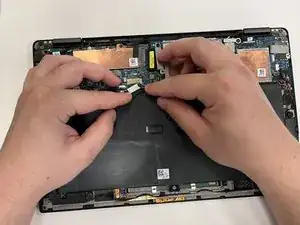
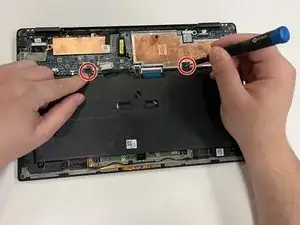
Use a Phillips #000 screwdriver to remove the two screws (M1.6x4) that secure the battery to the palm-rest assembly.
-
-
-
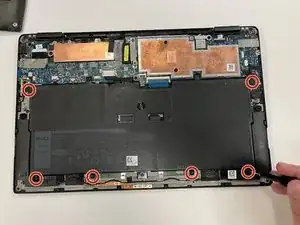
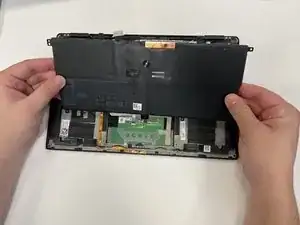
Use a Phillips #000 screwdriver to remove the six screws (M2x3) that secure the battery to the palm-rest assembly.
-
To reassemble your device, follow these instructions in reverse order.
Take your e-waste to an R2 or e-Stewards certified recycler.
Repair didn’t go as planned? Try some basic troubleshooting, or ask our Answers community for help.
Keeps track of the screws is vital. Put screws together put in seperate piles for each level. You want to be able to put the same screw back in the same place, and the screws are small so easy to mess up.
Alexander Wolf -