Einleitung

Use this guide to remove the back panel of the camera.

  1. kZcTd2qwCBv4uPMa
    kZcTd2qwCBv4uPMa
    KIG2Lguv3MgKVUsR
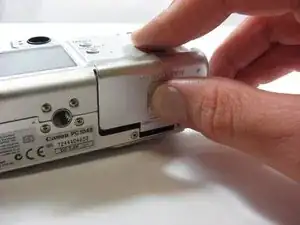
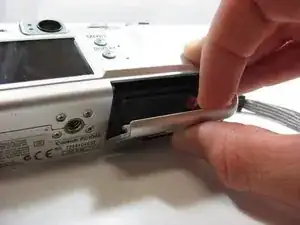
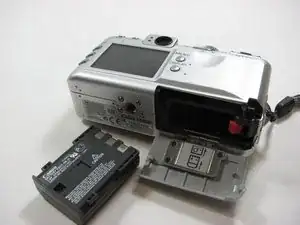
    • Place camera LCD side up and press up on the battery door.

    • Let it swing open until you can see the battery inside.

  2. LvSKpbTyjrap6MxR
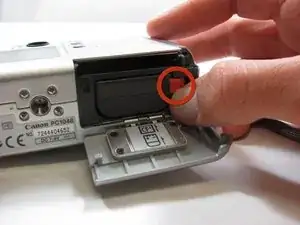
    • Press down on the orange plastic.

    • This will gently eject the battery from its compartment.

  3. LOrnOEErk5pgDMyM
    LOrnOEErk5pgDMyM
    TRHuGEHDx5f2sRsg
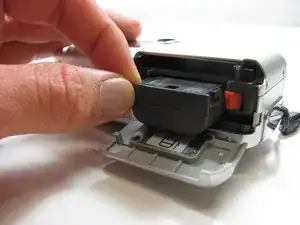
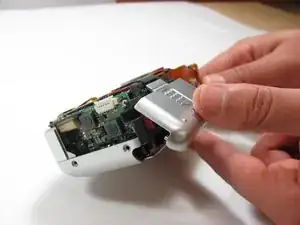
    • Holding the edges, slide out the battery.

  4. EUrNU1GdHJq1Mraq
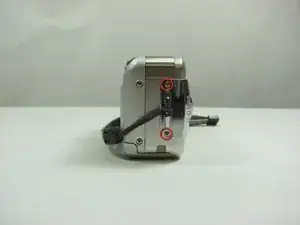
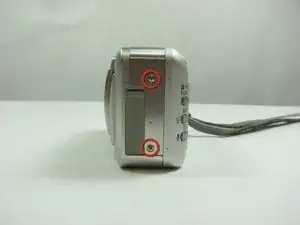
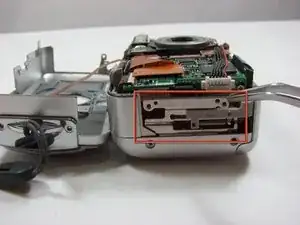
    • Look at the camera from the side with the lanyard and 4 screws.

    • Remove the two 3.4 mm screws on the metallic colored part.

  5. pLcfAtxQMKyFhKHU
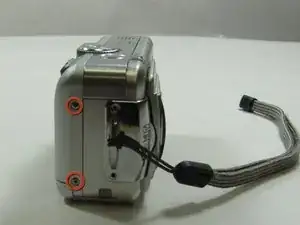
    • Remove the 3mm screw on the top left.

    • NOTE: When reassembling, it is helpful to put the top screw back in before placing the front cover back on the camera.

    • Now remove the 5.3mm screw on the bottom.

  6. BbFuXliuyWW3Zkvn
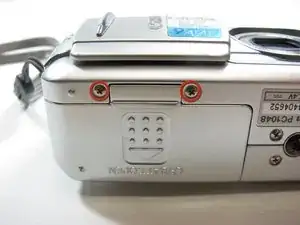
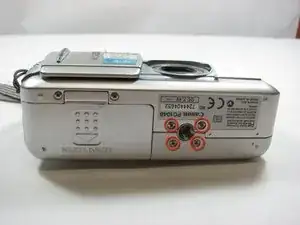
    • Place the camera LCD side down.

    • Remove the two 5.3mm screws by the battery door.

  7. 6xccUTkl1BHbDwin
    • Remove the four 3.4mm screws on the bottom of the camera around the tripod mount.

    • Make sure to keep these screws separate from the previous 5.3 mm screws.

  8. 5deMqk4XUCV1YxLK
    • Stand the camera back up.

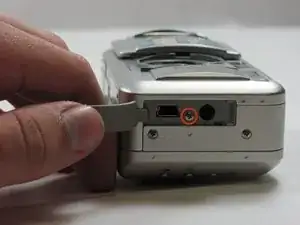
    • Remove the two 3.6mm screws on the side with the A/V Out port.

  9. VZJEOIRqkYhQq1FE
    • Lift open the rubber flap covering the A/V Out port.

    • Remove the 3.4mm screw in the center.

    • During reassembly, put the A/V out rubber door on before replacing the front panel of the camera

  10. EKmMh4UPW1YXY5HO
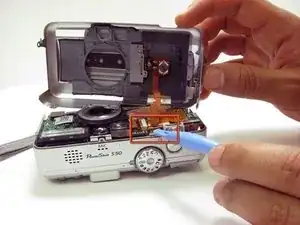
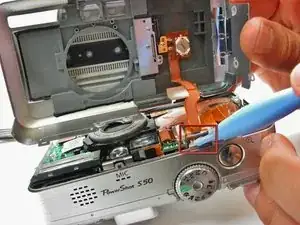
    • Use a spudger and gently open up the front panel of the camera.

    • A thin plastic ribbon will stay connected by a brown piece to front panel of the camera.

  11. Y66y6oaAACpaw6uf
    • There will be a brown plastic piece keeping the thin plastic ribbon in place.

    • Use the spudger to pull out the brown plastic piece attached to the orange plastic.

  12. EOuJFCAwSWbdkkBt
    • Use a pair of tweezers and remove the metal piece inside the camera.

  13. Ni2aCupMFN1XMM3T
    • Remove the battery door

    • NOTE: Putting this back on requires aligning the spring on the back of the door with the hole on the camera

  14. oWHIG2wBhPdVJDqR
    • Using a spudger, gently separate the back panel from the rest of the camera and remove it.

Abschluss

To reassemble your device, follow these instructions in reverse order.
Karim

Mitglied seit: 12/04/12

24 Reputation

0 Kommentare