Einleitung
If bearings are worn or if fan is damaged, the replacement of the entire bearing assembly is required. After opening the case, the bearing assembly can be lifted out by hand.
Ersatzteile
-
-
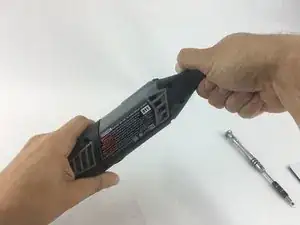
Start by removing the housing cap by unscrewing it.
-
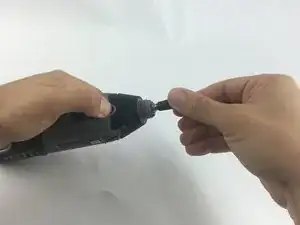
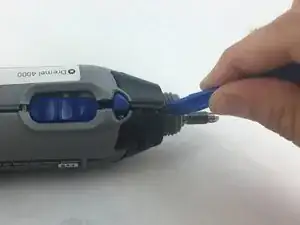
Next, unscrew the now exposed collet nut while holding down the shaft lock button.
-
-
-
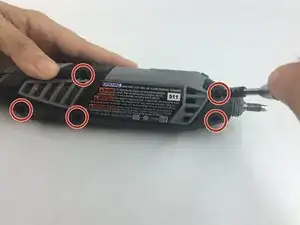
Using the Torx 15 screwdriver tip, remove the 5 screws (12.5 mm) that hold the casing together.
-
-
-
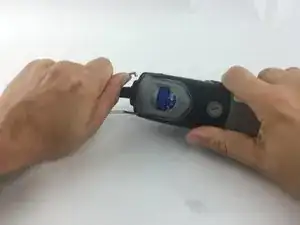
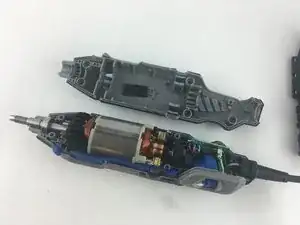
Use your hands to carefully remove the back casing so that none of the components fall out.
-
-
-
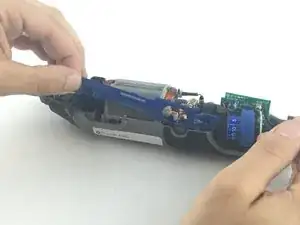
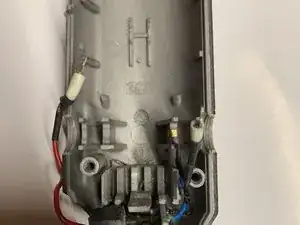
To clear access to the electrical assembly, remove the variable speed dial cap and blue power lever, and set them aside.
-
-
-
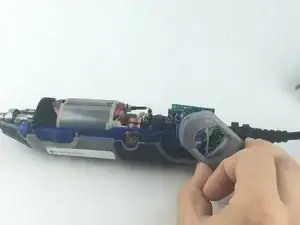
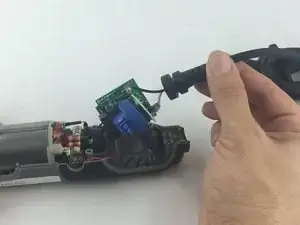
Using your fingers, carefully pull the circuit board from the casing. This will make it easier to remove the power cord.
-
-
-
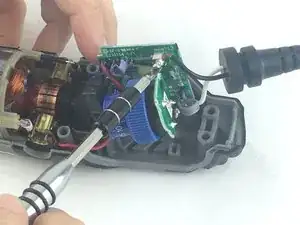
Each wire is fed through a small opening on the circuit board and held with a flat head screw.
-
Loosen the screw just enough to remove the wire by gently pulling it with your hand.
-
-
-
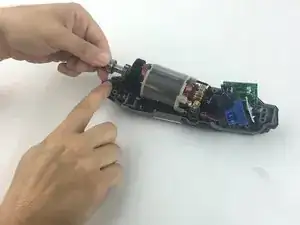
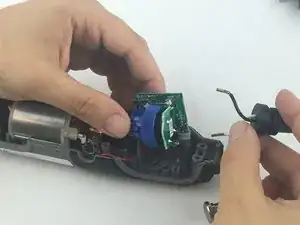
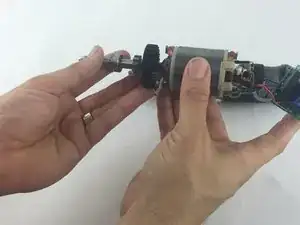
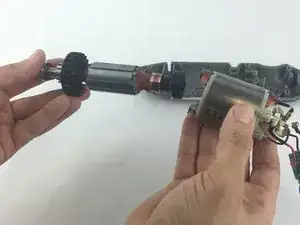
Firmly hold the field assembly in one hand and the bearing assembly in the other.
-
Carefully slide the bearing assemble out of the field assembly.
-


To reassemble your device, follow these instructions in reverse order.
2 Kommentare
Nice guide. FYI, I've found that removing the rotor/bearing assembly is just as easy without removing the input power wires.
Absolutely, it is.
Is this a joke??? Wanna maybe possibly tell US WHAT A COLLET NUT LOOKS LIKE?? I mean it's obviously very exposed (not exposed one bit. My Dremel 4000 looks exactly like it did before. No Collet nut suddenly stood out) and not all of us have advanced degrees in Dremel parts
Jeff Wagner -
Dam Jeff. I am not sure if you are being sarcastic or not, but maybe you should go lie down for while.
itguyfla -