Einleitung

This guide will show you how to replace the trigger in a Dyson V11 Torque Drive vacuum cleaner. Since the trigger is made of plastic is it easily breakable. If the trigger on your Dyson V11 Torque Drive is broken then it will not start vacuuming. Even if the battery is fully charged, the Dyson V11 Torque Drive will not start vacuuming. Once you replace the trigger the Dyson V11 Torque Drive vacuum should be operational agin and it will start vacuuming.

Tools you will need to replace the trigger on the Dyson V11 Torque Drive vacuum are a Phillips #1 screw driver, Phillips #0 screw driver, and a spudger.

  1. GjFY5tOxoEhJfYwb
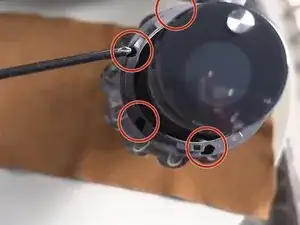
    • Remove the four screws beside the battery indicator with a Phillips #1 screwdriver.

    YOU MUST REMOVE THE BATTERY FIRST!! It is not apparent in this guide, but I almost got electrocuted when I went to remove the power in step 6!

    Ran Xiao -

    done the same once, but yeah always remove the power source before working on any appliance

    Ray Bradshaw (Falconsirrus) -

  2. qOT6w4tUI2WGhuKy
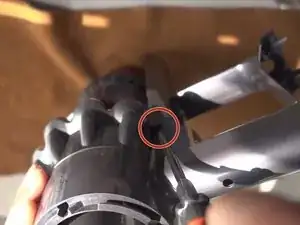
    • Remove two screws next to the handle using a Phillips #1 screwdriver.

  3. WHZi2pCJvJm5nDuo
    • Separate the handle and the front end of the vacuum cleaner.

  4. DafmKoDds5lXIsvC
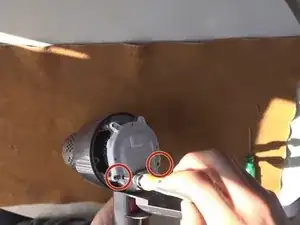
    • Remove two screws from the protective case covering the circuit board using a Phillips #0 screwdriver.

    These screws were Torx #7 instead on my Dyson V11

    Lenno -

    Same for me.

    Beth Romanelli -

    its a T8 on all of the Dysons V10 and V11 at this stage

    Ray Bradshaw (Falconsirrus) -

  5. UctQyjDigS4DwF5V
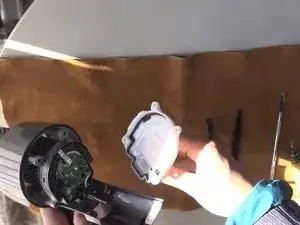
    • Take the plastic protective case off.

    You need to pop the connector through the white cover to enable its removal.

    Chuck -

    unnecessary in my experience, just move out the way, unclip the tiny wire and remove the 2 power lines

    Ray Bradshaw (Falconsirrus) -

  6. dsrtsI4ehtFSQvGM
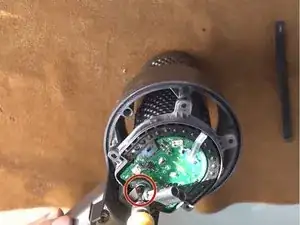
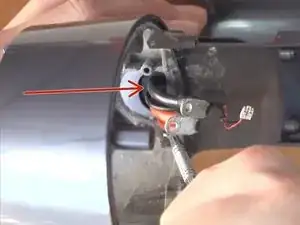
    • Remove the single screw from the motherboard using a Phillips #1 screwdriver.

    These screws were Torx #7 instead on my Dyson V11 and bth need to be removed and the pins plied back.

    Lenno -

    There are two screws (torx) here connecting both terminals to the motherboard. Also the pins need to be bent back to slow them to pull through. There was also a black wire that had to be disconnected.

    Chuck -

    your spot on there. like most metals bending more than necessary will snap them so be careful.

    Ray Bradshaw (Falconsirrus) -

  7. yDa552GTij2diQRU
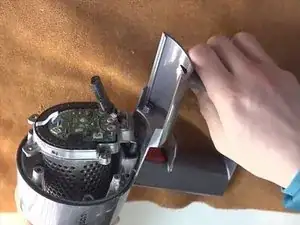
    • Remove the center part from the outer shell.

  8. qGlZBjLMHsNtECQQ
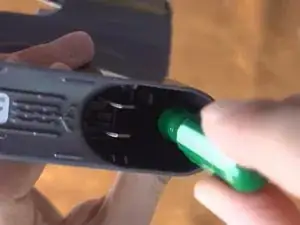
    • Remove the single screw inside the charging compartment with a Phillips #0 screwdriver.

    This screw was Torx #7 instead on my Dyson V11

    Lenno -

    What if the housing on that screw is broken? Is it necessary for that screw to be in place?

    BK Estis -

    No, the point of this screw is to fix the trigger assy inside the handle, technically when you refit the battery and screw in, it will all hold in place

    Ray Bradshaw (Falconsirrus) -

  9. 3pSvuZNberXpZuvj
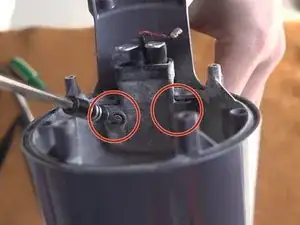
    • Remove two screws with a Phillips #0 screwdriver.

    These screws were Torx #7 instead on my Dyson V11 and you need a very short screwdriver/ratchet or a flexible bit attachment.

    Lenno -

    T8 - i use a 100mm long shaft, it is at a bit of an angle but works fine

    Ray Bradshaw (Falconsirrus) -

  10. DCVOUUxZ4JPvFIUS
    DCVOUUxZ4JPvFIUS
    no1SLBFrge4cJEMD
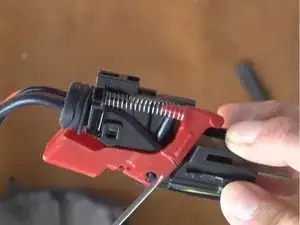
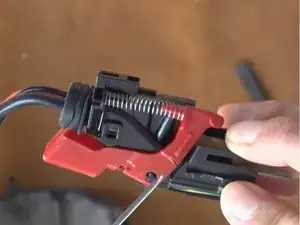
    • Use a spudger to push the part marked in the image to remove the trigger from the charging compartment.

    pushing the trigger assy down tho the handle, well large screwdriver and small hammer works well, lol

    Ray Bradshaw (Falconsirrus) -

Abschluss

To reassemble your device, follow these instructions in reverse order.

Beicheng Zhu

Mitglied seit: 15/01/22

237 Reputation

2 Kommentare

Some of the screws in this repair (step 8 and 9) require a T8 Torx bit instead of a Phillips. The Torx screwdriver should be at least 10 cm long and relatively thin to be able to fit into the base of the vacuum. The screwdriver I used from my iFixit essentials kit was too short and too wide to fit into the compartment. That should be added to the guide.

James Leung -

L'assemblage de cet appareil le rend assez compliqué à démonter... surtout la partie avec les câbles de puissance qui vont à la batterie.

Par expérience, en ce qui concerne la gâchette c'est faisable. La gâchette peut se trouver facilement sur internet, ça permet de réparer à pas cher et souvent certaines pièces génériques sont renforcées.

Brendan -