Einleitung

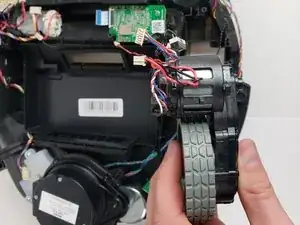
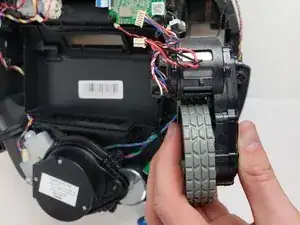
Wenn ein Rad im Deebot schwergängig geworden ist, kann er sich nicht mehr richtig bewegen. Diese Anleitung zeigt, wie du ein Rad im Deebot austauschen kannst.

  1. VHK2cONFvHuigp3j
    • Entferne alle Bürsten vom Deebot.

  2. ZoLK3UZkhrKpFVgt
    • Drehe die beiden 12,25 mm Kreuzschlitzschrauben am Akkufachdeckel heraus.

  3. K2VZcVAmgKmvvij3
    • Entferne den Akkufachdeckel.

    Anyone know where I can buy the battery for the Deebot 900. Evovacs is saying they won’t/dont sell them.

    Mike -

  4. S6j5WVJvdw3KwRYR
    • Ziehe den Akku behutsam an den beiden seitlichen weißen Laschen heraus

    • Achte darauf, dass das Akkukabel nicht abreißt.

  5. wqInpF4eQPGaQJHN
    • Ziehe den Akkustecker unten im Akkufach vorsichtig aus seinem Anschluss heraus.

    I have two issues with these instructions.

    Title is Ecovacs Deebot 900 Battery Replacement. The battery was never replaced the device was reassembled.

    For battery replacement you need a battery it would be nice to have the replacement battery part number as well.

    Rick Sargent -

    I’d like some more info on part numbers, too. I have a Deebot 901 with a battery that, already after 2 years, has deteriorated significantly. Deebot 901 is also called “DE5G.10” in Europe, and it’s existing Battery back has model number ZJ1517-HFR, on which I can find almost no info, let a lone a compatible part somewhere in The Netherlands.

    eymert -

  6. cVHXroOd2QmmmIEx
    cVHXroOd2QmmmIEx
    jQQCtdUFVFH2RmuG
    • Entferne die acht Kreuzschlitzschrauben #00 von der Unterkante des vorderen Stoßprofils.

  7. H5AgGyvq6XChQPRe
    • Entferne den schwarzen Streifen von der Unterseite des Stoßprofils.

  8. SGHYMJJexfLtrLKY
    SGHYMJJexfLtrLKY
    yoOpbKOnP3As2264
    • Hebe das Stoßprofil vorsichtig hoch, bis es sich ablöst.

  9. UADkZUE2gmBgncyG
    UADkZUE2gmBgncyG
    vMeA13dOwNNT1xUY
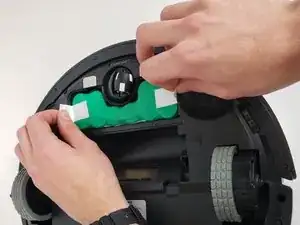
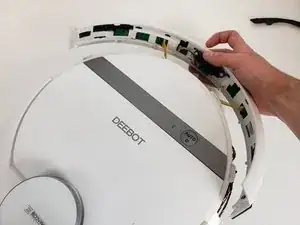
    • Trenne die beiden Kabel ab, mit denen das Stoßprofil am Deebot angeschlossen ist.

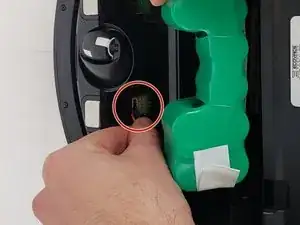
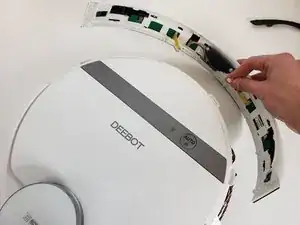
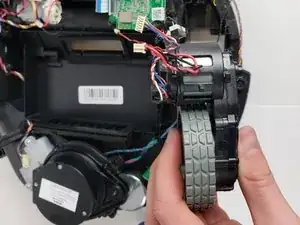
    • Entferne das vordere Stoßprofil vom Gerät.

  10. sSRjWadmhwVKaPMQ
    sSRjWadmhwVKaPMQ
    UKy3duFTkfKPFL6X
    • Drehe die sechs Kreuzschlitzschrauben #00 am Rand des Gehäusebodens heraus.

  11. xSlyamjTv56DOfZe
    xSlyamjTv56DOfZe
    dREJOmWpALY52D5N
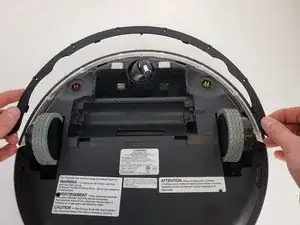
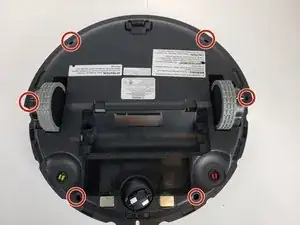
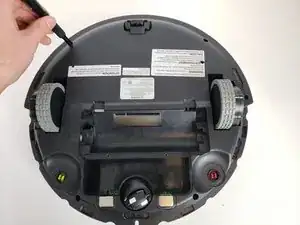
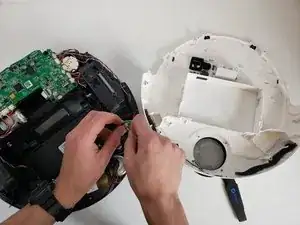
    • Setze einen Jimmy in die Naht ein und führe ihn rund um das Gehäuse herum.

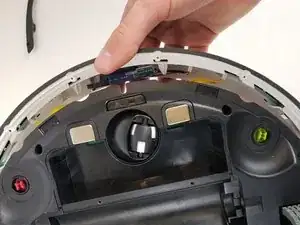
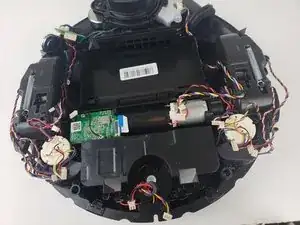
    • Löse die beiden Kabel ab und entferne den Gehäuseboden vom Gerät.

    Thank you for your work on this guide!

    Dominick Borrego -

    Im not able to remove the bottom case. I have a Deebot 711

    rocksmum -

  12. wkWqUqVuINPJlyPk
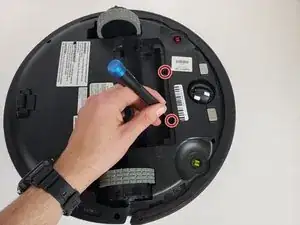
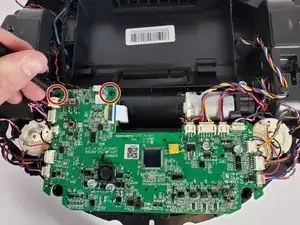
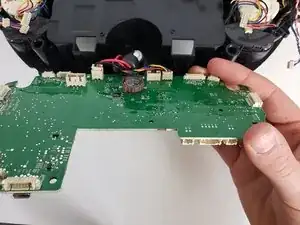
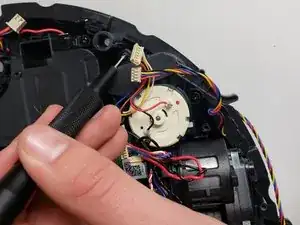
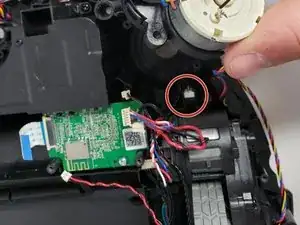
    • Drehe die beiden schwarzen Kreuzschlitzschrauben #00 heraus, mit denen die Hauptplatine befestigt ist.

  13. vXwsFxyNVRpJ3Y6n
    • Trenne vorsichtig die Flachbandkabel oben an der Hauptplatine ab.

    • Merke dir, welches Kabel wohin gehört.

  14. sCZlvqUXlrtxUc4k
    • Löse die letzten drei Flachbandkabel von der Unterseite der Hauptplatine ab.

  15. 6CptTrLbYbsD4TjI
    • Hebe die Hauptplatine hoch und entferne sie vom Deebot.

  16. gbC6v5aKiN2WLRIg
    • Hebe die Feder an, ziehe sie an einer Seite ab und entferne sie.

  17. PvsZwblWNGRhMGcF
    PvsZwblWNGRhMGcF
    xqDtIvphJU5er4bd
    • Drehe die vier Kreuzschlitzschrauben #00 heraus, mit denen die Radeinheit befestigt ist.

  18. okXWBKjlq6ZyKCHd
    • Entferne die Abdeckung über dem Rad.

  19. QowBxWsErstVCCW2
    QowBxWsErstVCCW2
    Ki34V6EmhuNqPHos
    pDOqUDXqrmVyFcQm
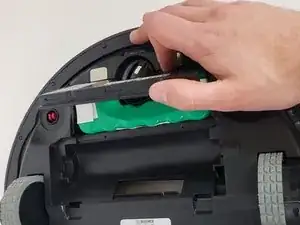
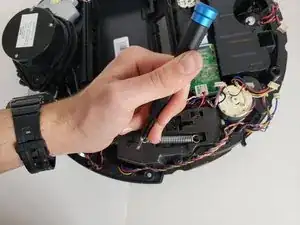
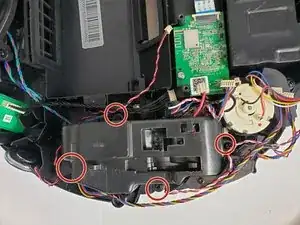
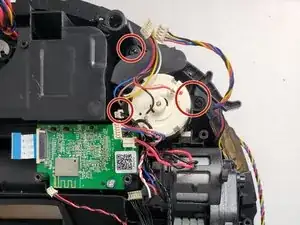
    • Entferne die drei Kreuzschlitzschrauben #00, mit denen der Motor für die seitlichen Bürste befestigt ist. Hebe den Motor nach oben.

  20. roPfvaHNcOgjMauo
    roPfvaHNcOgjMauo
    AtWVUWTUg2eWqIXV
    • Hebe die Radeinheit zusammen mit dem Sensor (schwarzes Kabel) hoch und entferne sie.

Abschluss

Um dein Gerät wieder zusammenbauen, folge den Schritten in umgekehrter Reihenfolge.

Christina Corliss

Mitglied seit: 16/01/20

664 Reputation

6 Kommentare

Thanks, it helps a lot

Agoston David -

I have an OZMO 930 that the left driver wheel is stuck. I tried to follow the above instruction, but I can’t go beyond step 10, I can’t take out the cover. Any help will be greatly appreciated,

OldManInChicago -

do you have place to buy ecovac_deebot_900_54_gear ?? I thinking on printing it but after my printed gear to papper shreder I have no hopes it will last.

Plewu Gracz -

Thanks for the guide on the Deebot 900 wheel replacement. Though it has partially helps to resolve the problems, but unable to find a wheel replacement. Hope you can help too.

wong CS -

The rubber tires on my Deebot have worn through. Does anybody have a source for rubber tire replacement? The company wants to sell me two entire wheel assemblies. I find that unreasonable.

akobelan -

To every one that got broken motor gears. You can buy them on ali or ebay. Fix is easy and done even as unprofessional as me. You can also print them if you have god material. I've found 3d printing model for this if someone need it- mail/ pm me.

Plewu Gracz -