Einleitung
Es ist sehr schwer, diese Tastatur zu zerlegen, da es im Inneren nur eine Schraube gibt, die, die das Logic Board befestigt.
Alles andere ist geklebt und zugeschweißt.
Aber es gibt einen Weg, die Tastatur auseinanderzubauen, zu reparieren und wieder zusammenzubauen, ohne dass außen sichtbare Spuren bleiben.
Werkzeuge
-
-
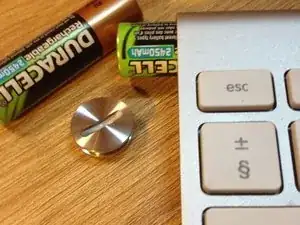
Beginne damit, die Abdeckung des Batteriefachs auf der linken Seite der Tastatur abzuschrauben und entferne die zwei AA Batterien.
-
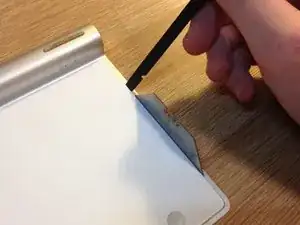
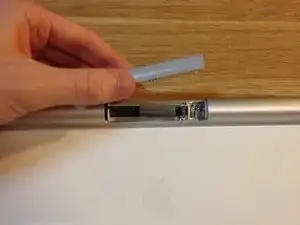
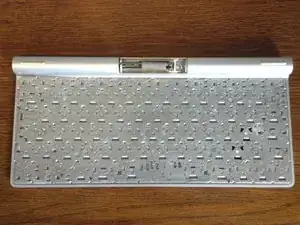
Drehe die Tastatur dann um und suche die graue Plastikabdeckung am Rand. Drücke fest in Richtung Innenseite der Tastatur auf die Abdeckung und hebe sie von der Tastatur ab.
-
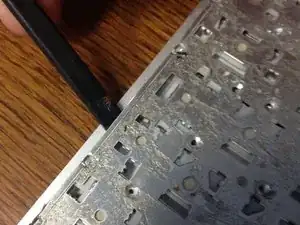
Die Abdeckung wird von sechs Clips gehalten. Wahrscheinlich wirst du ein Kunststoffplektrum benötigen, damit du sie abbekommst.
-
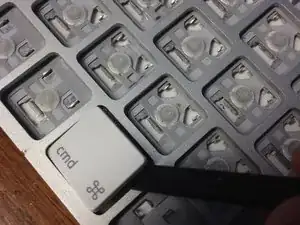
Außerdem musst du die Tasten entfernen. Jede einzelne. Und deren Clips. Nimm dir Zeit und ziehe nicht an den Tasten. Nutze dein Hebelwerkzeug, um die Tasten von den Clips zu lösen.
-
-
-
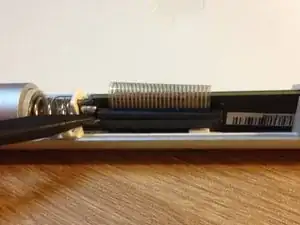
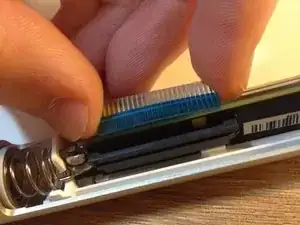
Benutze ein Hebelwerkzeug oder deine Fingernägel und hebe vorsichtig die Sicherheitsverriegelung an, um das Flachbandkabel aus seinem Stecker auf dem Logic Board zu trennen.
-
Das Flachbandkabel ist sehr empfindlich. Spürst du Widerstand beim Herausziehen des Kabels, höre auf und stelle sicher, dass die Sicherheitsverriegelung richtig geöffnet ist. Ziehe auf keinen Fall seitwärts oder diagonal, das Kabel könnte sonst reißen!
-
Lokalisiere jetzt die einzige Schraube in dieser Tastatur. Behandle die Schraube mit größtem Respekt, schraube sie vorsichtig heraus und lege sie beiseite. Genieße den Moment, später wirst du dir wünschen, es gäbe mehr von ihnen.
-
-
-
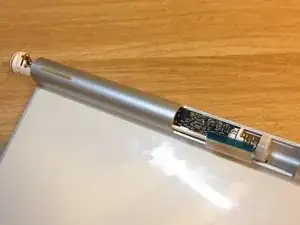
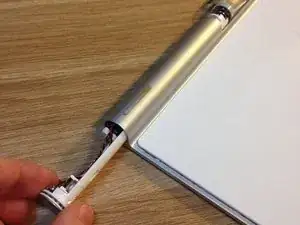
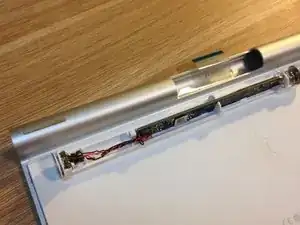
Drehe die Baugruppe des Logic Boards vorsichtig gegen den Uhrzeigersinn (vom Power-Button gesehen) bis die Platine 90° von ihrer Ausgangsposition entfernt ist.
-
Schiebe die Baugruppe durch das Öffnung mit dem Power-Button heraus. Wenn es schwer geht, dann verdrehe die Platine mehr oder weniger, bis sie leicht herauskommt.
-
Achte darauf, dass das empfindliche Flachbandkabel beim Herausschieben nicht im Weg ist, damit es nicht versehentlich beschädigt wird.
-
-
-
Wenn du unsicher bist, ist jetzt die letzte Möglichkeit aufzuhören. Die weiteren Schritte lassen sich nicht leicht rückgängig machen.
-
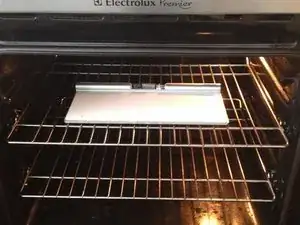
Heize den Backofen auf 100° bis 150° vor - nicht um die Tastatur goldbraun zu backen, sondern um den Kleber aufzuweichen. Lasse die Tastatur höchstens fünf Minuten lang im Ofen und hole sie dann heraus - Achtung: sie ist heiß!
-
-
-
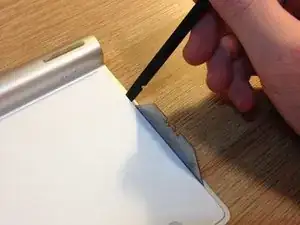
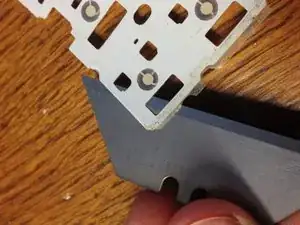
Arbeite bei diesem Schritt langsam und sorgfältig. Hebe mit einem Hebelwerkzeug die Bodenplatte behutsam an einer Seite hoch. Wegen der engen Toleranzen musst du am Anfang eventuell eine Rasierklinge benutzen.
-
Anschließend kannst du die Bodenplatte ganz aus der nun weichen Klebeverbindung lösen. Versuche nicht, sie zu biegen oder an ihr zu ziehen, sie besteht aus sehr dünnem ABS und verformt sich leicht.
-
-
-
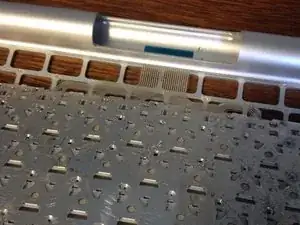
Wir wissen ja alle, dass Apple von Klebstoff begeistert ist, aber jetzt hast du es mit Schweißpunkten zu tun! Unter der Bodenplatte befindet sich eine mit Kleber bedeckte Aluminiumplatte, die mit nicht weniger als 100 Schweißpunkten am Aluminiumrahmen befestigt ist.
-
Jetzt kommt deine Bohrmaschine ins Spiel. Bohre jede einzelne Schweißstelle auf, achte aber darauf, nicht zu tief zu bohren und die von außen sichtbaren Kanten zu beschädigen.
-
Die Bohrlöcher sollten höchstens so tief sein, dass nur die schräge Spitze sichtbar ist, also so tief, wie man für Absenkungen anbohrt.
-
-
-
Kontrolliere nochmals, ob du wirklich alle Schweißpunkte ausgebohrt hast, fange dann an, die Kanten der Platte abzuhebeln. Sie ist sehr dünn und du wirst sie kaum abhebeln können, ohne sie leicht zu verbiegen. Keine Sorge, das kann später repariert werden.
-
Wenn du auf eine Schweißstelle stößt, die noch nicht gelöst ist, dann halte an und bohre nochmals nach. Arbeite wieder langsam und sorgfältig, verbiege die Platte nicht zu sehr.
-
-
-
Jetzt sind wir endlich drin!
-
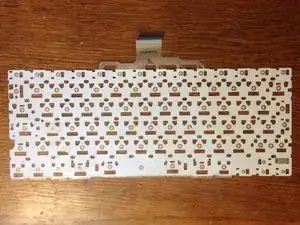
Nachdem du endlich die Metallplatte angenommen hast, wird die zu reparierende Membran sichtbar.
-
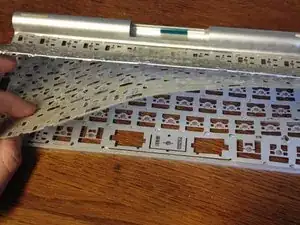
Das Flachbandkabel von vorhin ist ein Teil von ihr. Es muss durch den schmalen Schlitz durchgefädelt werden, bevor sich die Membran entfernen lässt. Die Membran ist eventuell ein wenig angeklebt, in diesem Fall musst du sie vorsichtig in einem flachen Winkel zum Ablösen nach oben ziehen.
-
Unter der Membran befindet sich eine Folie mit beweglichen Kuppeln, die dazu dienen, die Pads auf der Membran zusammenzudrücken. Dieses Blatt kann an Ort und Stelle bleiben, da es für uns keine weitere Bedeutung hat.
-
-
-
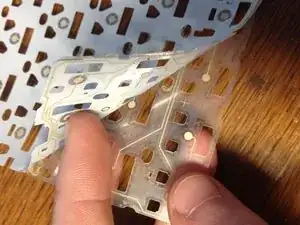
Die Membran besteht aus zwei Lagen von Kunststoff, die - du errätst es nicht - zusammengeklebt sind. Sie lassen sich nur sehr schwer trennen und du musst sehr geduldig sein.
-
Fange an einer Ecke damit an, die Schichten mit einer dünnen Klinge voneinander zu trennen (am Besten an der Ecke in der Nähe der schadhaften Tasten) und ziehe die Schichten ganz langsam auseinander. Wahrscheinlich musst du sie nicht komplett voneinander lösen, nur soweit, bis die Stelle mit den schadhaften Tasten offen liegt.
-
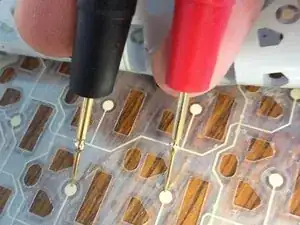
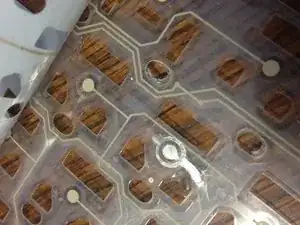
Auf den Innenseiten findest du ein unübersichtliches Durcheinander von weißen Linien und Punkten. Das sind die Leiterbahnen. Verfolge die Bahnen bis unter die Tasten, welche die Probleme machen.
-
Stelle dein Multimeter auf Durchgangstest und überprüfe, ob die Leiterbahnen zwischen den fraglichen Pads und seinen Nachbarn unterbrochen sind. Verfolge die Leiterbahnen und schaue nach, welche Pads miteinander in Kontakt sein sollten. Manche Stellen sind mit Kunststoff bedeckt, hier musst du drumherum arbeiten.
-
Versuche möglichst genau die unterbrochene Stelle zu finden und markiere sie ganz genau. Ein Buchzeiger zum Kleben (und wieder Ablösen) eignet sich sehr gut dafür.
-
-
-
Wenn du alle Unterbrechungen in den Leiterbahnen gefunden hast, dann nimm den Behälter mit Leitsilber und schüttle ihn kräftig, damit sich das Silber gut im Lösungsmittel verteilt.
-
Nimm einen sehr dünnen Pinsel oder einen Zahnstocher, tauche ihn in das Leitsilber ein und bessere die schadhafte(n) Stelle(n) in den Leiterbahnen mit einem dünnen Pinselstrich aus.
-
Lasse das Leitsilber mindestens 24 Stunden trocknen.
-
Wenn immer noch Lücken in deiner Farbschicht sind, dann trage eine weitere Schicht auf und lasse sie wieder 24 Stunden trocknen.
-
Überprüfe dann die Stellen mit dem Multimeter. Wenn du alles richtig gemacht hast, dürfen jetzt keine Unterbrechungen in den Leiterbahnen sein. Hol dir einen Drink und feiere dich! Der kniffligste Teil ist geschafft. Wenn es noch nicht funktioniert, musst du weiter mit dem Multimeter suchen und die betreffende(n) Stelle(n) ausbessern.
-
-
-
Es lohnt sich sehr, vor dem mühsamen Zusammenbau der Tastatur diese auf korrekte Funktion zu überprüfen.
-
Lege die Membran an ihren Platz zurück, wobei du auf die richtige Lage achten musst und fädle das Flachbandkabel durch die schmale Öffnung zur Abteilung des Logic Boards.
-
Folge den Schritten 3, 2 und 1 in umgekehrter Reihenfolge, um das Logic Board und die Akkus einzubauen. Die graue Kunstoffabdeckung brauchst du nicht anbringen.
-
Verbinde die Tastatur mit einem Mac-Computer und drücke von der Unterseite her behutsam auf jedes Pad, um so die Funktion jeder einzelnen Taste zu überprüfen.
-
Wenn du eine nicht funktionierende Taste findest, musst du wieder dein Multimeter nehmen und die Fehlerstelle finden. Denke dran, dass sie auf jeder Seite der Membran und für das Auge nicht sichtbar sein kann.
-
-
-
Wenn du mit der Funktion der Tastatur ganz zufrieden bist, dann schalte sie aus und bringe die dünne Metallplatte wieder an. Klebe sie mit Sekundenkleber wieder an den Schweißstellen fest und drücke sie nach unten. Drücke sehr fest, so dass keine Spalten entstehen.
-
Das Ganze dauert ziemlich lange, es lohnt sich aber, sehr sorgfältig zu arbeiten, da die Schweißstellen sehr wichtig waren. Sie verhindern, dass die ganze Tastatur herausspringt, wenn eine Taste gedrückt wird. Der Sekundenkleber reicht aus und hat noch den Vorteil, dass er sich leichter lösen lässt, wenn du die Tastatur nochmals öffnen musst.
-
Wenn der Kleber auf der Rückseite der Platte noch in Ordnung ist, sollte sich die weiße Platte wieder ankleben lassen, wenn nicht, musst du etwas Klebstoff verwenden.
-
Jetzt kannst du auch die graue Abdeckung und jede einzelne Taste wieder befestigen. Drücke sie dazu mit zwei Fingern fest, einer von oben, den anderen von unten. Dadurch wird der Kleber nicht abgelöst.
-
Das war's! Teste nochmals ausgiebig. Wenn alles gut geht, kannst du wieder damit arbeiten. Denke dran, dass die komplette Struktur beeinträchtigt ist. Wenn du mit den Fäusten auf die Tasten hämmerst, kann sich die Verklebung lösen.
-
Um dein Gerät wieder zusammenzubauen, folge den Schritten in umgekehrter Reihenfolge.
25 Kommentare
What was the total time to do this repair? I did the original tear down but didn't think this was even possible. Congratulations on your resolve to succeed. You'll do well in life if you don't waste to much time ;-)
mayer -
Hi,
It took me about 48 hours allowing two coats of conductive paint to fully dry; maybe two hours actually working on it, figuring everything out as I went along.
Dan -
Hi Mayer,
did you make the photos tear down the keyboard? Could you share the guide photos?
Can you clarify bullet points 2 and 3 under Step 6? Since the aluminum plate is directly below (or above, once it's flipped) the aluminum body, how can the holes be drilled without damaging the body? If we are drilling the welds OUT, how does that work exactly? Thanks for this.
Sinan -
Since they're only spot welds, drilling them out doesn't require going very deep into the body. No more than a millimetre in fact. So the body will be damaged, but only on the inside of the unit where it won't be visible after reassembly.
Hope that helps!
Dan -
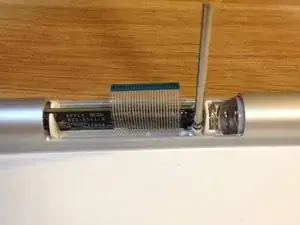

My small tool kit bit for this size screw is too tapered, so I used my trusty little iFixit screwdriver. Problem is the screwdriver doesn’t provide enough grip area to remove this tenacious screw without stripping it. The screwdriver does have a hex at the end of the handle, which is 9/32” inch. Get a socket and handle, or even a 1/4” ratchet handle and you’ll have an easier time removing it.
Dennis Johnston -
Make sure you’re using a Philips driver and not pozi, they have different taper angles and are technically incompatible
Dan -