Einleitung
Diese Anleitung zeigt, wie man das Kopfhörer-Modul des Fairphone 2 austauscht.
Werkzeuge
Ersatzteile
-
-
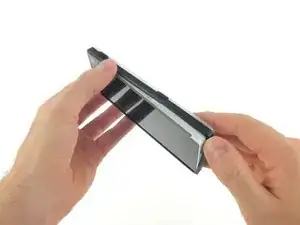
Löse die Rückschale, indem du einfach an einer der Ecken beginnst und dich am Rand entlang arbeitest.
-
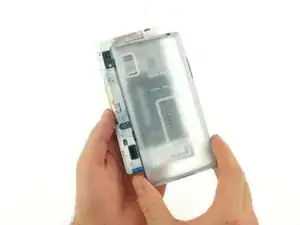
Nimm die Rückschale ab.
-
-
-
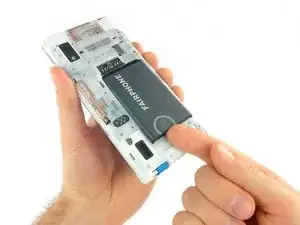
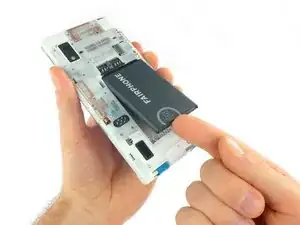
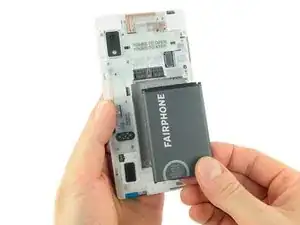
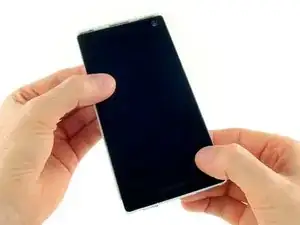
Nachdem der Akku herausgenommen wurde entriegelst du die Display-Einheit.
-
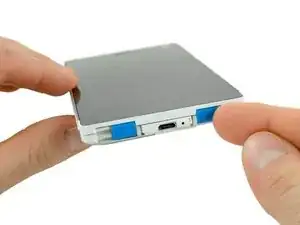
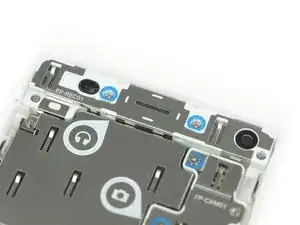
Stelle hierfür die beiden blauen Schalter auf die innere Position.
-
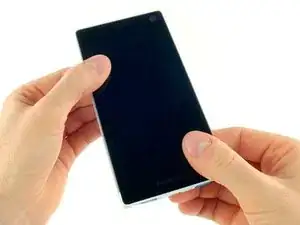
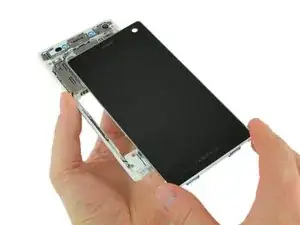
Schiebe die Display-Einheit nach unten.
-
-
-
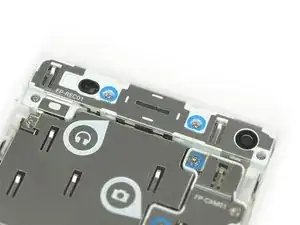
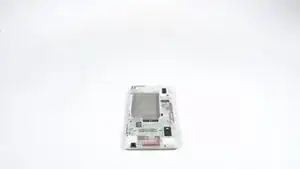
Drehe den Hauptrahmen um, so dass du von der Rückseite her drauf schaust und die beiden freien Stellen des Moduls sehen kannst.
-
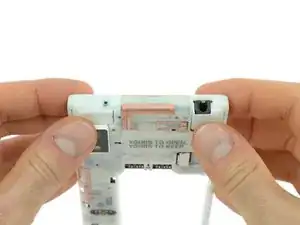
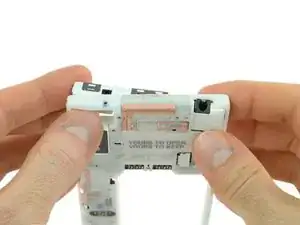
Löse das Modul indem du zuerst den linken Teil mit dem Daumen herausdrückst und die andere Seite fixierst.
-
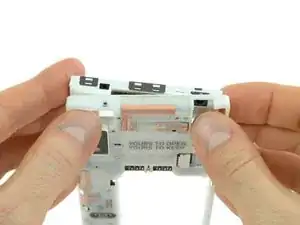
Dann drücke mit dem anderen Daumen die rechte Seite heraus.
-
Arbeite die Schritte in umgekehrter Reihenfolge ab, um dein Gerät wieder zusammenzubauen.
Informationen zum Thema "Was mache ich mit dem alten Modul" sind auf der FairPhone-Supportseite und im FairPhone-Forum zu finden.
10 Kommentare
Die beiden Schrauben, die blau gekennzeichnet sind - es sind vier Schrauben. Soweit bin ich jedoch nicht gekommen, da der Bildschirm sich auf beide genannten Weisen nicht abschieben lässt. Schraubstock und leichte Schläge mir einem breiten Schraubenzieher werden keine sinnvollen Werkzeuge sein. Schraubenzieher: Im Baumarkt gibt es keinen PH 0 sondern PH 0 x 60. Der Verkäufer meinte, es müsste der PH 00 x 60 sein; also beide mitgenommen. Zum Testen, welcher der richtige ist, bin ich nicht gekommen, siehe oben. Vielleicht sind auch beide falsch und es gibt per Internet tatsächlich den PH 0. Außerdem muss ich nicht das Kopfhörerteil austauschen, sondern den Lautsprecher, den ich nach Schwierigkeiten inzwischen erhalten habe. Über Lautsprecheraustausch finde ich keine Anleitung. cw@actanol.de
Hallo, die zwei blauen Schrauben lösen das Modul vom Rahmen, die beiden anderen sind Torx Schrauben und öffnen das Modul selbst. Das Display sitzt recht fest und muss ein wenig lose gewackelt werden. Eventuell hilft es Gummihandschuhe zu verwenden oder das Fairphone mit der Displayseite auf eine rutschfeste Matte zu legen und dann durch Hin-und Herbewegen zu lockern. Die Anleitung für das Mikrofonmodul zeigt, dass darin auch den Lautsprecher sitzt: Fairphone 2 Mikrofon-Modul ersetzen
Um einen Fussel aus der Klinkenbuchse zu entfernen, benötigt man zusätzlich zum Philips #0 ,
einen Torx #5 um die beiden kleinen Schrauben zu lösen. Die Metallklammern solten kein Problem darstellen.
Nach dem Tausch muss der Näherungssensor (Proximity Sensor) neu kalibriert werden, sonst bleibt das Display beim Telefonieren immer schwarz!
Einstellungen->System->Wartung->Näherungssensor
Worked flawlessly. Thank you.
So for those of you not speaking english - it can be a good idea to calibrate the proximity sensor after replacing the module (the sensor that blanks (blacks) the screen when holding the phone to your ear).
Settings - Maintenance - Proximity Sensor
johan -

My cover is broken - the rubber is lifting from the hard plastic. What can I do? Where can I purchase replacement cases? Perhaps the iFixit app could affiliate with the parts suppliers and host a link for when parts go missing or broken.
Osh Gates -
Thanks for the hint. We added a link to the spare part directly from Fairphone (also for all the other guides and parts). Be aware that Fairphone only ships to European continental countries as stated on their page: https://support.fairphone.com/hc/en-us/a...
Tobias Isakeit -
It wasn’t obvious that the outer rim of the cover alaso need to be unclipped after the back cover was removed.
Once I did that, everything was easier.
Stephen Morton -
It wasn’t obvious that the outer rim of the case also needed to be removed. Once I worked this out, everything was much easier.
Stephen Morton -
I am with Stephen Morton. I didn’t understand that there was an independent rim, but once I saw Stephen’s comment, it was quite easy. I think you should add this as a stage in this process.
M ichael Cross -
The image is misleading. The black rim and the back cover are two different items and do not come out together. The first to be removed is the back cover, here the transparent item, and then remove the black rim in the opposite direction as the back cover. Please fix the image, as it can be risky to try to do it as shown.
Domingo Alvarez Mendez -
I’ll add to what other people are saying, trying to raise the topic for a change. You cannot remove the cover as a whole, it has two pieces that must come separately.
Aloïs Glibert -
The above confusion comes from the fact the picture shows the original 1-piece cover with a soft rubber rim, whereas all recent FP2 are sold with the new slim cover that comes in 2 part : first remove the back, then the front part. Hope this helps!
-> the pictures should be updated as they are not accurate for new users most probably needing the help now
tonidekohlanta -
We have a separate guide for replacing the slim case version of the back cover / bumper. You can find it here: Fairphone 2 Slim Case Austauschen
Tobias Isakeit -