Einleitung
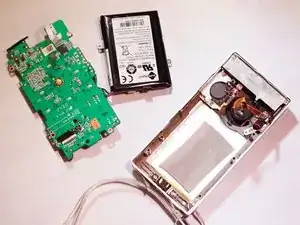
This extensive guide will provide you with specific steps to replace the battery of the Flip Mino HD. To remove the logic board, which is required in order to access the battery, it is recommended to use a soldering station, but keep in mind this step can be done if with caution and delicate use of tweezers. Please follow along carefully and be sure to mindfully place all parts aside somewhere safe. Happy fixing!
Werkzeuge
-
-
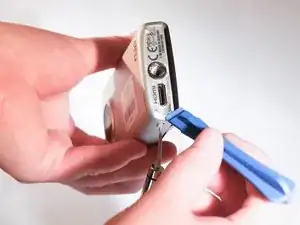
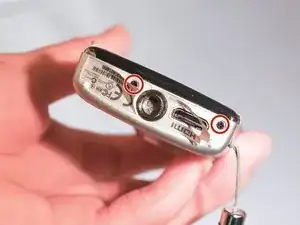
With the plastic opening tool, remove labels from the Flip Mino HD. 2 small black screws should appear.
-
With the Phillips Screwdriver 000, unscrew the 2 screws and set aside in a safe place.
-
-
-
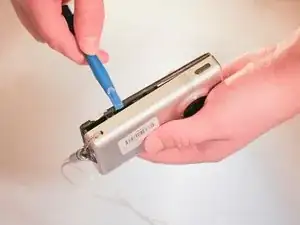
With the plastic opening tool, gently pry the front casing away from the device by carefully running the tool around each edge and lifting.
-
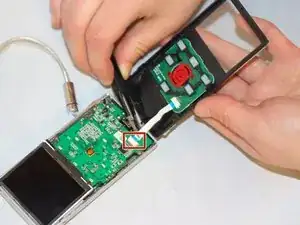
Once case is loose, flip up and over the device. Note that casing is still connected to the device.
-
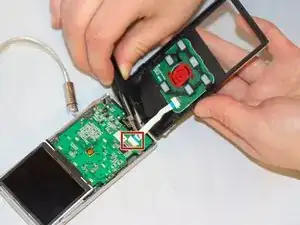
Using tweezers, pull connecting strip to disconnect it from its socket on the logic board.
-
-
-
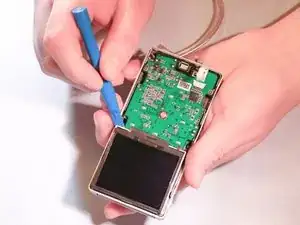
With plastic opening tool, take the display screen out of its socket by gently lifting each corner. Flip the screen up towards the Motherboard that it is still connected to.
-
Using the spudger, gently lift the film underneath the display bracket to peel it off. Set aside.
-
With the plastic opening tool, gently pry open metal display bracket to remove from the Motherboard.
-
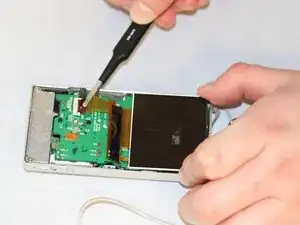
Using fingernail, pry black tape up from zif socket to remove the partially attached display screen.
-
-
-
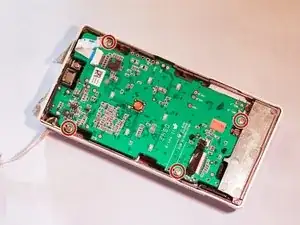
With the Phillips screwdriver 000 unscrew the 4 screws attaching the Motherboard to its outer casing and place safely aside.
-
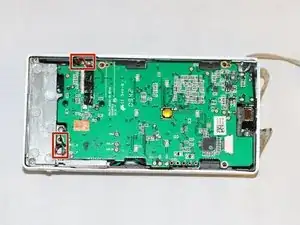
Set up soldering station. At station, de-solder the leads of both microphones from the Motherboard.
-
With tweezers, gently pull the lead away as you heat up the joint with the tip of the iron. Do this for all 4 microphone leads.
-
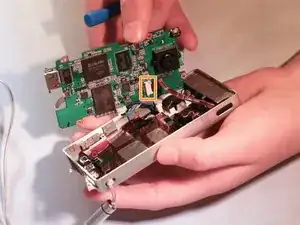
Gently pry the Motherboard out of its case, minding that the cords are still connecting the case and Motherboard. Remove the small black piece of tape that is securing the USB cable to the battery.
-
With tweezers, pull the USB ribbon cable connector away from its socket. Pull battery connector out of its socket on the logic board. The Motherboard should now be loose and free to remove.
-
-
-
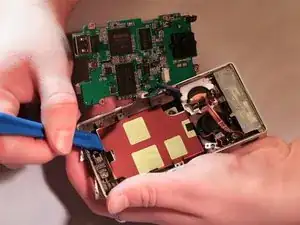
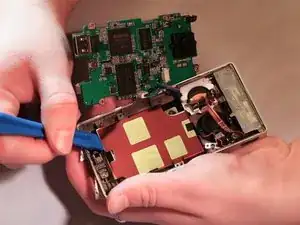
With the Phillips screwdriver 000, unscrew the two small screws securing the battery to the outer case and set safely aside.
-
With the plastic opening tool, pry the battery out of device and set aside. Now the battery is fully removed.
-
To reassemble your device, follow these instructions in reverse order.
5 Kommentare
Hello ! I want to ask a question that my flip mino hd turns on properly but when i press the recording button to record video my flip mino hd turns off suddenly..and it also recharges normally...please help me ..if any one has a solution must tell me!
saif -
Hello Saif, Did ever get your question answered to your satisfaction? I currently have the exact same problem you described in your post!
Thank you! Chris
ccc 124 -
In Step 3, the 2nd photo is wrong - it's the same as the 2nd photo in Step 2!
In the 2nd bullet, the black film should remain attached to the back of the screen, not the metal plate beneath.
In the 3rd bullet it's not very clear how the metal plate is meant to be released. It's secured by 3 plastic clips which I think are supposed to just pull off though one on mine has broken in the process. Some more double sided tape underneath the plate doesn't help.
Thank you for the guide! I used this to fix my Flip MinoHD 3rd Generation model. The model pictured in these instructions appears to be the 2nd Generation model, so everyone PLEASE NOTE this before proceeding with your repair. Here is some feedback after we completed these instructions:
1. Says the process should take 15 minutes. It takes MUCH longer than that (around 2 hours for us).
2. If you're going to use a #000 Phillips screwdriver, make sure it has a really good grip. The screws on this camera were in there super tight.
3. An extra pair of hands helps!
4. There's a part in the article that talks about de-soldering wires. You do NOT have to do this. Just be very careful!
5. You WILL need electrical tape to stick the new battery into the metal housing that holds the battery in the camera.
6. You need very flat tweezers for this, so we used eyebrow tweezers to handle the ribbon cables. Pocket knife tweezers are NOT recommended.
Hope this feedback helps!
