Einleitung

In this guide, we will be taking apart the Fujifilm FinePix S4800 to remove and replace the LCD screen. This involves taking off the rear plastic case of the camera by removing screws and using a plastic removal tool to separate the rear case from the rest of the camera. Then, only one ZIF connector stands between you and a new LCD screen.

  1. Tww2KLZG5q55y5uv
    • Make sure that the camera is powered off before continuing.

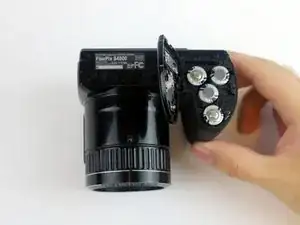
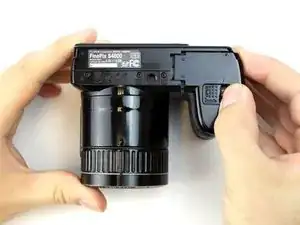
    • Rotate the camera so that the label on the base of the camera is facing up.

    • On the battery compartment door, there is a slider that says "open". Slide it down and push the door to the right to release the door.

  2. NWnbm6qTL6wW3ax3
    NWnbm6qTL6wW3ax3
    ZiaVLgHMYI2EFtXu
    WkpSsx2jKjsdJePP
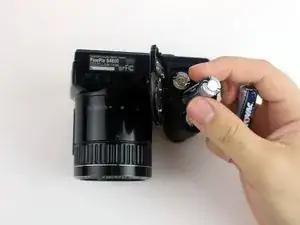
    • Remove all four batteries and set them aside.

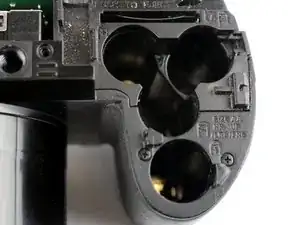
    • When replacing the batteries, be sure to note the markings on the face of the battery compartment. These markings let you know which side of the battery ("+" or "-") needs to be facing up in each slot.

    I chose kazino vulkan for myself https://vulkanvegas-102.com/ru I seem to win often. And you can play in this game club not only for fun, but also to earn money. Already got all my friends hooked on gambling. I recommend to come here!

    Denis -

  3. ZYRZ4RFV3IHacVDX
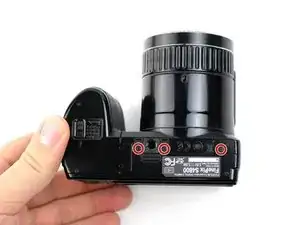
    • Remove the three 5.0 mm JIS #000 screws on the bottom of the camera.

  4. 6mex6lALBpLjnmMo
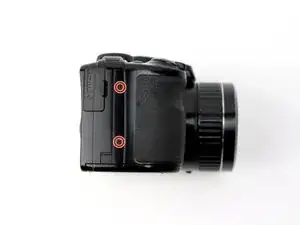
    • Rotate the camera so that the HDMI port is facing up.

    • Remove the two 5.0 mm JIS #000 screws.

  5. nWKrAfDZPcMmRQFv
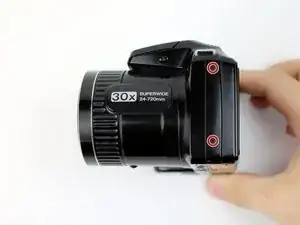
    • Rotate the camera so that the text "30x superwide 24-720mm" is facing up.

    • Remove the two 5.0 mm JIS #000 screws.

  6. IKNPka5ZoAc3LFVU
    IKNPka5ZoAc3LFVU
    DEQoR33xGRiGCK5l
    iRXsoJdNYgwTnHtT
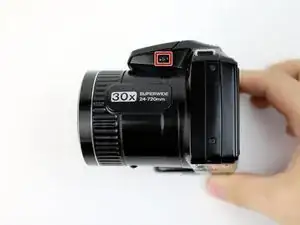
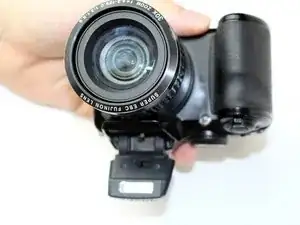
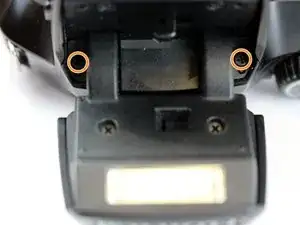
    • Press the pop-up button highlighted in the picture to release the flash mechanism.

    • Remove the two 5.0 mm JIS #000 screws highlighted in the picture.

  7. 2HB1W6xKm4IrcB2a
    2HB1W6xKm4IrcB2a
    qRCfZ4LHuMxC4uPS
    Mp533T2Be4YRROM5
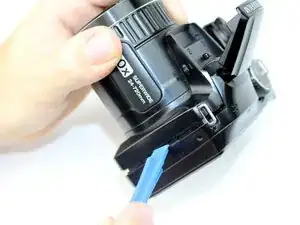
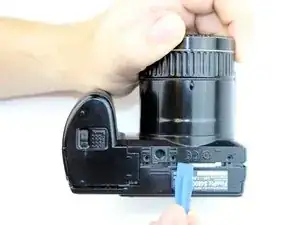
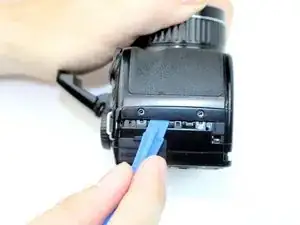
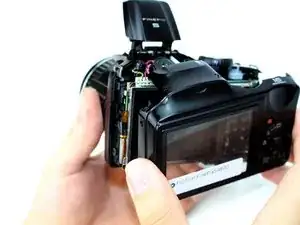
    • Use a plastic opening tool to separate the rear case from the camera on each of the sides until the panel is completely separated.

    • The plastic case is fragile, so take your time on each side making sure to pry each side evenly as you continue around the camera with the tool.

  8. 6hw16DTGFbmXiUPH
    6hw16DTGFbmXiUPH
    RNPGVmCZRLDYqIlm
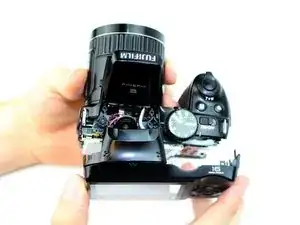
    • Gently, remove the rear case from the camera and set it aside.

  9. xTNDaFsLMMgoAeDM
    xTNDaFsLMMgoAeDM
    WZJbS6qOyxHmuYYQ
    Q4GjwLsC6IOdfw2O
    • At this point, it is highly recommended that you wear an ESD wristband to prevent damage to the internal electronic components.

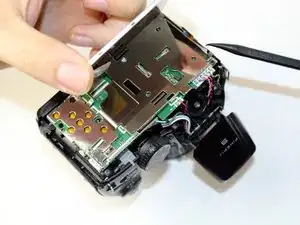
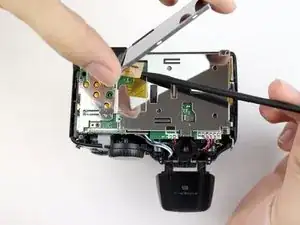
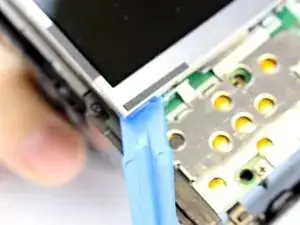
    • With respect to the camera that was disassembled for this guide, the LCD display easily fell out of its housing after the rear case was removed. If your screen fits more tightly, you can use a plastic removal tool to gently pry up one of the edges of the screen and that will release it from its mount.

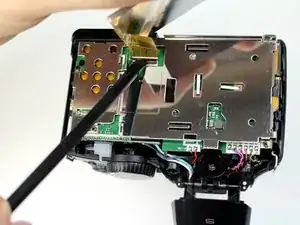
    • Gently tilt the LCD screen toward the bottom of the camera and use a spudger to flip the lock for the ZIF cable attached to the LCD.

  10. ppraoLY54ly2lxZQ
    • Lift the screen away from the camera and set it aside.

Abschluss

To reassemble your device, follow these instructions in reverse order.

Stephen Calabrese

Mitglied seit: 17/02/17

584 Reputation

2 Kommentare

Thank you Stephen for this tutorial. I have two hobbies, photography and video games, especially in games, I am fascinated by music. I know that licensing music for developers is a long process, but thanks to a service like https://www.styngr.com/ music licensing for developers won't be a problem

Sean Foden -

It's easy to agree that, it's very hard to find a reputable and trustworthy online casino. The only casino I can recommend is GG Bet promokod casino because people trust it. According to statistics https://crongdor.com/ this online casino has the highest RTP.
Дмитрий Куб -