Einleitung

Use this guide to replace a damaged back or top case, or open the case to access other components of your camera.

We highly suggest you use a magnetic project mat or an organization tray. This camera has many different types of screws and keeping them organized is key to proper reassembly.

  1. FJFUcvh6IKVLYypC
    FJFUcvh6IKVLYypC
    6rFnDNwhUJDHSHSo
    • Remove the lens.

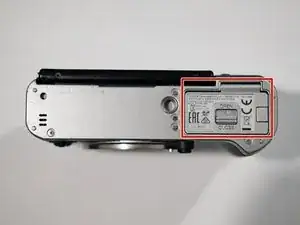
    • Turn the camera upside down to locate the battery compartment.

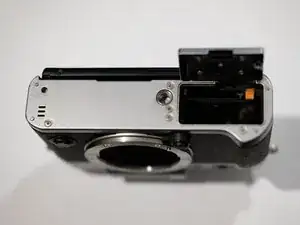
    • Slide the button up to open the compartment.

    • Slide the orange button up to release the battery.

    • Push to remove SD card

    • The lens, battery and SD card is not shown in these photos.

  2. c6OiK1C6XgoJBUSL
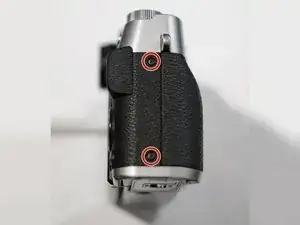
    • Remove x2 4.3 mm length Phillips screws from both sides of the camera.

  3. Afgpww2AYgRoNlRO
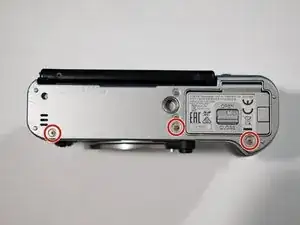
    • Remove the 3x 3.7 mm length Phillips screws from the bottom of the camera.

  4. JcVBDZ2Yg42vWHaL
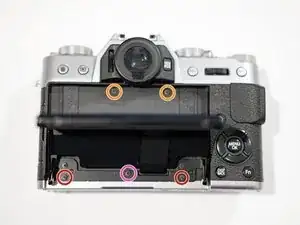
    • Remove 2x 3.7 mm length Phillips screws.

    • Remove the 3.1 mm length Phillips screw.

    • Remove 2x 3.2 mm length Phillips screws.

    • When reassembling take a note of the screw lengths.

  5. 2CKSd6hiJRK6SypY
    2CKSd6hiJRK6SypY
    xQFxnRAJHSBgVxoI
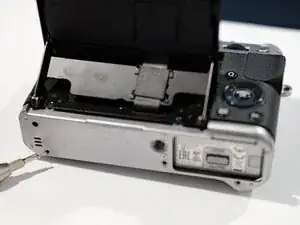
    • Slowly pry and slide the bottom cover down.

  6. SSVveJGHFBuXMEnC
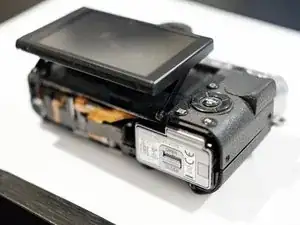
    • Work slowly on this step. There is a chance of ripping a ribbon cable.

    • Start prying and lifting the back LCD assembly

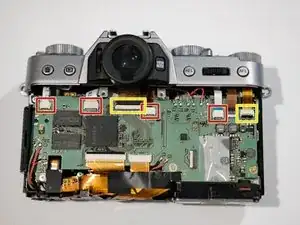
    • To remove the ribbon cable, flip up the WHITE lock on the large ZIF connector with the flat end of a spudger.

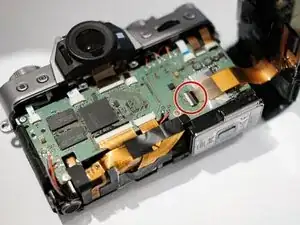
  7. dcBxwTjntAaVKJG2
    • To remove the ribbon cable, flip up the BLACK lock on the connectors with the flat end of a spudger.

    • Carefully pull out the ribbon cables.

  8. KuOgbpReN6tppM3Y
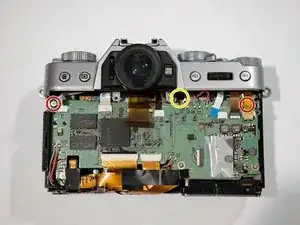
    • Remove x2 2.1 mm length Phillips screws.

    • Screw on the right is behind the ribbon cable and some tape.

    • Remove 6 mm length Phillips screw from deeper in the case.

  9. tSjqs3X1u6rBDGwI
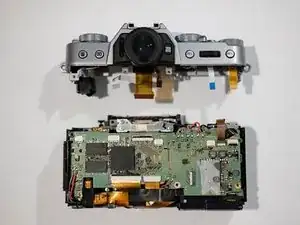
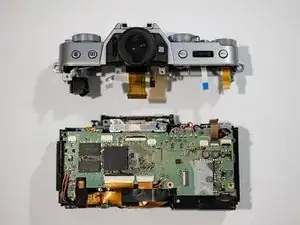
    • Slowly pry and lift the top assembly away from the body.

    • DONE!

    • To reassemble, follow the steps backwards.

    Thank you very much the detailed instruction. I should replace the whole eyecap unfortunatelly. Can you help me how could I replace it after I disassembled the camera follow your instruction? How is that part assembled?

    Thank you!

    V. Péter -

    Hi, could you share an image of exactly which piece is broken and you want to change? As I am looking at my X-T10 it does not have the usual big rubber eyecap that you can see in X-T2, DSLRs or similar cameras :)

    Rimvydas -

    Hi,

    Thank you for your answer.

    No unfortunatelly it is not only a removable eyecap. It is the whole viewfinder cover. The material of this piece began to break down. Nobody knows why. I can share some photo with you.

    Thank you for your kindly help in advance!

    V. Péter -

    OK, I see… It does look strange.

    I will keep it in mind to do a more detailed top part dissassembly guide so you could separate that part. But since I am just a hobbyist myself I can’t give you an answer when I will find time for it :)

    Hope you understand :)

    This is a lovely camera and enjoy it while it works, luckily it is not something that stops it from working :)

    Rimvydas -

    Thank you very much. Do you know when could you share the details with me? I would like to repair my camera.

    Thanks!

    V. Péter -

    I've used this guide to successfully repair my Fujifilm X-T20, thank you!

    Guido Santacroce -

Abschluss

To reassemble your device, follow these instructions in reverse order.
Rimvydas

Mitglied seit: 29/03/12

710 Reputation

0 Kommentare