Einleitung

The manufacturer indicates that this watch is not user replaceable. However, this guide provides easy instructions to follow for replacing the battery of your Garmin Forerunner 10. No previous skills are needed for this moderately easy replacement.

  1. N2crFW1PTHeXsnHE
    N2crFW1PTHeXsnHE
    ICTG3im2vY4JKdHU
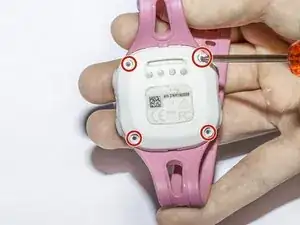
    • Use the Torx 5 Screwdriver to remove all four 1.1 mm screws on the back of the watch.

  2. JAbT6OYqGqSAWD1D
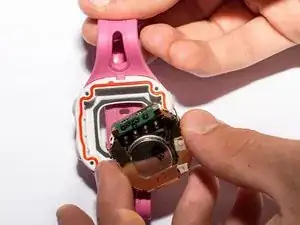
    • Place the watch upside down and lift the back panel from the watch.

    • Remove the battery housing from the watch.

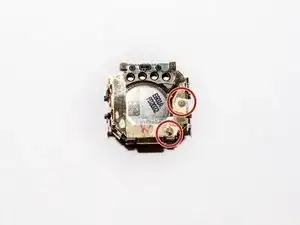
    • Place the housing face up to ensure that the two springs do not fall out.

    • Some have noted that certain features of the watch do not work if the springs are mixed up. Be sure they stay in place.

  3. ifCXLXCM42EXDtDA
    • Secure the two springs with two small pieces of scotch tape to ensure the springs do not fall out.

  4. hiNwOBwaAPWKRUbF
    hiNwOBwaAPWKRUbF
    MILMoJYMPyBGHqfX
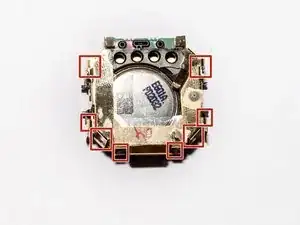
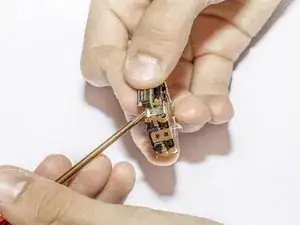
    • Remove the 8 metal latches from the black battery housing.

    • Gently bend the 8 metal latches slightly away from the black battery housing.

  5. vR4uASwgexRkkpPd
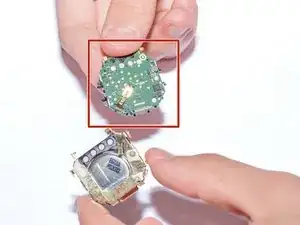
    • DO NOT directly touch the circuit board on the motherboard of the watch. This will render your watch inoperable.

    • Grab the motherboard from its sides and set it aside in a safe place.

  6. jexVZc2VsLIWQqOQ
    jexVZc2VsLIWQqOQ
    jjP6DAhFwNqaPqdN
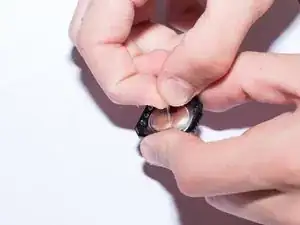
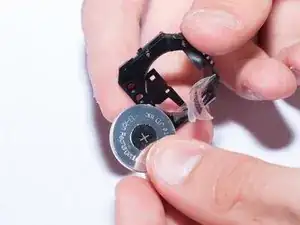
    • Separate the clear tape attached to the battery.

    • Be gentle! You will be reusing this tape for the new battery.

  7. LVohkiLuLJCdreOP
    LVohkiLuLJCdreOP
    kwhOgeIiDAglmPlE
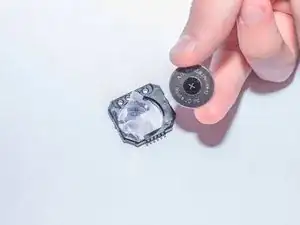
    • Prepare your new battery.

    • Secure the battery under the tape.

    • The + sign should face away from the tape.

Abschluss

To reassemble the watch, follow these instructions in reverse order. Charge your watch when finished. Check to make sure all features are working.

Alana Joldersma

Mitglied seit: 28/04/17

465 Reputation

10 Kommentare

This was probably beyond my skill level, but I tried this and it seemed straightforward, but after re-assembly, when I hooked it up to the charge cable, the watch doesn't seem to be charging and won't turn on.

ericcox1 -

Did you get it work?

Ruslan -

great guide! thanks so much for sharing!

Lindso -

Thanks you for sharing. Easy enough to follow. A bit fiddly but took my time and made sure I had a small box to keep the bits in while I waited for the new battery to arrive. One of the springs did pop out (Step 2) but I didn’t lose it!! Reassembled and the watch turns on so all looking good! I think my old battery leaked so I am hoping no internal damage was done and the watch can recharge the new battery.

Jon Titchmarsh -

Also works on the Garmin Forerunner 15

Extra hints:

Step 2 - The red seal can come out with the back - carefully place it back into its slot in the body of the watch before reassembly. It only goes in one way. Not sure about turning it over to be ‘face up’ as the springs will fall out. Move onto step 3 and tape them, etc.

Step 3 - you can tape the springs, but when the motherboard is removed, they can fall out the back. Consider carefully removing them first and setting aside in the matching pattern for easy replacement

Steps 4-6 - all good, but don’t bend those metal clips too much…

Step 7 - consider taking the tape off the front of the battery (+ side) as well and moving to the new one

Step 8 - reassembly of motherboard - carefully compress each corner and feel as each clip ‘clicks’ back into place

Step 9 - place back in housing, making sure it sits level

Step 10 - replace back of watch - a few careful jiggles may be required as there are 6 different springs to get touching at the right places.

John Magnussen -

Regarding symptoms where the buttons don't work after putting it back together:

The rectangle cutout in the battery tape seems to be important to have in the exact same orientation so that the contacts from the cover can connect with the battery. I solved this by removing most of the tape.

I got in trouble by removing the tape to get the old battery out, thereby losing the correct placement.

Larry

Larry -

Worked beautifully - thanks for this guide. If ericcox1 still checks this, I had the same issue after replacing the battery - cleaning the charge nodes on the watch and charger cable with a Q-Tip and rubbing alcohol fixed it. Fired up as good as new.

gjmarshaz -

Hi my name is Ernesto Garcia. I have foruner25 the battery just die, I want to know if is any Garmin shop near the area to replace the battery, or how do I get this fix. Thanks so much I live in Los Angeles zip code 90019. reach me @ ernestogarcia007@gmail.com [310]593-1258

ernestogarcia007 -

Surprisingly (given my limited skill set) I was able to follow this guide and get my Forerunner 10 back to life! Couple of notes: Those two springs are tricky - I ended up just setting them aside until reassembly. Also be careful with the clips and don't bend them too much. Other than that, straight forward!

Roy Dube -

Awesome! Worked like a charm. When I went to Amazon to order the Torx screwdriver, I ended up buying a little Teckman repair kit for $9.99 that also contained some very fine tweezers and some small pry tools that came in handy on this job. Thanks for posting these directions!

BK Hogstrom -