Einleitung

Use this guide to replace the battery in the Garmin Nuvi 255W.

  1. NOFRZCY4HaDn1iyo
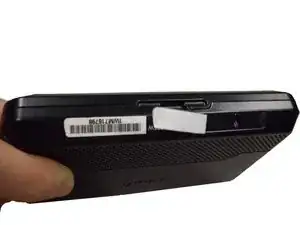
    • Remove the barcode sticker at the bottom of the device.

  2. DtdR4SeJZkvquui5
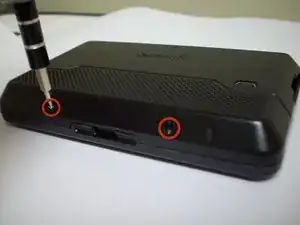
    • Remove two 8.4 mm T5 screws from the bottom of the device.

  3. G1iRb3GNFPKPTaXe
    G1iRb3GNFPKPTaXe
    GFE616mEevrkYLjV
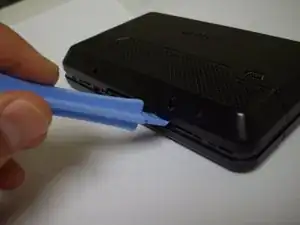
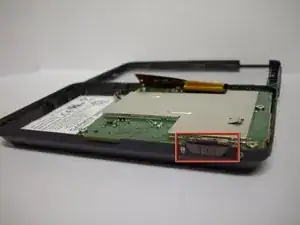
    • Using a plastic opening tool, carefully pry open the device.

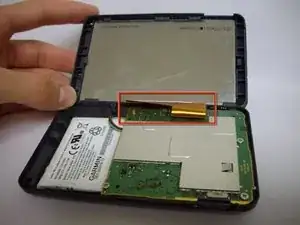
    • Open the device carefully, making sure not to damage the gold ribbon cable that connects the screen to the motherboard.

    turn the unit around

    Andrew Hayden -

    Since there is no replacement speaker whats the point of this process?

    greg -

    Very detailed set of instructions! Does anyone known the thread size of the screws in step 2? 8.4 mm T5 screws: is the length of the screw (8.4 mm) ,and the head specification (T5- size of screw driver). I need the actual thread specification. I lost one of the screws and the other one 's head is stripped. I need to replace both screws.

    Harold Schultz -

  4. b5TPtEO1ebpjPLwF
    b5TPtEO1ebpjPLwF
    yayblkxJbYISGvQW
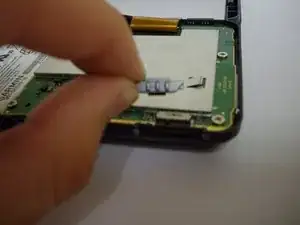
    • Remove the power button.

    Where can I buy the button

    milosvalek -

  5. Gy26dUKyhLqwympl
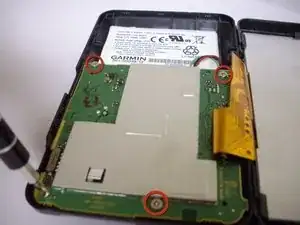
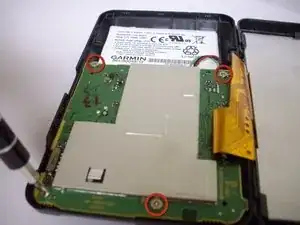
    • Unscrew the four 6.70 mm screws holding the motherboard in place using a philips #0 screw driver.

  6. lqdDSTJQpgKOr1ic
    lqdDSTJQpgKOr1ic
    nWoHVSotxxrOOY1C
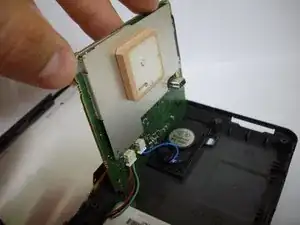
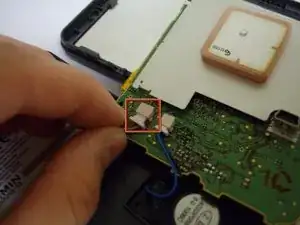
    • Lift up the motherboard.

    • Carefully disconnect the battery and motherboard. Slowly wiggling the connection makes it easier to disconnect the battery from the motherboard.

  7. beoCHZ6WZIpxHGlM
    beoCHZ6WZIpxHGlM
    FUmSgICHZSDc6twq
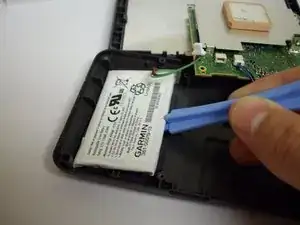
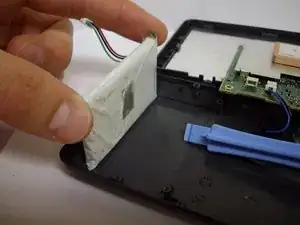
    • Using the plastic opening tool as a wedge, pry the battery from the case. This can be fairly tough as the battery is glued to the case. Don't be afraid to use force and some good leverage.

    ottima guida ho perso ar

    Francesco Renon -

Abschluss

To reassemble your device, follow these instructions in reverse order.

Timothy

Mitglied seit: 26/01/12

66 Reputation

8 Kommentare

Thanks for this very nicely illustrated guide.

RBStorms -

Thanks for the guide. Used it to open up a Nuvi 265 because the battery had been left to discharge below the protection circuit's limit. Connected the battery leads (Green = ground, Red = voltage, Black = temperature) to a 5v USB charger for ~20 seconds to revive the protection circuit, and the unit is now charging again. If you're going to do this, know the risks. Thermal runaways in lithium batteries can be extremely volatile.

rbol -

Used these instructions to replace battery in my 5-year old Garmin nuvi 205W (which has the same access and internal geometry).

JRedmond -
Thanks, great demonstration.

peter2x4 -

This is great! I have run into a big problem, though. One of the screws is "unthreaded." The head has become smooth, and I can't unscrew it to get the cover off. Is there any way to get it off???

nancyw -

There are screw bits made specially to extract stripped screws, but if the screw isn't too far below the surface it's going through, the cheap way is to file or grind a slot into the head so you can extract it with a jeweller's flathead.

rbol -

Kein Problem, keine 10 Minuten gebraucht, um im nüvi 255W den Akku zu wechseln!

w.gerrit -

Thanks, esp for an amatuer born before Torx and Phillips and old enough to have learnt not to throw things away.

Maxwell Jordan

Maxwell Jordan -