Einleitung

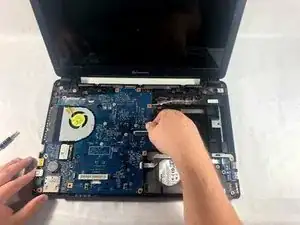
Is your computer making loud noises and taking longer than normal to boot? Consider using this guide to replace the cooling fan in your device.

  1. ljB3MxxHg3VDow1N
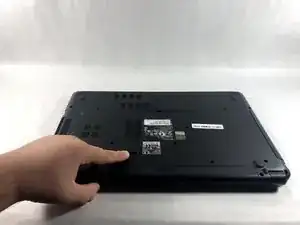
    • Make sure to power down and turn off the laptop before proceeding with this guide.

    • Flip over the laptop.

  2. yNKPpljJaBOZLZfX
    yNKPpljJaBOZLZfX
    EFTqncFF4dBJwR6w
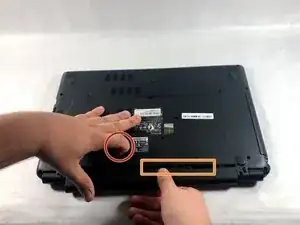
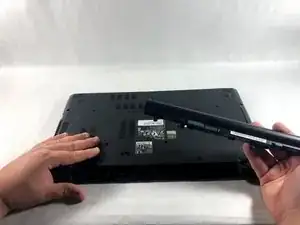
    • Slide the tab to the left and hold the tab there.

    • While holding down the sliding tab, remove the battery from the device.

  3. rhT1lcNoWxlnx2GY
    rhT1lcNoWxlnx2GY
    BZqCECy4FeumkqHT
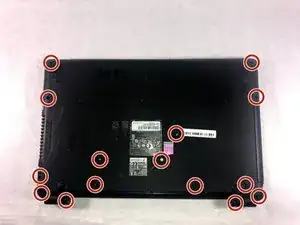
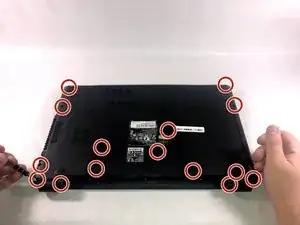
    • After removing the battery, remove 15 7mm screws using the Phillip #1 Screwdriver.

  4. sXsQeDloFAIgbsOI
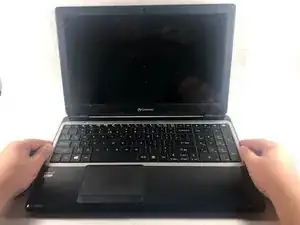
    • Flip over the laptop and open it so the screen is facing you.

  5. 4VXdcGG5DfPnOKhG
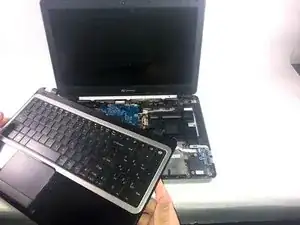
    • Lift the upper case cover off of the device. Use a prying tool along the edges if necessary.

  6. faB6oGShPZJMNKZj
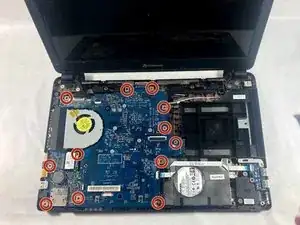
    • Remove the twelve 3mm screws using the Phillips #00 screwdriver.

  7. cvUSKcSZ6XjuOesH
    cvUSKcSZ6XjuOesH
    Z1RIFyYWG3g6sS1u
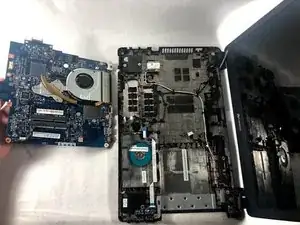
    • Gently lift and remove the motherboard off of device.

    • This will also remove the fan from the device but it will remain attached to the motherboard.

  8. D6rNukKp43SeQjHZ
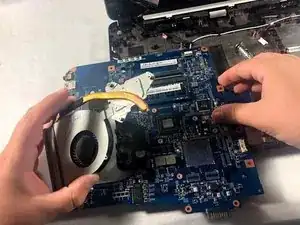
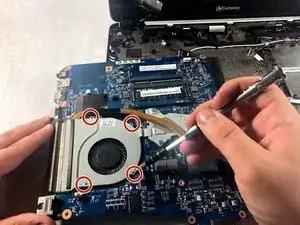
    • Remove the four 3mm screws attaching the fan to motherboard using the Phillips #00 screwdriver.

  9. GtHciO3uuJXcPOZJ
    GtHciO3uuJXcPOZJ
    PJoPZlT6WeHVMCbK
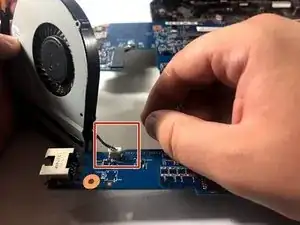
    • Gently lift the fan and disconnect the fan from the motherboard.

    • Remove the fan from the device.

Abschluss

To reassemble your device, follow these instructions in reverse order.
Kelsey Rodrigues

Mitglied seit: 23/10/18

495 Reputation

0 Kommentare