Einleitung

As your laptop ages, drops, spills, and time can cause damage to your laptop screen. If the image is often distorted, the LD light is corrupt, or just a blatant crack in the screen, you can follow these steps to easily replace your screen. Replacing the screen will allow for a better image as well as an easier use of your device, without the frustration of looking at an unsatisfactory display.

  1. exIMORKXLLKFj5to
    exIMORKXLLKFj5to
    6lPNprcRYGTBiIUZ
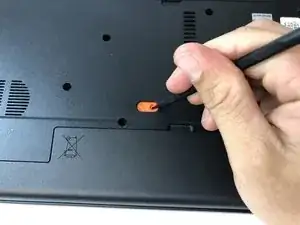
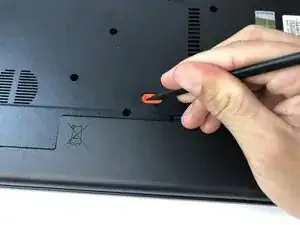
    • Using the spudger, push the orange tab to the unlock position.

    Do you have shots of before and after? For this kind of step, iFixit prefers flipbook style shots.

    Alex Watkins -

    You also used the screwdriver, not the spudger, in the image. Be sure to appropriately identify tools.

    Alex Watkins -

  2. GJgm5KPZTRTSZV31
    GJgm5KPZTRTSZV31
    XldfDsXDJnACBwTW
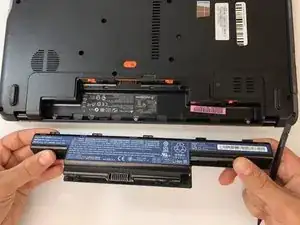
    • Lift the battery from its compartment.

    • When reinstalling, insert back end of battery first, then clicking into place.

    As before, include multiple shots to demonstrate how to do this. Also, since you’re not using the screwdriver, I would not include it in the background here.

    Alex Watkins -

  3. rXnohPNCwHZmpCwb
    rXnohPNCwHZmpCwb
    gmcP2hJCTVMZjUrQ
    uemWWnqvM1rGeK3v
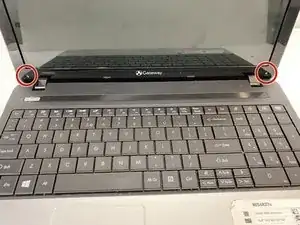
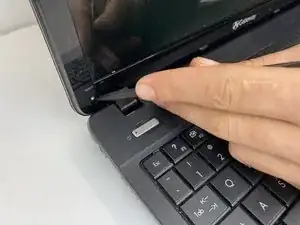
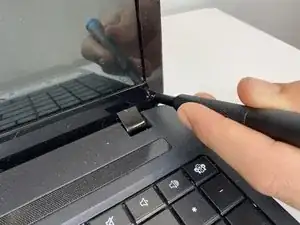
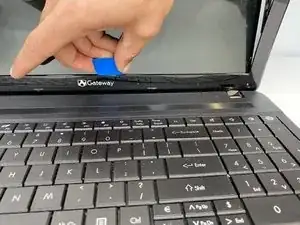
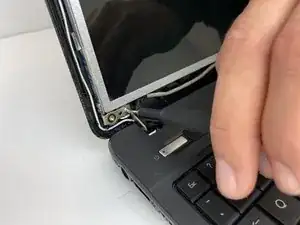
    • Using the spudger, remove the protective caps for the screen to expose the screws.

    • Using the Phillips #000 screwdriver, unscrew the bottom two 1mm screws.

    Typically, iFixit wants you to remove the battery before doing work on the device. Note the fragment in the first bullet. Add flipbook style shots, and potentially separate to provide more room for depicting action. Measure all screws.

    Alex Watkins -

  4. i3tD6bVxyaEspSBJ
    i3tD6bVxyaEspSBJ
    OUCyZAQEAiKAHSeN
    VHElZTsAjQhCTjXj
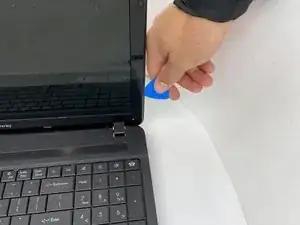
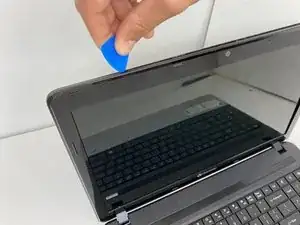
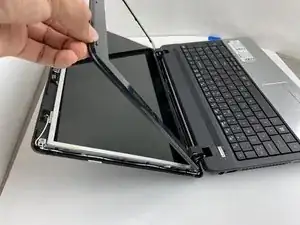
    • Using the opening pick in between the front cover and bezel, gently loosen and lift the plastic bezel from the screen and backing.

    How should I use the pick? Add more detail to the steps here.

    Alex Watkins -

  5. H2PWHDSldSlTia2x
    H2PWHDSldSlTia2x
    AVGjiAifuNonlpGD
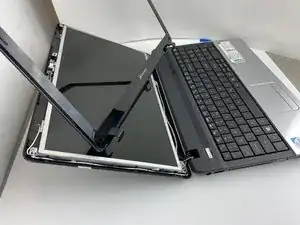
    • Gently lift the frame of the screen from the top to unhook the frame from the base.

    • When reassembling, hook the bottom of the screen to the base of the laptop before snapping into place.

    The background is a bit messy here. I would retake the shots. How should they lift it? Gently, with force?

    Alex Watkins -

  6. 4DshELQBGG26QFFV
    4DshELQBGG26QFFV
    EPdNQXdYIisgSAHO
    ynSyYAFL3arlKUHH
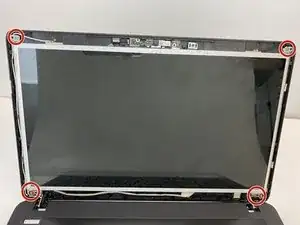
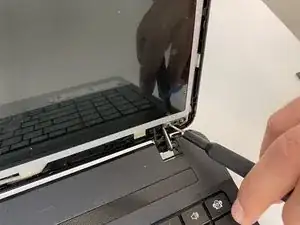
    • Using the Phillips #000 screwdriver, unscrew the four 1 mm screws in the front corners of the metal frame.

    • Lift the screen slightly to expose the connector board.

  7. HVKMmgDm3cP1buAL
    HVKMmgDm3cP1buAL
    rYBKeRGLCONWZxEf
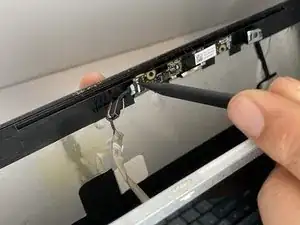
    • Using the spudger, carefully remove the webcam connector from the metal frame.

    Can you add one more shot here to show what it looks like when it’s disconnected?

    Alex Watkins -

  8. 5GGWGystZf36yDGh
    5GGWGystZf36yDGh
    hMCCFNUZ4E5wRlUb
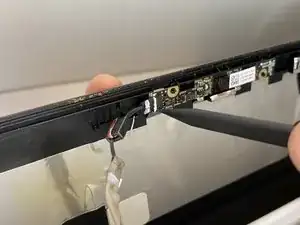
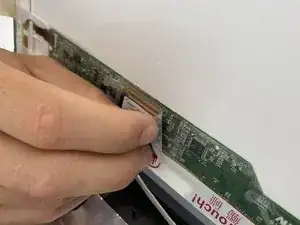
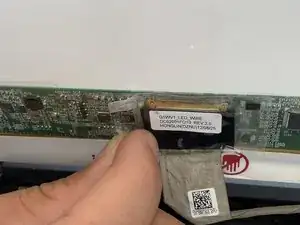
    • Peel the tape covering the display cable, releasing the wire from the metal frame.

    • Unplug the display cable from the image processing board on the screen.

    Where on the device is this? I would put in a zoomed out shot with markup to give some perspective. Also, the orientation on these two shots shifts, which is kind of confusing for me as a reader. ,

    Alex Watkins -

  9. jnTbglCO1djFYeIA
    jnTbglCO1djFYeIA
    fguUcyjAplhkDBoI
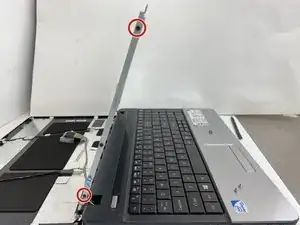
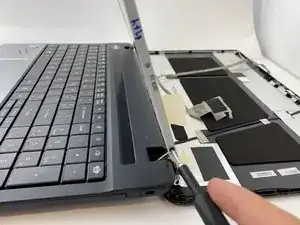
    • Using the Phillips #000 screwdriver, unscrew the four 1 mm screws from the sides of the metal frame.

    • Remove the screen from the metal frame.

    Check apostrophe use here. Also, I would add shots of the screen actually being removed as the last step.

    Alex Watkins -

Abschluss

To reassemble your device, follow these instructions in reverse order.
Piper Moeller

Mitglied seit: 24/01/20

613 Reputation

0 Kommentare