Einleitung
Grundständige Anleitung. Diese Anleitung ist Teil eines anderen Verfahrens und ist nicht dazu gedacht, eigenständig benutzt zu werden.
Werkzeuge
-
-
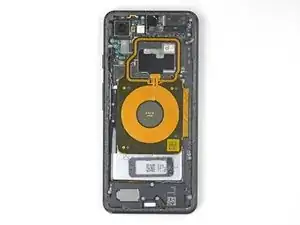
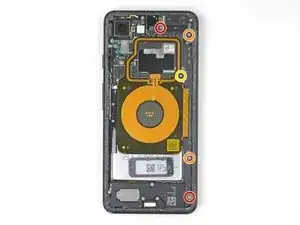
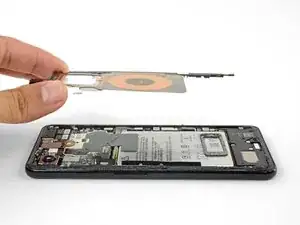
Entferne die fünf Kreuzschlitzschrauben, mit denen die kabellose Ladespule befestigt ist:
-
Zwei 1,9 mm Schrauben
-
Zwei 4,2 mm Schrauben
-
Eine 4,3 mm Schraube
-
-
-
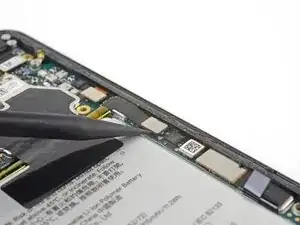
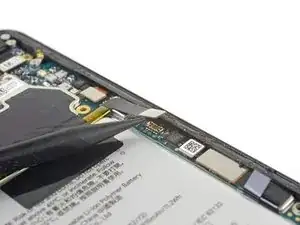
Heble den Druckstecker des Akkus mit der Spudgerspitze aus seinem Anschluss nahe der rechten Kante des Smartphones hoch und trenne ihn ab.
-
Abschluss
Um dein Gerät wieder zusammenbauen, folge den Schritten in umgekehrter Reihenfolge.

The top 1.9 mm screw can’t be totally removed — it comes out with the coil once loosened
Dmitriy -
Can I leave the wireless charging coil out?
This may also allow a bigger battery!
Jex Webster -
You may be able to! Note that this is not only the wireless charging coil, but also the NFC antenna (the upper loop).
Arthur Shi -
The 1.9 mm screws are actually screwed into the head of another screw beneath them. Sometimes the lower screw unscrews instead of the upper. That leaves both screws attached to the coil. If possible you should separate the two screws and screw the lower one back in first using a small flat blade screwdriver.
Richard Elder -
If you decide to clean the wireless coil assembly, be aware that IPA will completely remove the printed 2-D barcode on the lower right. (Hopefully that's not important.)
Bitt Faulk -
There were 7 screws!!! The last two were both near the power button.
Emily Viehland -