Einleitung

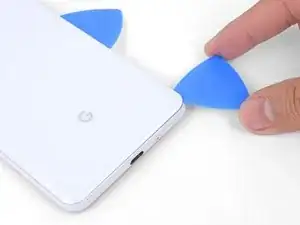
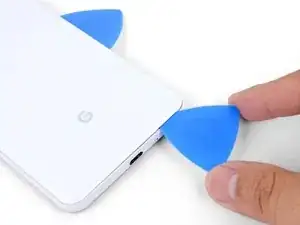
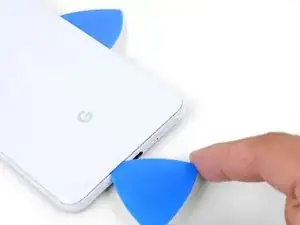
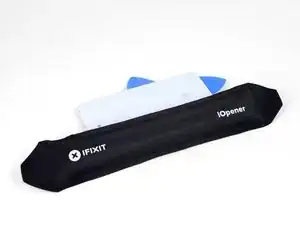
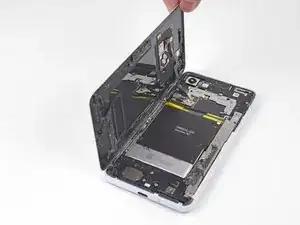
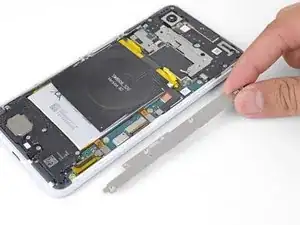
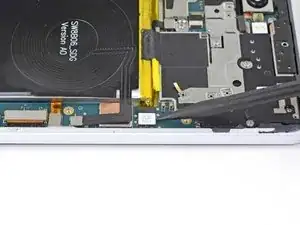
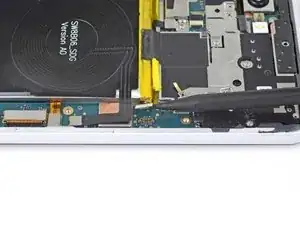
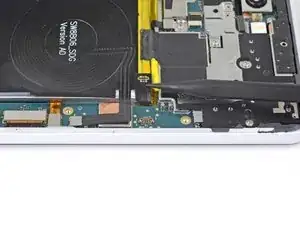
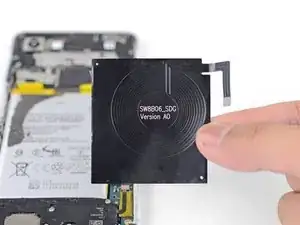
In dieser Anleitung wird gezeigt, wie die kabellose Ladespule in deinem Google Pixel 3 XL ausgebaut und ersetzt wird.

Die Ladespule ist fest mit dem Akku verklebt. Um Schäden am Akku zu vermeiden, musst du Klebstoffentferner oder hochkonzentrierten Isopropylalkohol verwenden, um die Ladespule vom Akku abzulösen.

  1. wIigbvaXNQ1gCfa2
    wIigbvaXNQ1gCfa2
    4f3uBiUqnYIwtpHk
    5fCoAkkaQhAC1YlB
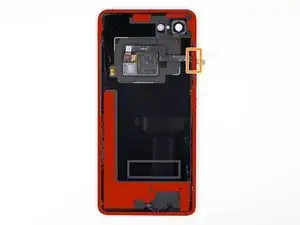
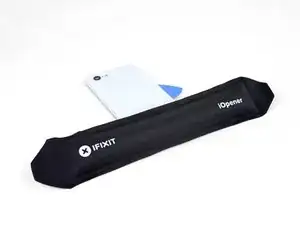
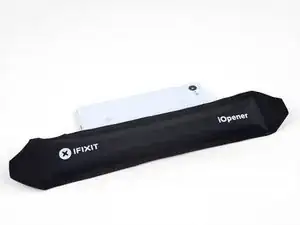
    • Erwärme einen iOpener und lege ihn eine Minute lang auf die rechte Kante der Rückabdeckung.

    • Du kannst auch einen Fön, eine Heißluftpistole oder eine Wärmeplatte benutzen, aber achte darauf, das Gerät nicht zu überhitzen. Das Display und der interne Akku sind beide sehr hitzeempfindlich.

    • Während der Wartezeit kannst du Kenntnis von folgenden Bereiche nehmen:

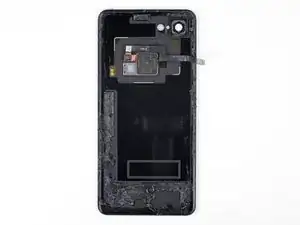
    • Starker Kleber - unten am Gerät befinden sich große Bereiche mit Kleber.

    • Kabel des Fingerabdrucksensors - achte darauf, beim Hebeln dieses Kabel nicht zu durchschneiden

  2. cZhYNQPJKIpeBdUV
    cZhYNQPJKIpeBdUV
    O3ZtiUsIEYd1LOi5
    PdMr62SQHqkykS2M
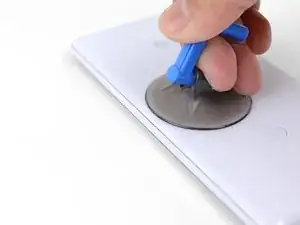
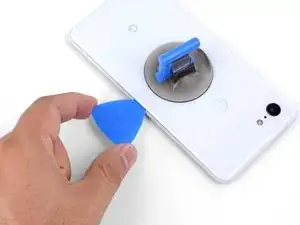
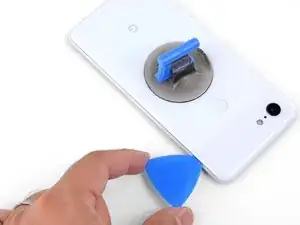
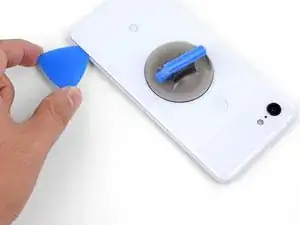
    • Setze einen Saugheber auf die erwärmte Kante der Rückabdeckung, und zwar so nah wie möglich am Rand.

    • Ziehe fest und gleichmäßig am Saugheber, um eine Lücke zu schaffen.

    • Je nach Alter deines Smartphones kann das unter Umständen schwierig sein. In diesem Fall ist es hilfreich, die Kante erneut zu erwärmen.

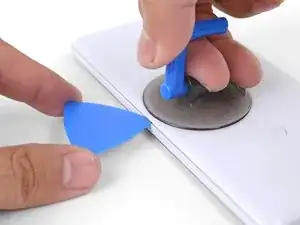
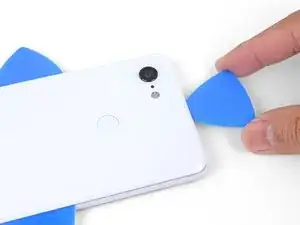
    • Setze die Spitze eines Plektrum in die Lücke.

    Suction cup doesn’t work on severely cracked glass.

    Jeffrey Kongthong -

    Step 1 - 2 took me about 50 minutes. Back and forth with heat and trying with suction cup. I could get my finger nail in but not the pick. Took two people, but we finally got a pick in. 2 year old phone.

    Andrew Messier -

    Took about 15 minutes and three total attempts. On the third attempt, I also used a thinner, metal, pick to widen the gap just enough for the plastic pick to fit (Though be careful as you can easily break it with a metal pick). The phone is three years old.

    Hotohori -

    Could not get in with the pick or in from the side. Targeted the bottom of the phone with the iOpener and managed to gently create some space for the pick with the opener tool.

    Daniel R. -

    I also struggled here for a while. I ended up working my way around the entire edge of the phone until I found one spot where I could pry up the back panel. I used a jimmy instead of the opening pics. I also used a hairdryer on lower heat instead of the iopener. 3 year old phone.

    Bryan Wethington -

    Took 30 minutes + to get the back cover off. Used another suction cup to grip from the busted screen and the ifixit suction cup for the back. A thinner Acoustic guitar pick was required opposed to the standard Blues picks provided in the kit (har-har). Would HIGHLY suggest getting a pick into both the back and the front before removing the panels as it will give you more surfaces to pry from. Made that mistake...

    Brian Sommer -

    Over 2 hours of trying, I keep reheating the pouch and let it sit on the edge for sometimes up to 10 minutes since the directed 1 minute wasn't working. Physically cant get enough leverage on the back of the phone; picks are too thick to get under the crack, and the suction cup pops off before I can get enough force to see any gap open. Phone is 5 years old. I really need some help

    Grant Cooper -

    Hey Grant!
    I hear your pain—the adhesives on this phone are very strong. The initial gap is one of the hardest parts of the procedure. Here are some suggestions:
    * If you have a hair dryer, give that a shot. Heat the edge until it is slightly too hot to the touch.

    * These adhesives separate not with extreme force, but with constant steady force and time. Try heating the edge and pull on the suction cup with firm force for about a minute to let the adhesive separate.

    * If you have an opening tool, you can try this procedure to get the initial gap.

    Arthur Shi -

  3. ecDEBpnvfOTcMLZ2
    ecDEBpnvfOTcMLZ2
    2uOnUFqafrCYXyEN
    p51ClEsXXIXPIR4Z
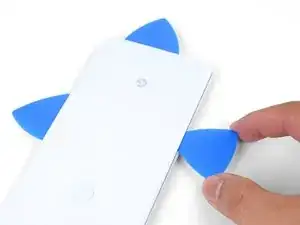
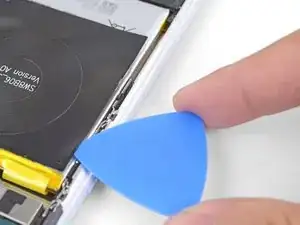
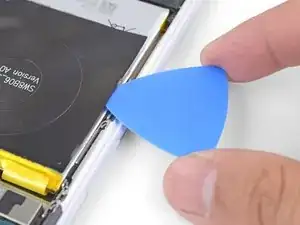
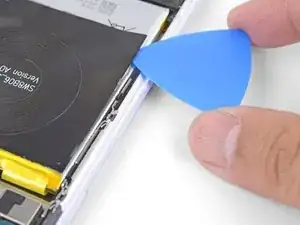
    • Schiebe ein Plektrum an der rechten Kante entlang, um den Kleber durchzuschneiden.

    • Der Kleber verklebt beim Abkühlen wieder, dadurch wird das Schneiden schwieriger. Wenn das passiert, musst du die Kante erneut erwärmen.

    • Wenn du die Kante durchgetrennt hast, dann lass ein Plektrum stecken, damit der Kleber nicht wieder anhaftet.

  4. KQZNiMIXEoEv3sQA
    • Lege einen erwärmten iOpener eine Minute lang auf die Unterkante der Rückabdeckung.

  5. gBLNTMRXodCAlNJR
    gBLNTMRXodCAlNJR
    Vbq4vFubRlSHJKRY
    4UK5LbKHwIXueBJp
    • Schiebe ein Plektrum um die untere rechte Ecke und an der Unterkante entlang, um den Kleber zu durchtrennen.

    • Arbeite langsam, um zu vermeiden, dass die Abdeckung bricht, wenn du das Plektrum um die Ecke schiebst. Erwärme sie erneut, falls nötig.

    • Lass das Plektrum in der Kante stecken, damit sich der Kleber nicht wieder verbindet.

  6. K1DNALhsFYem6WuY
    K1DNALhsFYem6WuY
    2FCl2jg2ZVTGSvUm
    IXQXmHMoJGXm3PXr
    • Erwärme und durchtrenne den Kleber an den restlichen Kanten.

    • Sei besonders vorsichtig, wenn du die linke Kante durchtrennst. Wenn du das Gefühl hast, dass dein Plektrum im oberen Bereich festhängt, hast du vielleicht den Fingerabdrucksensor erwischt. Ziehe das Plektrum etwas weiter heraus und versuche es erneut.

    • Achte darauf, die dicken Klebestellen im unteren Bereich und an der rechten Kante zu durchtrennen.

  7. USkM2UJmmdDVnTmv
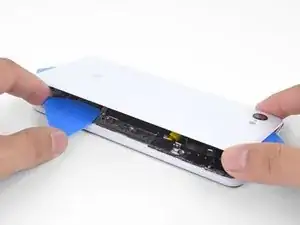
    • Heble vorsichtig die rechte Kante der Rückabdeckung hoch.

    • Zertrenne alle Klebereste an den Kanten mit einem Plektrum.

  8. 1nxmI4hs2Gymfag5
    1nxmI4hs2Gymfag5
    M4kcSI5plQnJtuT1
    MBJ2GPSSE3RnNtLF
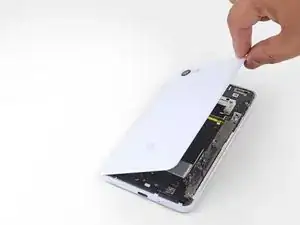
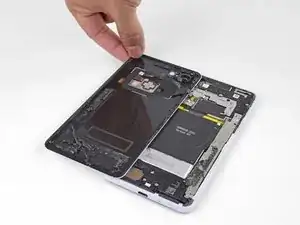
    • Klappe die rechte Kante der Rückabdeckung hoch und lege das aufgeklappte Panel auf die linke Seite des Smartphones.

    • Achte darauf, dass das Kabel des Fingerabdrucksensors Spielraum hat und vermeide es, es einzuklemmen.

    • Beim Wiederzusammenbau ist dies ein guter Moment, um dein Smartphone einzuschalten und alle Funktionen zu testen, bevor du es wieder verschließt. Achte darauf, dein Smartphone wieder komplett auszuschalten, bevor du weitermachst.

    • Folge beim Wiederzusammenbau dieser Anleitung, um die maßgeschnittenen Klebestreifen auf deine Rückabdeckung zu kleben.

    Reassembly is way harder. The adhesive guide is generic and not super helpful, so don't be surprised if things went smoothly until you get to this step and then everything starts sticking to things its not supposed to.

    Christopher Trimby -

    This is great but how you address that fact that the phone is tied to a particular fingerprint sensor and after replacing, the new sensor is not recognized by the original phone?

    Dave -

    Hi Dave!

    There's a software calibration tool that you can use to calibrate your new fingerprint sensor. I've updated this step to include a link to the tool.

    Arthur Shi -

    I have a pixel 3 xl and I can't get the tool to work. I finally got the driver's installed after several hours and it says it's for pixel 6 and up basically. So I tried the other option and it's basically saying to do a factory reset? Did I mess something up on the install or what am I doing wrong here? Thanks

    Cody L Paulsell -

    Uhhh

    So, apparently the connector on the motherboard for the fingerprint sensor is just ridiculously fragile, because after plugging and screwing everything in (pretty much reassembled except for the adhesive), I closed up the phone and powered it on to test if everything was working, and when I opened it back up and let the top hang off to the side, it just snapped off. I didn't even have it tensioned that much, it was just hanging off to the side and snapped. So now I've traded a non-functional camera with a non-functional and irreparable (unless I get a new motherboard) fingerprint sensor.

    The guide really ought to emphasize how delicate that connector really is. I have a google drive link here to a photo of the remnants of my poor fingerprint sensor connector :( link

    Mindle -

  9. 66BxIa114CvPBDXF
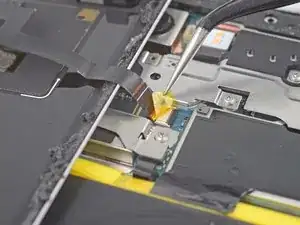
    • Benutze eine Pinzette, um das gelbe Klebeband auf dem Stecker des Fingerabdrucksensors abzulösen und zu entfernen.

    This step is utterly unnecessary. It achieves nothing, and the tape is there for a reason (I'm not sure why, maybe to prevent short circuits). I didn't remove this tape while disassembling and it didn't change anything.

    Krzeszny -

    The Kapton tape should adhere to both the cable and the connector. It helps prevent the cable from slipping out of the ZIF connector. You're right in that you don't have to completely remove the tape—I've adjusted the step to reflect this.

    Arthur Shi -

    I just finished this guide, thank you. It would be nice to have a "before ribbon removed" reference picture that's also without the Kapton tape in place if possible. I was no longer certain how far back into the ZIF connector I had to place the ribbon cable as I simply forgot what it looked like before removing it. Basically, it "felt" like it was out too far, but since I had no reference I couldn't compare. Step 10 has good close up pics, but the ribbon cable is already out a bit so a bad reference.

    teknomedic -

  10. sIaa2bIVcTWtgVNZ
    sIaa2bIVcTWtgVNZ
    kljONWUpcx2eLE4p
    syrHkK1ndwxqPAh2
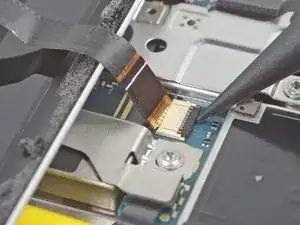
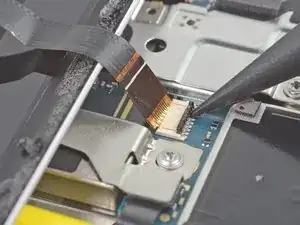
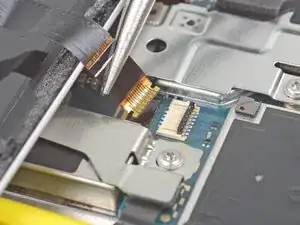
    • Klappe die schwarze Verriegelung am ZIF-Anschluss des Fingerabdrucksensors mit der Spitze eines Spudgers hoch.

    • Fasse die Lasche des Kabels mit den Fingern oder deiner Pinzette und hole das Kabel vorsichtig aus dem Anschluss heraus.

    • Um einen Kurzschluss zu vermeiden, achte darauf, dass du die Metallkontakte auf dem Kabel nicht mit deiner Pinzette berührst.

  11. KOLMNRDZQHXDXx2H
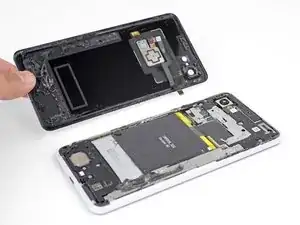
    • Entferne die Rückabdeckung.

  12. ZRoNSKDIlMf5W2Yh
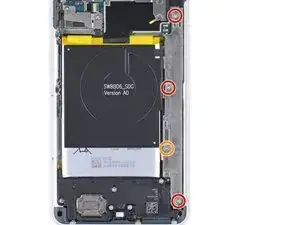
    • Entferne die folgenden vier T3 Schrauben, mit denen die Abdeckungshalterung aus Metall befestigt ist:

    • Drei 4 mm lange Schrauben

    • Eine 3 mm lange Schraube

    • Halte während der gesamten Reparatur die Schrauben gut geordnet und achte darauf, dass jede wieder an ihren ursprünglichen Platz zurück kommt.

    Be careful when putting the screws back in that you do not over tighten. This will cause you to destroy some pixels on your screen.

    Brian Retterer -

    The long screw on my disassembly was adjacent to the lettering for the Qi inductive receiver, and not close to the silver exposed part of the battery as indicated

    Andrew Munro -

    In my case, all the screws are the same length.

    Krzeszny -

  13. iMjRoXXfrrJG6TTj
    iMjRoXXfrrJG6TTj
    EbGvs3NuseOA34IT
    • Setze das flache Ende eines Spudgers unter die rechte Kante der Metallhalterung und heble sie nach oben, um sie abzulösen.

    • Entferne die Metallabdeckungshalterung.

    There is a small adhesive pad under the metal bracket, between the two middle screws that will provide some resistance when lifting the metal cover bracket

    Andrew Munro -

  14. 2FT5FhK5JAiFdDI6
    2FT5FhK5JAiFdDI6
    Ll1pjbf2FDCAQSUM
    Q2TwemRwJ1F5JGut
    • Heble den Akkustecker mit der Spitze eines Spudgers hoch und trenne ihn von seinem Anschluss.

    • Benutze beim Abtrennen des Akkus keinesfalls Werkzeuge aus Metall, da das einen Kurzschluss auslösen könnte.

    • Biege das Akkukabel so, dass der Stecker nicht versehentlich den Anschluss berühren kann.

  15. FxnPXw2vGkLrtRQO
    FxnPXw2vGkLrtRQO
    FOfsKEE2OeHdtwHw
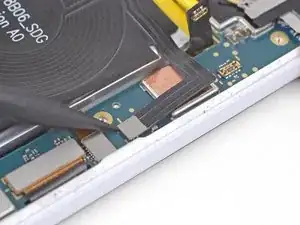
    • Benutze die Spitze eines Spudgers, um den Stecker der Ladespule nahe der rechten Kante des Smartphones auf dem Motherboard hochzuhebeln und abzutrennen.

  16. dFmoE2oZYbWXGgUf
    dFmoE2oZYbWXGgUf
    NUjMMOTZk23TbIGc
    iZVVhoTpTDaMpEbU
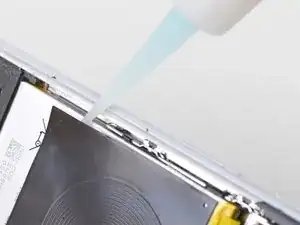
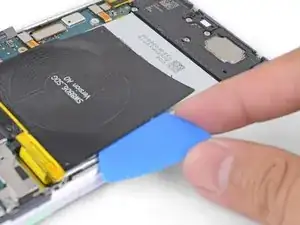
    • Setze die Spitze eines Plektrums unter eine Kante der Ladespule.

    • Schiebe das Plektrum an der Kante entlang, um den Kleber zu lösen.

    • Schneide so tief wie möglich, aber achte darauf, die Oberfläche des Akkus nicht zu beschädigen.

    This step is completely not needed. The new battery already had a coil attached so i didn’t need to remove the coil from the old battery.

    Mike Moffit -

    ^ Not in my kit.

    Go slow, don't rush this one. It is harder than the case (at least for me)

    Christopher Trimby -

    My kit also did not come with a replacement coil or adhesive. Any suggestions on what to do here? Could I use adhesive strips to re attach the coil?

    Glendon sowder -

  17. mYxCHnqChuLsYPTC
    mYxCHnqChuLsYPTC
    xRRqsGxGeBEhOoE6
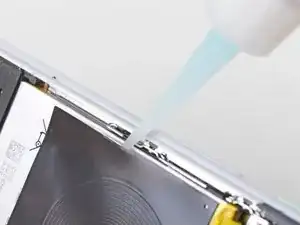
    • Halte die Kante, die du durchtrennt hast, nach oben.

    • Halte das Smartphone in dieser gekippten Position und träufle ein paar Tropfen Klebstoffentferner oder hochkonzentrierten Isopropylalkohol an der Kante entlang.

    • Halte das Smartphone ein oder zwei Minuten in dieser Position, damit der Kleber aufweichen kann.

  18. PFjAfwTW4SIxL1dc
    PFjAfwTW4SIxL1dc
    b45lPre2jJPALAlw
    WkAcBkXw2OpQPWwQ
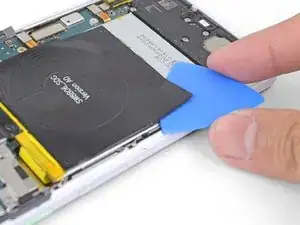
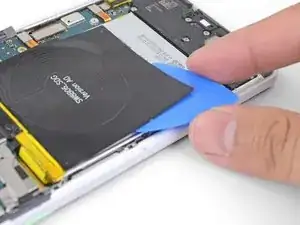
    • Setze die flache Seite eines Plektrums unter eine Ecke der Ladespule.

    • Drücke das Plektrum langsam und fest unter die Ladespule, um den Kleber zu lösen.

    • Der Kleber befindet sich hauptsächlich um den Rand der Ladespule herum. Schneide langsam mit einem Plektrum durch den Kleber.

    • Wenn sich der Kleber nur schwer durchtrennen lässt, dann kippe das Smartphone wieder hoch und träufle noch ein paar Tropfen Klebstoffentferner darauf.

  19. BRHvrJqJYPPYy2Sa
    • Entferne die kabellose Ladespule.

    • Die Ersatzspule wird folgendermaßen eingesetzt:

    • Achte darauf, alle Klebstoffreste von der Oberfläche des Akkus zu entfernen. Sei dabei sehr vorsichtig, damit der Akku auf keinen Fall beschädigt wird.

    • Verbinde den Stecker der kabellosen Ladespule mit seinem Anschluss auf dem Motherboard. So wird sichergestellt, dass die Ladespule korrekt ausgerichtet ist.

    • Löse alle Klebefolien von der Ersatzspule ab.

    • Lege die Ladespule auf den Akku und drücke sie gut fest.

    This step is a bit out of place. It is only relevant if you are replacing the charging coil and keeping the old battery.

    Michael Stember -

    My kit did not come with adhesive for the coil. So check for that before you begin.

    Christopher Trimby -

    My kit also did not come with adhesive for the coil. Where can I buy the replacement coil or the adhesive to reinstall the old coil?

    Glendon sowder -

Abschluss

Um dein Gerät wieder zusammenzubauen, folge den Schritten dieser Anleitung in umgekehrter Reihenfolge.

Entsorge deinen Elektromüll fachgerecht.

Lief die Reparatur. nicht wie geplant? Dann versuche es mit einer grundlegenden Fehlersuche oder stelle deine Fragen in unserem Antwortenforum.

Arthur Shi

Mitglied seit: 03/01/18

218620 Reputation

0 Kommentare