Einleitung

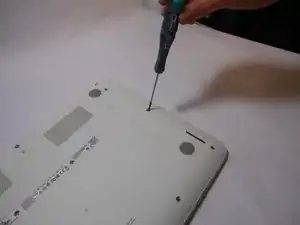
This guide will require removal of 1x3mm screws.

  1. oxA3GNGnINLcq2Ui
    oxA3GNGnINLcq2Ui
    SjfgyAv25cWEMocK
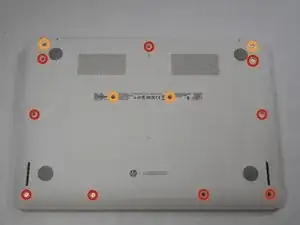
    • Flip the laptop with the base of the laptop is facing you.

    • Using the #00 screwdriver, unscrew these screws.

    • Using the #00 screwdriver, unscrew these screws.

  2. HOQCvYq4UmPC6yVr
    HOQCvYq4UmPC6yVr
    UBO21MeVoQs2RgKN
    1OwaB2cOiKGJFiDC
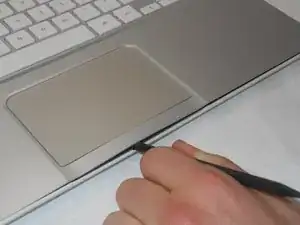
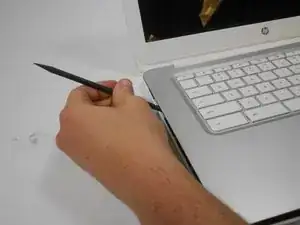
    • Start from the top right corner of the laptop and work clockwise with an iFixit opening tool or spudger to pry the keyboard from the frame of the laptop.

    • When prying open a laptop it could require some force, but it also has fragile connectors underneath. Use caution so as to avoid breaking these connectors.

  3. VKnKBtlTplmYBQmh
    VKnKBtlTplmYBQmh
    4ZUPEP4Hx4UEB6k2
    GIiayODhtKmVgKuN
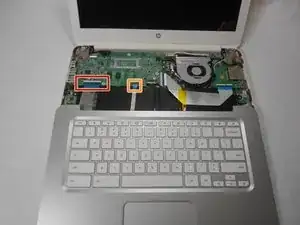
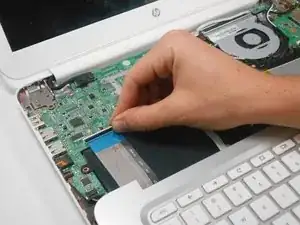
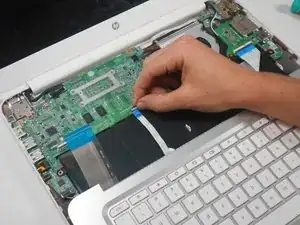
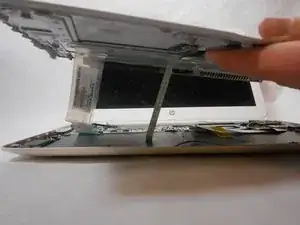
    • Gently pull the keyboard in the opposite direction of the screen, so the wires beneath are exposed.

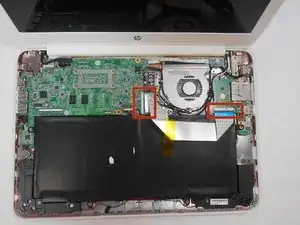
    • Lift the black flap and pull the blue ribbon gently towards you until it is disconnected.

    • Lift the white flap and pull the blue ribbon towards you until it is disconnected.

  4. p42wjgUxJJWmQAq5
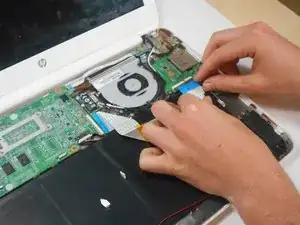
    • Lift keyboard slightly and remove the strip gently to prevent damaging any parts.

    • The tape has no function other than to keep the wire tucked away.

  5. 4GlFGjxrrWBtTj1C
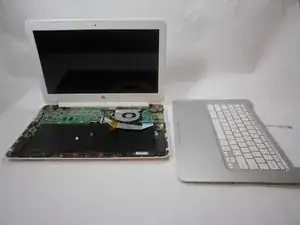
    • Set aside the detached keyboard.

  6. GdXqxSZnFvFXL4NU
    GdXqxSZnFvFXL4NU
    DtJaOYV6dAMJEAuR
    e4oaUC31NdbbvrfO
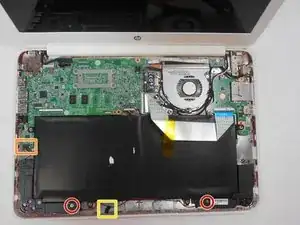
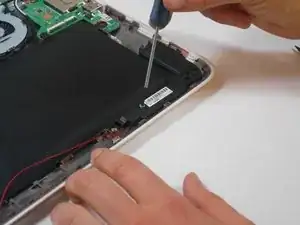
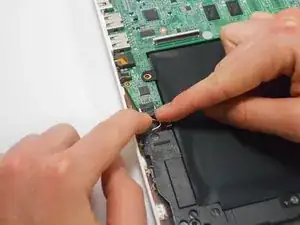
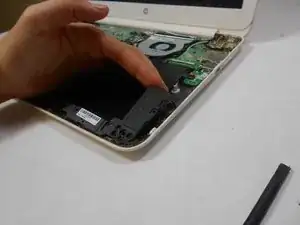
    • Use a #00 screwdriver to remove the two screws.

    • Using fingers or the spudger, slide out the black connector indicated on the left.

    • Undo the black tape located on the bottom from the frame of the laptop.

  7. GaB2fNTIVKqUIgAE
    GaB2fNTIVKqUIgAE
    NkIYDZSikHXWxR4W
    • Gently remove the speakers.

  8. DLdGJo2NoRGMQDWu
    DLdGJo2NoRGMQDWu
    OBhWFKkjEvDuxCTr
    • Lift the black flaps and gently pull the strip out.

    • Set the strip aside.

    • Note the shape that this wire strip is resting at and that the blue tip of the strip goes into the right connector for reassembly.

  9. UrMVkBMMvZkAk6OW
    UrMVkBMMvZkAk6OW
    uSQ5GkuYPC4VIwY3
    rpMxcujXaWQ5YQtx
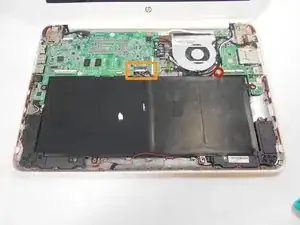
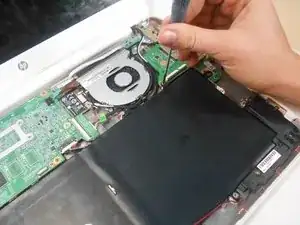
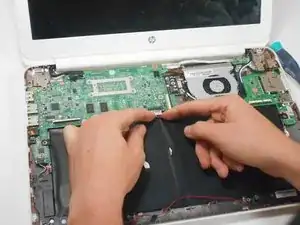
    • Remove the screw.

    • Use your fingers to pull the white tab out of the black slot above the battery.

    While reassembling, the chromebook powered up when I reconnected the battery. Didn’t know how I could power it down, as the keyboard was not connected at this point.

    Bart -

  10. nhA12bIcwK1kAyCV
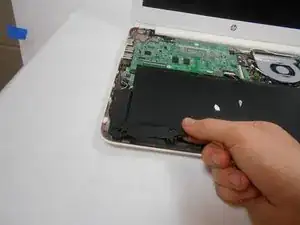
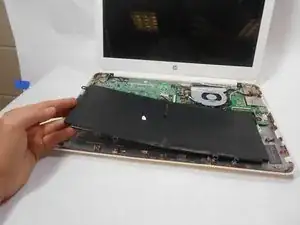
    • Gently remove battery.

  11. gsxE6ESkLK5QNYMT
    gsxE6ESkLK5QNYMT
    mIGCdyN6KtKVPo43
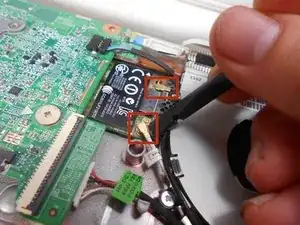
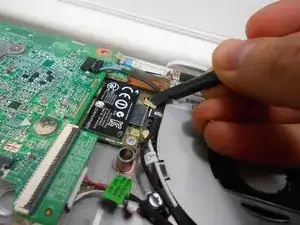
    • Using a spudger, remove the white and black cables from the card.

  12. 52pjUioE2DBRKXlL
    52pjUioE2DBRKXlL
    Y6hRL6drNZ3KCUBh
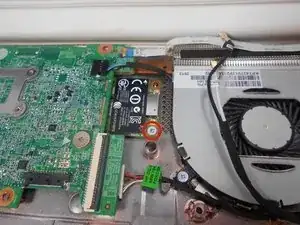
    • Remove screw from card.

  13. uXsLRyGiBamW2KQu
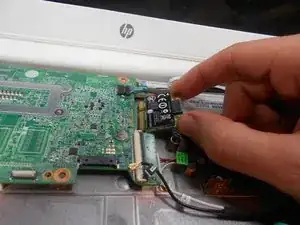
    • Gently pull card at a 45° angle to remove it.

  14. 55vnG4EUxJj52MZ5
    55vnG4EUxJj52MZ5
    XcdNS4BpEySOvk1K
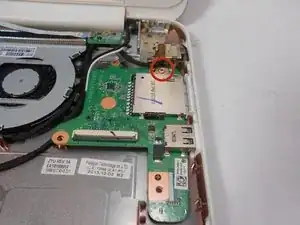
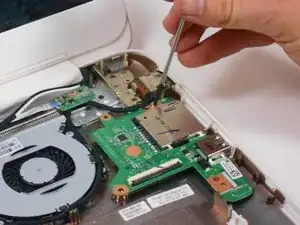
    • Remove screw indicated by the red circle at the top of the card port.

  15. PTquSeVkDMtvZLBN
    • Gently remove the USB/SD card port.

  16. xdox3qGDCqnoQ4Tx
    xdox3qGDCqnoQ4Tx
    EWQQV4X5RaFH6Atp
    FFot2vRj2BEEGVGg
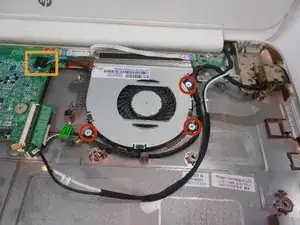
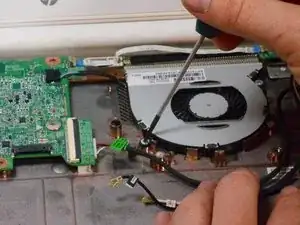
    • Remove the 3 screws around the fan.

    • Using your fingers or the spudger, disconnect the cable connecting the fan to the motherboard.

  17. HmfnctFqa6KRwfxu
    • Gently remove fan.

    how do I go about taking the fan off and what do I do after that?

    Maddie -

    Do I need to replace my fan?

    Maddie -

  18. nPvMTqxYtCE2fwuJ
    nPvMTqxYtCE2fwuJ
    YuwQr2RF2ON1a1YC
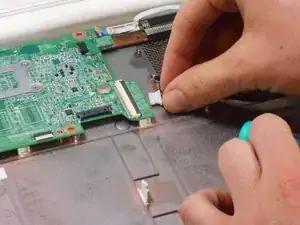
    • Using your fingers or spudger, pull out the connector.

  19. ujYTiDnJeIIWA2wV
    ujYTiDnJeIIWA2wV
    M5EfmvMCOYTPHQH4
    sCoyMSwtX4VTx5lV
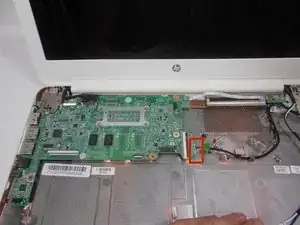
    • Remove all of the indicated screws.

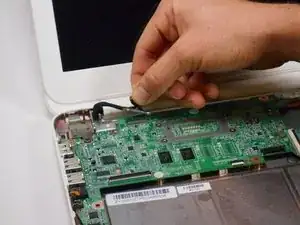
    • Pull up on black strip to remove the monitor cord.

    The pic with the 3 screws circled in red is missing

    Paula Hague -

  20. PEl3oVl6PETsKOLC
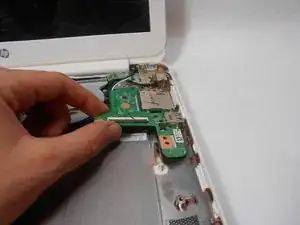
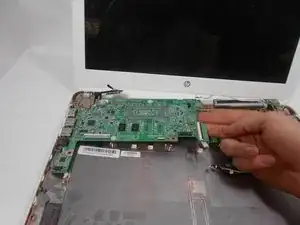
    • Gently remove motherboard.

  21. xBTOdCIcPFZ5FJwT
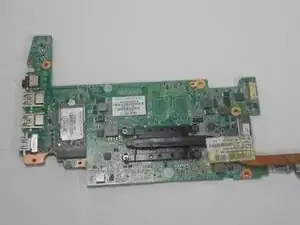
    • Flip motherboard over.

  22. cL6QiW3ZCPQGoZob
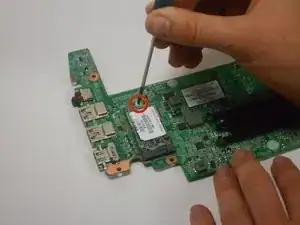
    • Remove the screw indicated by the red circle.

  23. mLLstjeeUrabTGEp
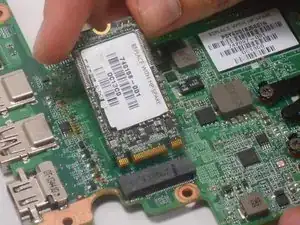
    • Remove the hard drive by pulling the device from the black slot.

Abschluss

To reassemble your device, follow these instructions in reverse order.

Kevin Piper

Mitglied seit: 16/01/15

1578 Reputation

3 Kommentare

Thanks so much for your clearly , detailed and easy to follow guide, nice job!

pedro munoz -

Buenas tarde y despuesnde quitar el disco duro que se hace se cambia por otro igual o que modelo

chaffa_45 -

Can you add more storage on the HP Chromebook 14 SMB about 500GB. I also want to know if the Chromebook can run Windows 10 without any problems.
Fire Alarm Collector -