Einleitung

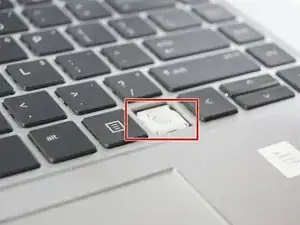
This guide is useful if the keys on the device’s keyboard are malfunctioning or broken. This guide will show you how to replace broken keys, and also offer a couple troubleshooting tips if the keys are simply malfunctioning, or if the keys are “sticky.” The only tool you need for this guide is a spudger, but you could also use a toothpick or a dampened q-tip if you are trying to fix malfunctioning or “sticky” keys.

Werkzeuge

  1. OOe3DUR5NTxoYaHw
    • Find the broken or malfunctioning key on the keyboard.

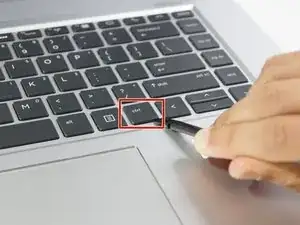
    • In this guide, we will replace the "ctrl" key, but this guide works for all keys on the keyboard.

  2. wYGI5SWyZ4RMxShH
    wYGI5SWyZ4RMxShH
    fVrBJlwoSKpledHe
    • Wedge the spudger under the corner of the key and pry up while moving the spudger along the length of one edge of the key.

    • Repeat this process for three sides of the key you are removing.

    • No matter how gently you attempt to remove the key, it will sound like it is breaking when you pry and remove it from its housing. THIS IS OKAY. The plastic brackets HP uses to keep its keys in place are very loud, but also very durable.

  3. gKuvVVoKgDBGyCXN
    • Lift the key manually by the the edge opposite the one side of the key you did not pry off with the spudger.

    • To ensure the easiest possible removal, lift the key up while gently pulling away from the edge that is still in the keyboard.

  4. O5ySjCbquY3UASQk
    • To replace the key, lay the new key over its housing with the proper orientation and push it down until you hear a click.

    • If the key is not broken, just "sticky" or malfunctioning, procced up to this step. You can now wiggle the white silicon portion of the key's interior around, pushing down on the extended part of the silicon and wiggling it back and forth. Once you have done that, you can replace the key as described above.

    • Furthermore, you can remove any debris from under the keys at this time with a toothpick or a dampened q-tip, which may improve the performance of your keys.

Abschluss

To reassemble your device, follow these instructions in reverse order.
Jacob Osecheck

Mitglied seit: 15/04/19

279 Reputation

0 Kommentare