Einleitung

Has your device not been connecting to Wi-Fi? Here are the steps to remove and replace the Wi-Fi card in your HP Envy x360 15m-bq021dx safely. Before performing this, try installing new network drivers or running a windows network diagnostic. Additionally, power off your device and disconnect it from the power adapter prior to beginning the repair.

  1. 3L4okIIvaEdYZtXU
    3L4okIIvaEdYZtXU
    wN3mFkWrSYvqIYcI
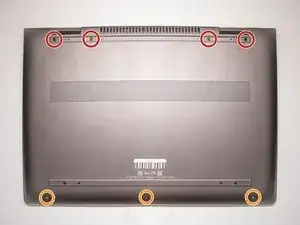
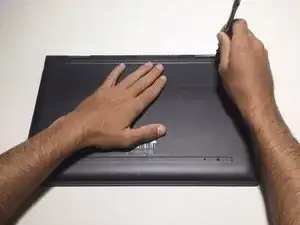
    • On the back panel of the device, remove the four (4) M2.5xL6 screws at the top of the photo using a Phillips #0 screwdriver.

    • Unscrew the three (3) screws at the bottom of the photo using a T5 Torx screwdriver.

    In the second step the photo looks like the laptop is still in the same position as the first step, which means, according to the first image, the second image shows someone removing the four screws at the top of the laptop. To be accurate to the text in Step 2, the barcode would appear at the top of the image.

    lkmemphis -

  2. wdFJWvkvJPKNdJ5K
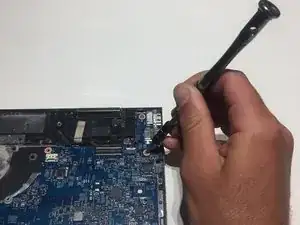
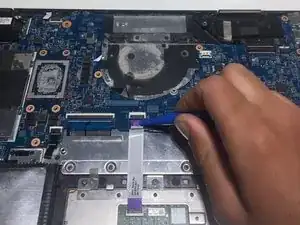
    wdFJWvkvJPKNdJ5K
    mIvVylGYCULFnmFK
    FImPr1PXccnwnCFL
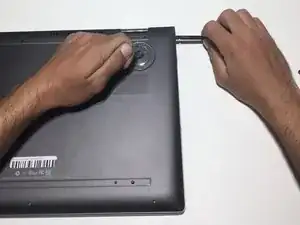
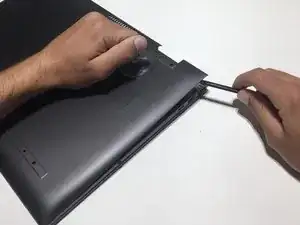
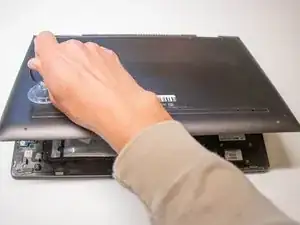
    • To remove the back cover, use the black spudger to lift up on the edges of the cover.

    • Use a suction cup to assist in lifting the back cover

  3. lMr3WCPrBtNvYtps
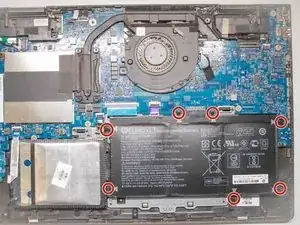
    • Use the Philips #0 screwdriver to remove six (6) M2.0x3.2 screws from battery.

    There are 7 red highlight circles showing on the image.

    lkmemphis -

    Okay, I see the seventh screw is addressed in the next step, #4. Shouldn’t the image in Step 3 show just the six screws the instructions is referring to>

    lkmemphis -

  4. Arc65xmBcTbJvNR3
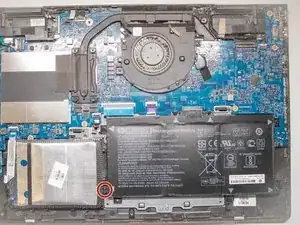
    • Using the Philips #0 screwdriver, remove the final screw from the battery connected to the SSD storage unit.

    Why is this seventh screw separate from the other six in the prior step?

    lkmemphis -

  5. 51tWCua61UB5YSOI
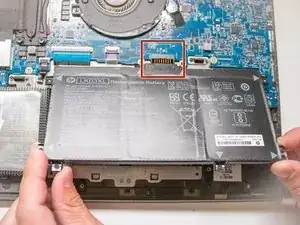
    • Lift and pull the front of the battery up and out (away from the connector) to remove.

  6. DJbe2aixmhWoNenY
    DJbe2aixmhWoNenY
    OmHS1lsTaKfAFX3N
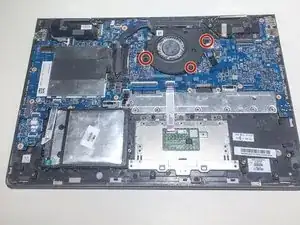
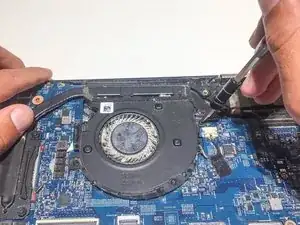
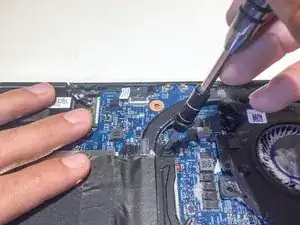
    • Using a Philips #0 screwdriver, remove the three M2x4 screws located around the cooling fan as shown in this picture.

    • Be careful as the fan might be sharp in some places when removing it.

  7. cbkHgS5ybmwyfoCW
    cbkHgS5ybmwyfoCW
    hmoufFbmUeRU5AvI
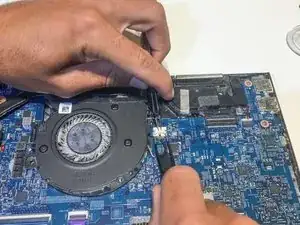
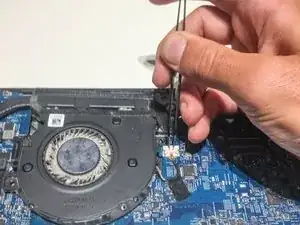
    • Remove the connector clip with the tweezers.

  8. iVSGcu3mGcKjTI2s
    • Remove the four spring loaded screws with a Philips #1 screwdriver.

  9. JUNulcr1J4mHklHe
    JUNulcr1J4mHklHe
    lHpA1jrU3n4JBQHK
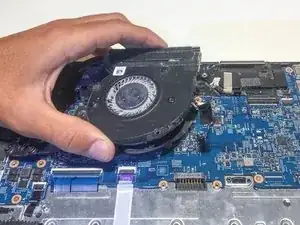
    • Remove the cooling fan.

  10. Z4mdY1UKqIj5HmUb
    Z4mdY1UKqIj5HmUb
    VTFCOGbKQrgBOIWd
    qgegwEnJPedgOTcP
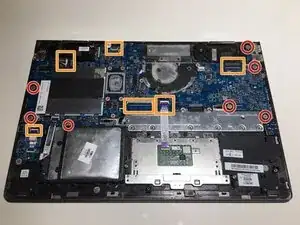
    • Using a Phillips #1, remove the seven M2.0x3.2 screws.

    • Undo the six connections using the blue opening tool.

  11. pQ5breXH6ZxHRfgP
    pQ5breXH6ZxHRfgP
    HsykVOQLIx2GaIQW
    qNWBnlSu3OAOGLTw
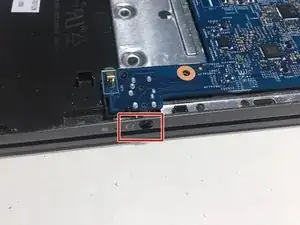
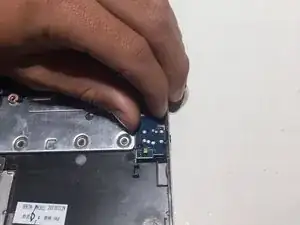
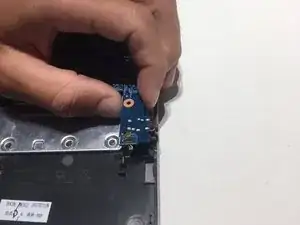
    • Carefully remove the aux port from the frame of the computer as shown.

  12. WvHLxMfl5yIGZV5K
    WvHLxMfl5yIGZV5K
    F14wGAWXWRB3Lnkc
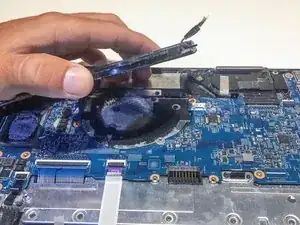
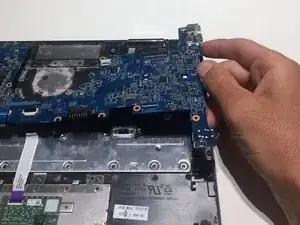
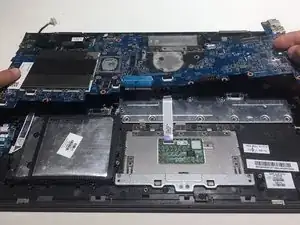
    • Pull the mother board up and away from frame of the computer.

  13. 5p1XlSSJQCuVajgN
    5p1XlSSJQCuVajgN
    OH4pEBVbeFHiP4qu
    AUTyCgBWbCadVtLW
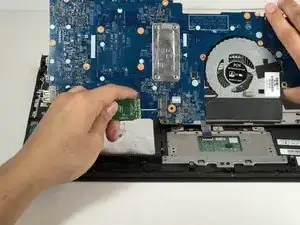
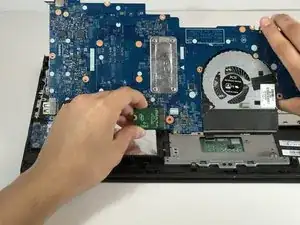
    • Flip the motherboard over.

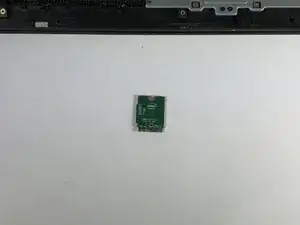
    • Pull the Wi-Fi card out from the slot.

    • Remember the orientation the Wi-Fi card is in, as it must be inserted in the same way.

Abschluss

To reassemble your device, follow these instructions in reverse order.
Emily Clark

Mitglied seit: 18/01/22

73 Reputation

0 Kommentare